Leading Practices and FAQs
Want to see how to take projects from good to great? Check out our Leading Practice & FAQ Home Page!
One of the most important stages of survey building is the testing stage. Time spent testing your survey and reviewing test data in reports and exports prior to sharing your survey is always time well spent. Testing will improve your respondents' experience and ensure that the data you get will be in a format that is useful to you.
Our testing suite has all the tools to help you with the process. Once you've built your survey questions and styled your survey to achieve the look and feel you desire, head over the Test tab of your survey.
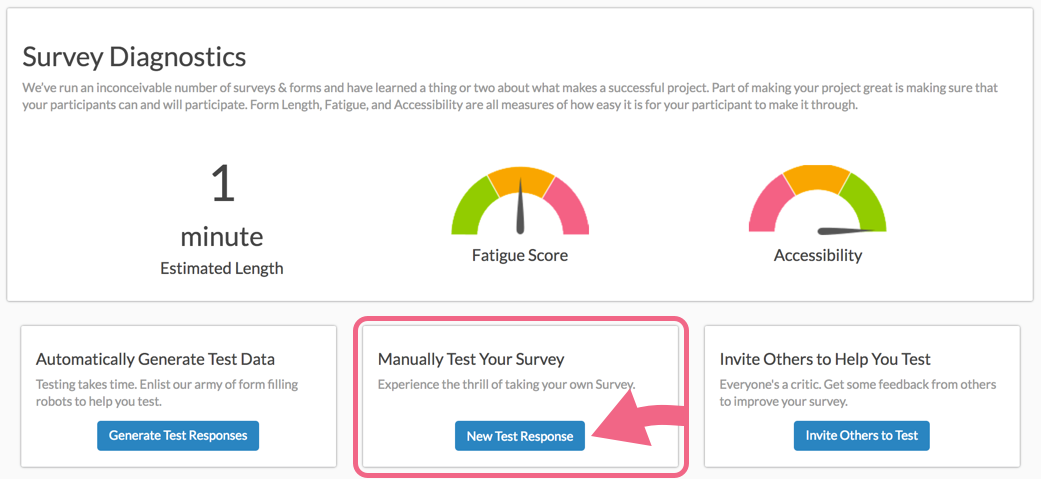
Here you'll find Survey Diagnostics that evaluate:
- Estimated Length
- Fatigue
- Accessibility
The Test tab also provides access to three different testing options:
- Automatically Generate Test Data
- Manually Test Your Survey
- Invite Others to Help You Test
Note: If you manually close your survey, test links will continue to be accessible.
Recommended Steps for Testing Your Survey
Below we will cover the steps we recommend taking before launching your survey.
Step 1: Take the Survey Yourself
Start by taking the survey as if you were the respondent. The easiest way to do so is to go to the Share tab and to click the View button (located to the right of the Primary Share Link) to open the survey in a new tab.
If you have access to the Test tab, click New Test Response.
The survey loads in a new window and you can use the available settings at the top of the page to customize your testing experience.

- Click the page dropdown to indicate which page you would like to start testing. When selecting later pages in your survey please be aware of any logic you have set up. Questions that are shown based on previous values will not display if the question was not answered.
- You will also have the option to select survey Language if you have multiple language versions available.
- If you have created multiple survey themes (based on the survey link), you can choose a theme for your test here by selecting the Default Link Dropdown.
- Finally, if you are using URL Variables for logic within your survey you can test this functionality by entering the URL Variables here.
- Use the Fire Actions toggle at the top of the page to indicate whether you would like to trigger actions during your test. For example, if you have a Send Email Action in your survey selecting this option will send the email when that page is reached. URL Redirect Actions will not fire in Preview/Test Mode.
- Indicate whether you would like to Record this response. If you choose this option, the response will show on your Responses tab with a Test flag and will be available in reports and exports. We recommend recording a few responses so that you can check out how your data looks in reports and exports.
- Indicate whether you want to View Comments that may have been left by previous testers. Learn about this feature here.
- Last, choose a mode of display from the available options of Desktop, Tablet, and Mobile.
Once you have selected your testing options, record at least one complete response to check for any snags caused by validation or required questions and get a general feel for the potential of survey fatigue.
Limitations
Data created via this test method is not compatible with the File Upload Question Type.
Step 2: Generate Test Responses
Now that you've experienced the survey you might choose to Generate Test Responses. This will run our test response generator and provide you with additional responses so that you can better examine your data in reports and exports.
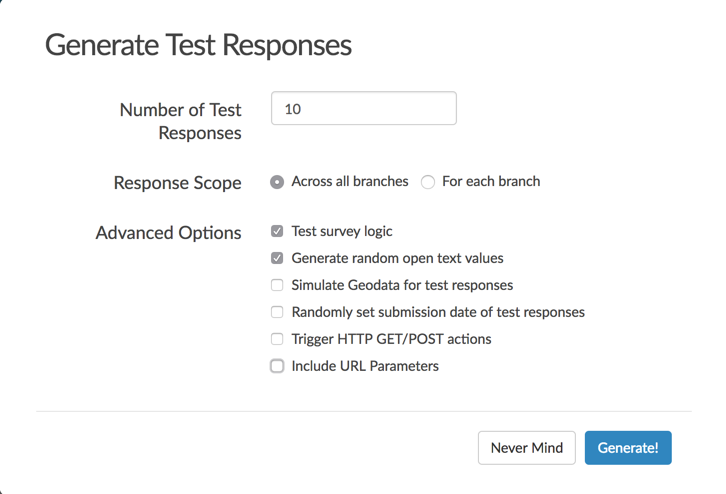
Click the button to Generate Test Responses.
- Indicate the number of test responses that you would like to generate.
- If your survey is utilizing the Percent Branch Action, choose your preferred Response Scope:
- Across all branches - generates a random set of data which may not generate data within each possible branch
- For each branch - test data will be generated within each branch ensuring that no branches are left without data
- Use the Advanced Options to customize the following settings:
- If you wish to have test responses follow survey logic, check the Test survey logic option. Learn more about which survey logic settings are compatible with the test data generator.
- If you'd like to Generate random open-text values leave this option toggled.
- If you'd like to Simulate Geodata for test responses to display on the response map, toggle this option.
- To Randomly set submission date of test responses, check this option. If unchecked, the date and time the response was generated will be used in the Date Submitted field.
- You can also Trigger HTTP GET/POST (Webhook) actions if you have them.
- Finally, check the option to Include URL Parameters for testing if you wish to test URL variables. Learn more about how to use this feature.
Test Data Generator Compatibility
Compatible Question Types
Data created via the test data generator is not compatible with the following question types:
Compatible Survey Actions
JavaScript Actions will not be fired when using the Generate Test Responses feature.
Compatible Survey Logic
If the option to Test survey logic is checked the following logic types will be applied in your test responses:
- Question Logic
- Page Logic
- Answer Option Logic
- Skip Logic
- DQ Logic
- Option Piping
- Question Repeating
- Page Repeating
- Admin Logic Settings: Admin Questions and Admin Pages
- Hidden By Default logic setting
Questions hidden via CSS (including the use of the sg-hide CSS Class) will not be obeyed when using the Test Survey Logic setting in generated test data.
Step 3: Invite Others to Test
All new accounts need to receive authorization in order to invite others to test and send an email campaign in our system. We do this in order to prevent abuse of our email system. This improves our overall deliverability.
Before you can invite others to test your survey, a physical address must be on file and the campaign needs to be reviewed by our staff. Once authorized you will have full access to invite others to test and email campaign functionality.
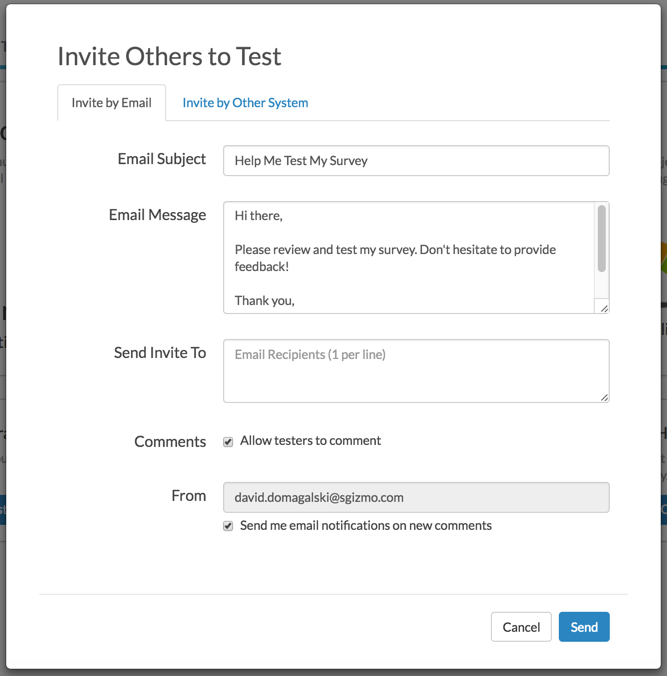
Once you've recorded a test response on your own, you can also share the survey with others by clicking the button to Invite Others to Test. You can send an email to invite your survey testers or you can get a Test link to share on your own.
Invite by Email
Enter the email addresses of the stakeholders you would like to test your survey. Customize your subject line and the message content. We recommend indicating that this is a test and requesting feedback on the survey. The option to allow testers to comment will be checked by default; if you do not wish to receive comments uncheck this option.
Learn more about Comment Mode including how to leave comments and how to view them in our Comment Mode documentation.
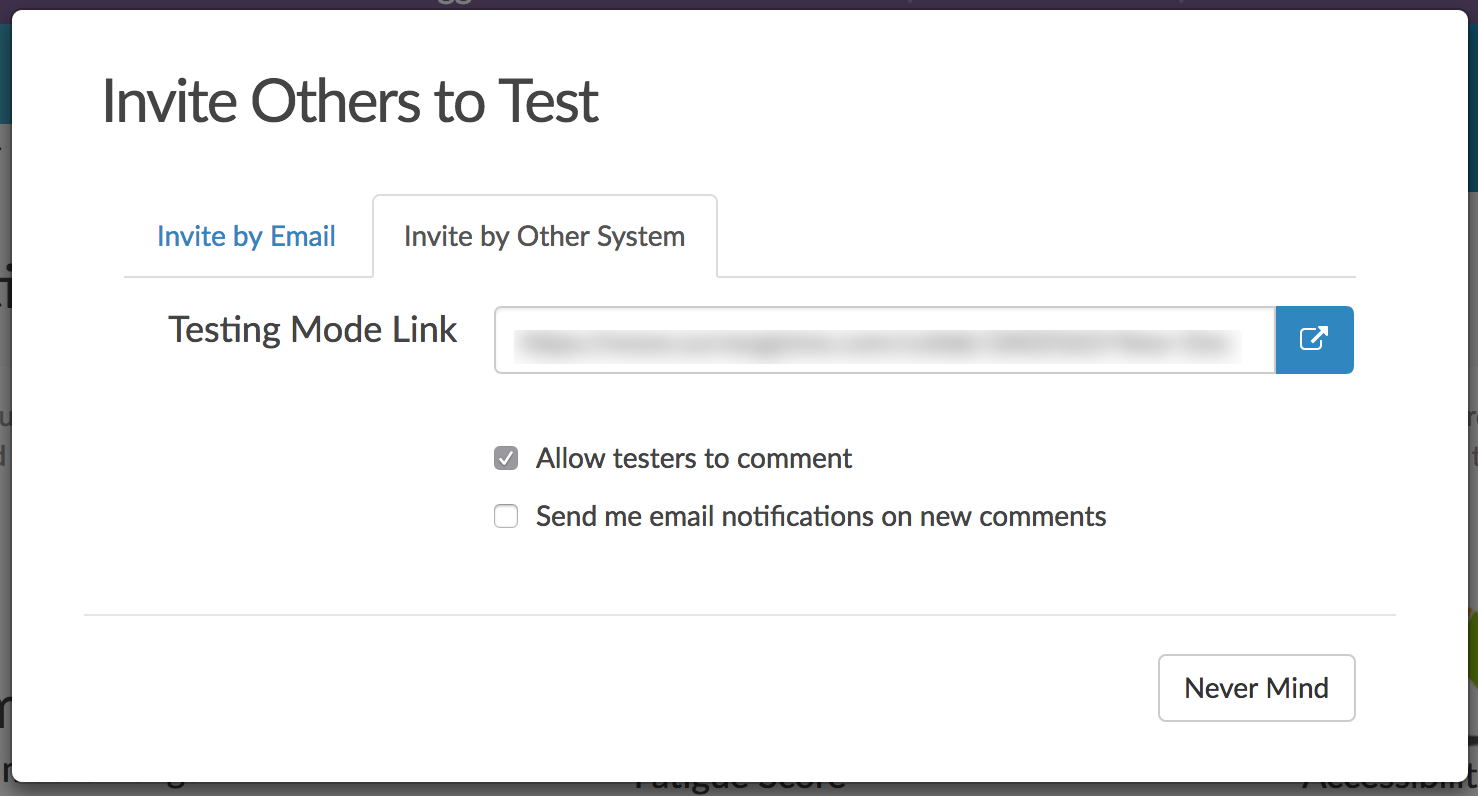
Invite by Other System
You can also access a Test link to the survey that you can distribute as needed by clicking the Invite by Other System tab. Copy the link to send via your third-party system. The option to allow testers to comment will be checked by default. If you wish to receive email notifications when new comments are received from testers check this option.
Learn more about Comment Mode including how to leave comments and how to view them in our Comment Mode documentation.
Step 4: Review Test Responses
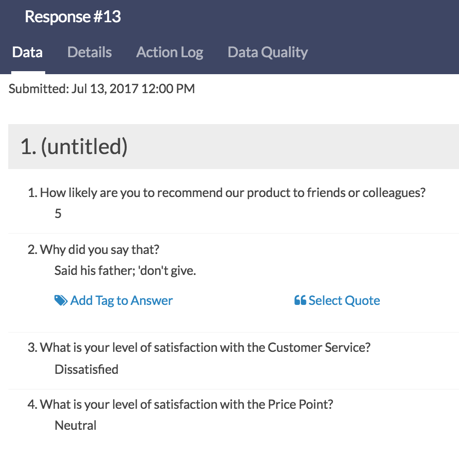
Now that you have some test responses recorded, you can explore your data. Start by viewing your individual responses under Results > Individual Responses. Click on your test responses and verify the data that has been recorded.
Step 5: Run Reports and Exports
You should now have sufficient data to examine your reports and exports. Head over to the Results tab of your survey.
Under Results > Reports we recommend taking a look at the Standard Report that is there waiting for you. A Standard Report will allow you to view your data in a summary or aggregate format. This is one of the most critical steps for testing. The way the data for each question reports depends on the question type you are using. This gives you the opportunity to change how you are asking the question if you require different data than what you are getting in the Standard Report. Phew, crisis averted!
Under Results > Exports the CSV/Excel Export will open a spreadsheet in Excel. If you are planning on doing any analysis outside of Alchemer, you will definitely want to verify that your raw data looks as it should.
Note: All Alchemer exports will export reporting values, not answer option titles.
Next Steps
- If you haven't already done so, check out the look and feel of your survey on the Style tab. The are many options for customizing the look and feel. Check out the Style Your Survey Tutorial to learn more!
- Learn how to share a link to your survey or check out our other share options!
- Once you are ready to report, you'll want to know how to remove responses marked as test from your reports and exports.
Note: The ReCAPTCHA Action is NOT compatible with test responses on surveys.