To use the Alchemer Digital Connector, you must have access to Alchemer Workflow and Alchemer Digital on your account. If you are interested in adding these capabilities to your Alchemer account please contact us for more information.
The Alchemer Digital Connector combines the powerful targeting capabilities of Alchemer Digital with the advanced automation features in Alchemer Workflow.
With the Alchemer Digital Connector you can initiate workflows in Alchemer Workflow when an event or series of events occur on your mobile app.
Alchemer Digital Connector Configuration
There are two parts to configure an Alchemer Digital Workflow Connector:
1. Initiator Configuration: In Alchemer Workflow, configure the initiator that will fire based on targeting conditions set in your mobile app.
2. Event/Targeting Configuration: In Alchemer Digital, configure the events, actions, and targeting that will trigger the workflow initiator.
Initiator Configuration in Alchemer Workflow
1. Create a new workflow in Alchemer Workflow.
2. Name your workflow. Then click "Start Building".

3. After creating a new workflow, select the Alchemer Digital initiator.

4. Select "Digital Interaction. 
5. Click "Next" on the integration overview screen.
You will need your Alchemer Digital API key to complete configuration.

6. Create a new authentication with Alchemer Digital by naming the new authentication and providing your Alchemer Digital API key.


You can find your Alchemer Digital API key in Account Settings > Your Profile.
 For more information on using the Alchemer Digital API, refer to this document.
Note: Billing contacts also have access to API keys via Account Settings > Company Account Overview.
7. Optional. Select Production or Staging. Then click "Next". 
8. Select the Alchemer Digital app where you want to create the interaction that will trigger the workflow.
You can only select one app. So, you will need to create two separate workflows and corresponding initiators for an app on both iOS and Android platforms.

9. Name the workflow interaction, so that you can locate the interaction later in Alchemer Digital. Then select your setup action.

10. In another window, sign into the Alchemer Digital app. Now you will need to configure the initiator targeting in Alchemer Digital. 
Targeting Configuration in Alchemer Digital
1. In the Alchemer Digital Interactions tab, select "Workflow Initiators".

2. Select the workflow interaction from the list. The interaction name is the name you provided earlier when configuring the initiator (see step 7 above).

If you need to pause or delete a digital initiator you should do it from this screen and then also update the initiator in Alchemer Workflow.
3. Name the interaction. On this screen, you can also see the Workflow Name and Workflow ID that this initiator is tied to.

4. Define the targeting for your initiator.
Take a thoughtful approach when configuring your targeting settings. We recommend starting by targeting only a small segment of your app users. Avoid broad triggers like "on app open" or "user logged in." Instead, be granular and intentional in defining your target audience, focusing on your specific use case.

There are two ways to initiate a Workflow via Alchemer Digital:
- Initiate the workflow via a Prompt. Configure the Prompt like your normally would, but you must also do the following:
To initiate a workflow via a Prompt, you'll need to create a button that triggers a Workflow Initiator.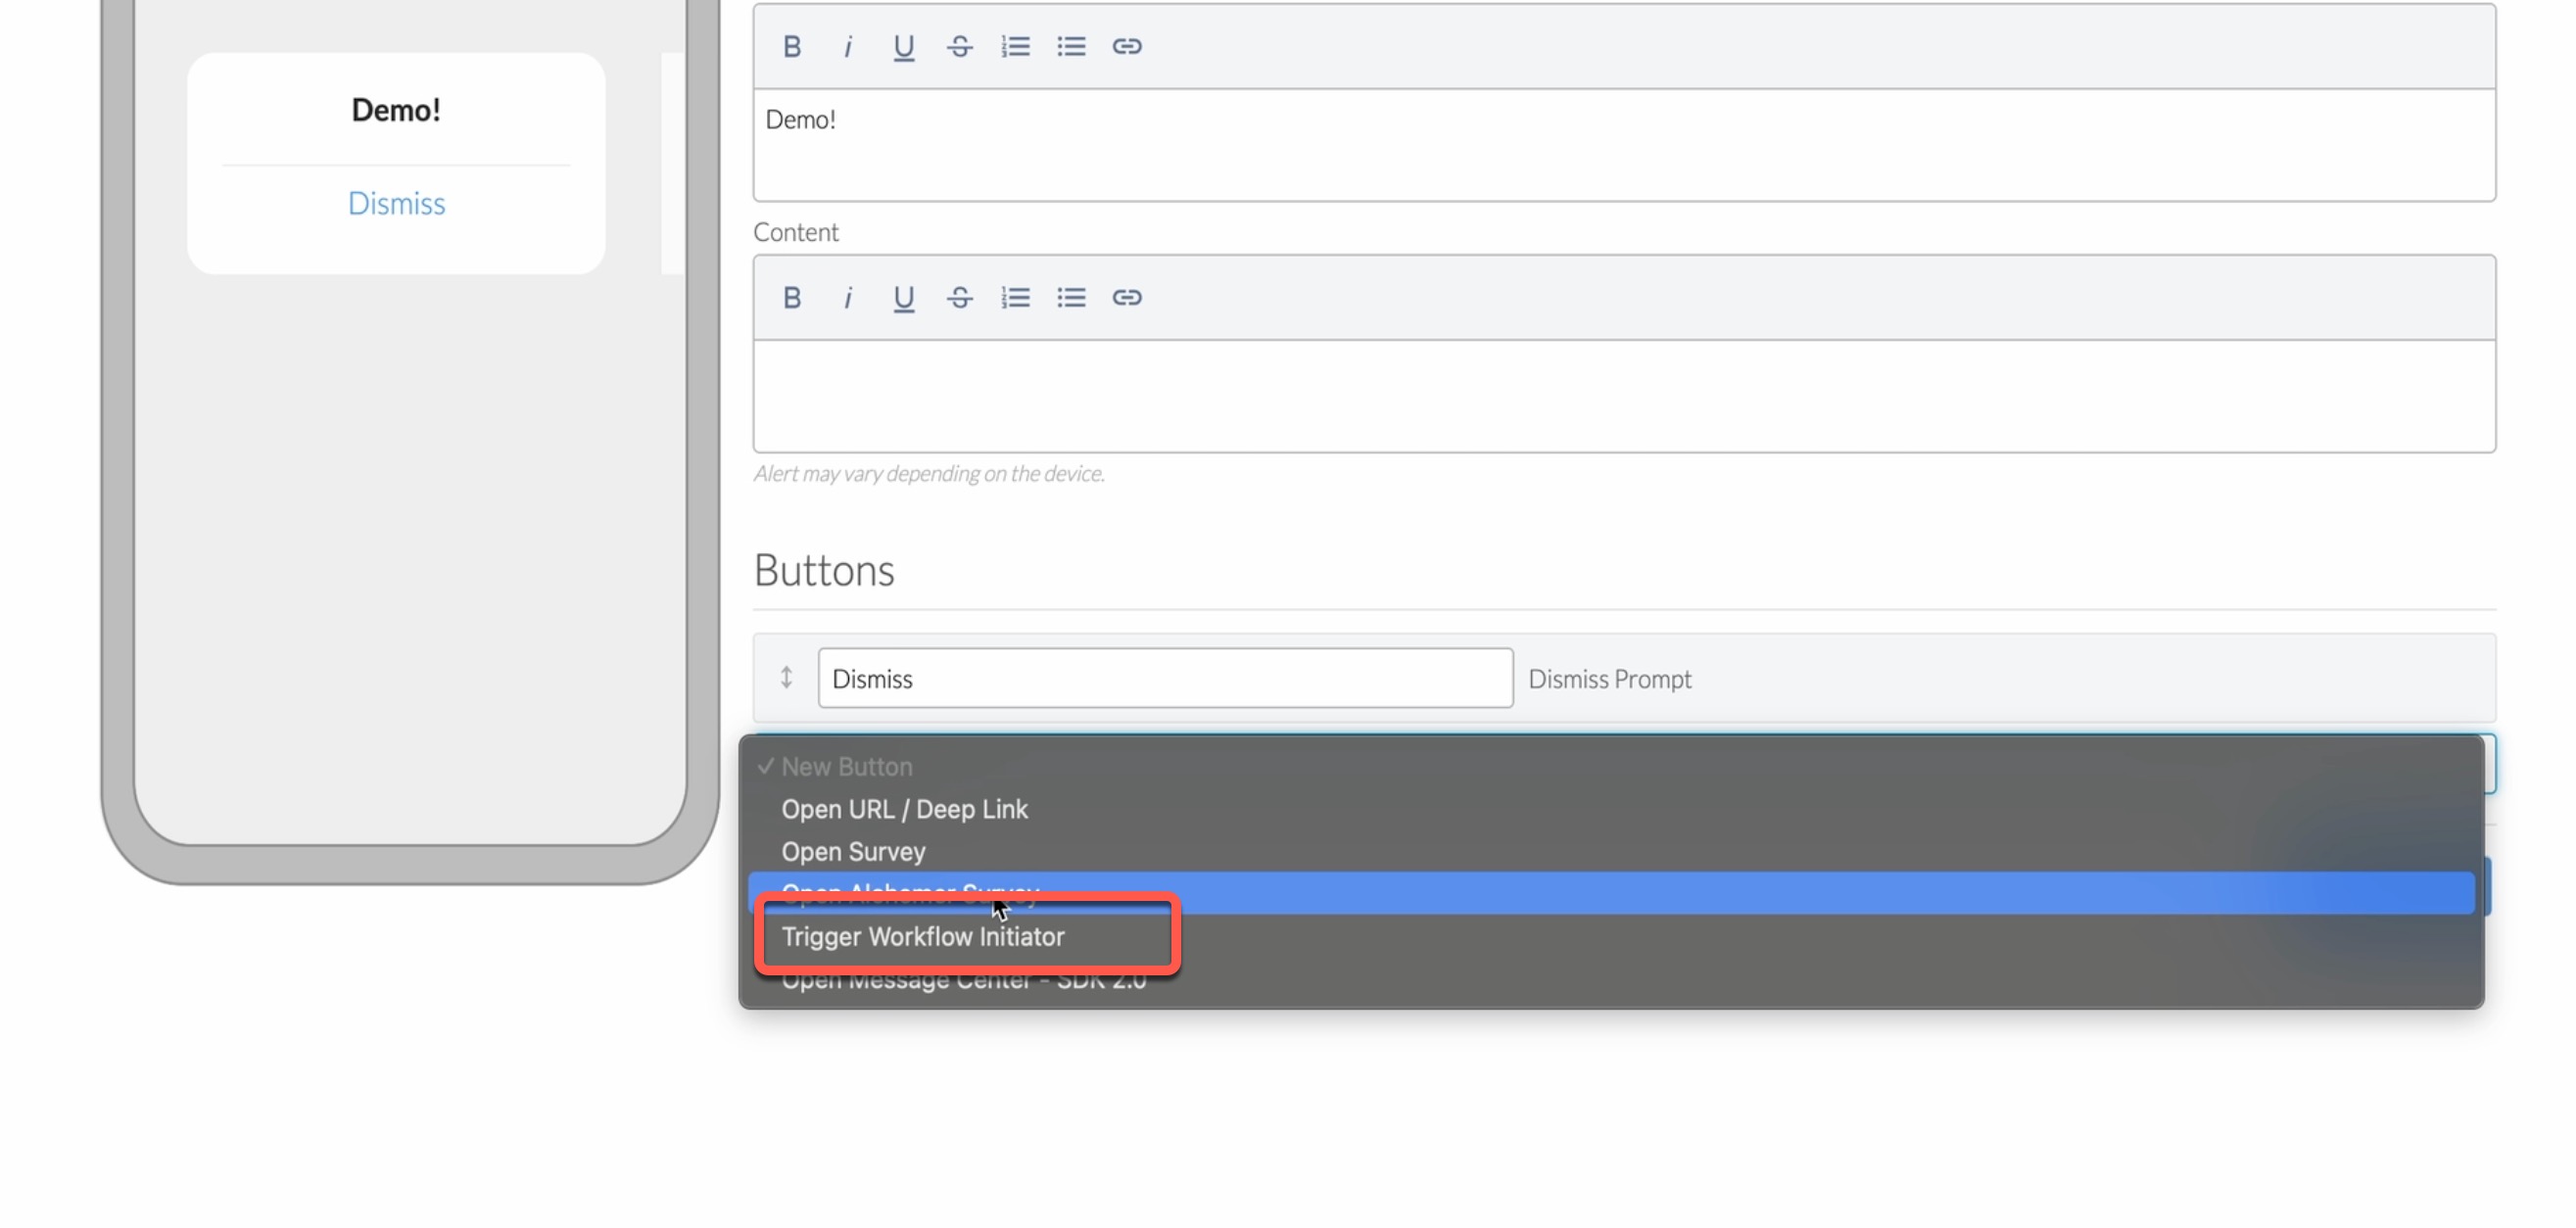 Give your button a label, and select the right workflow initiator.
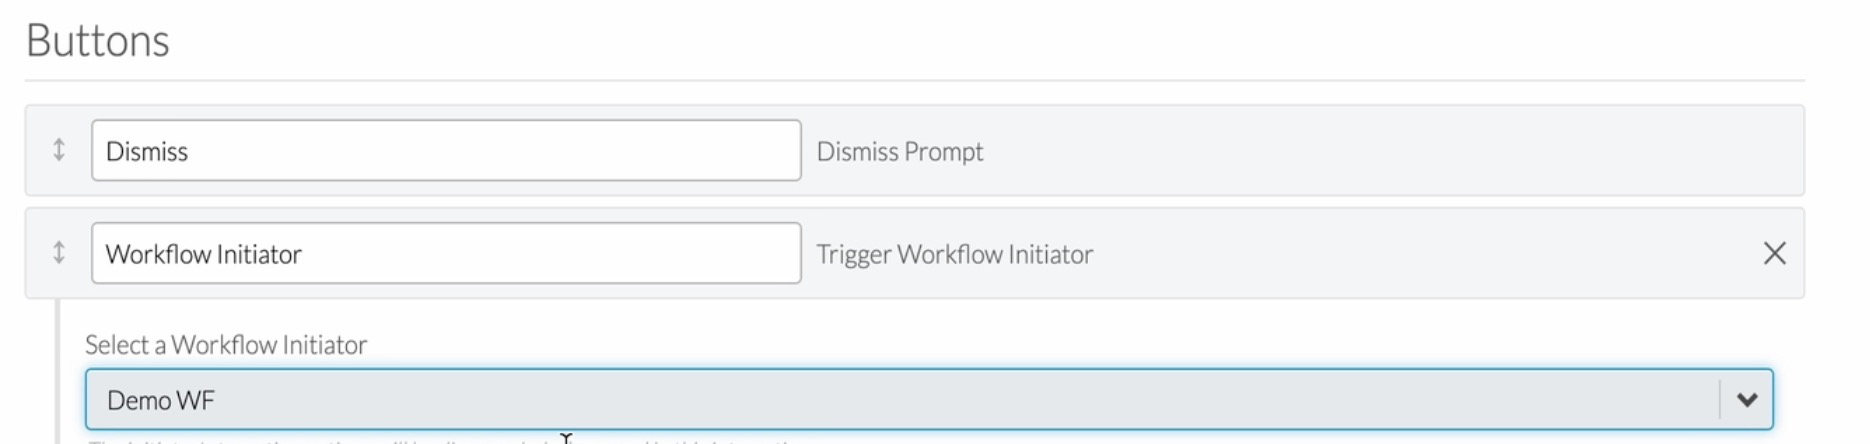
- Initiate the workflow using independent event criteria and targeting. For example, after a customer completes checkout.
 Give your button a label, and select the right workflow initiator.
For more details on setting up targeting in Alchemer Digital, refer to our more detailed targeting documentation.
5. Once targeting is complete in Alchemer Digital, click "Launch Workflow Initiator".


Launching the Workflow
1. Return to Alchemer Workflow and click save to configure the Alchemer Workflow initiator. If successful, after hitting save you'll see the message "Integration Successfully Setup!".

2. After configuring the initiator in Alchemer Workflow and setting up that initiators targeting in Alchemer Digital, return to Alchemer Workflow to build out your workflow steps.
For more information on building in Alchemer Workflow, refer to our detailed workflow documentation.

Merge Codes
After completing the initiator, fields from Alchemer Digital will be available as merge codes in Alchemer workflow. These merge codes can be added to workflow steps, like a Send Email step. For more information on using merge codes in Alchemer Workflow, refer to this documentation.

3. After building out your Workflow. Click "Publish" in the top right corner. Then click "Publish Workflow".

4. Then toggle "Activate" to on (green) in the top left corner.

Reporting
You can access reporting data in both Alchemer Digital and Alchemer Workflow.
Reporting In Alchemer Digital
In the Reporting Tab for your workflow initiator, you can track how many times the selected events occurred and how many times the initiator was triggered.
Reporting reflects the number of events triggered, but it doesn't necessarily correlate with the number of workflows executed.

Helpful Reporting Tip
If you linked your initiator to a specific event or Prompt, you will have access to additional metrics tied to that event or Prompt. This helps with troubleshooting and provides valuable insights. Those additional metrics can be found in the Reporting tab for that event or Prompt, rather than in the reporting for the workflow initiator.
Reporting in Alchemer Workflow
You can view and monitor workflow runs in the Monitor tab in Alchemer Workflow.
For information on Reporting in Alchemer, refer to this documentation.

FAQ
How does cloning work? What would happen if I cloned a Prompt that is tied to an Alchemer Digital Workflow Initiator?
Everything would be cloned, except the Digital initiator. You would need to reconfigure that part of the prompt.
What permissions do I need within Alchemer to set-up and use the Twilio integration?
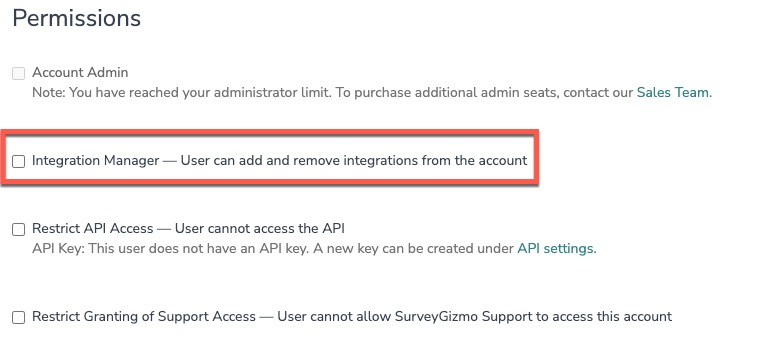
1. The Integration Manager Permission is required to set-up and use the Twilio integration. If you don't have this permission you will see the following message when selecting an initiator: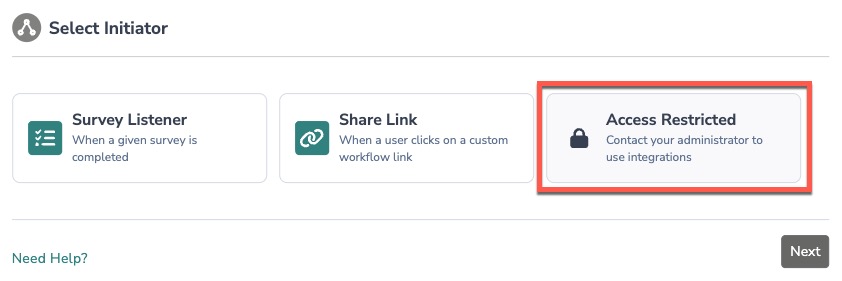 2. To grant this permission to someone on your team, go to the left-side product navigation and select the Account drop-down, then click on the user management tab.
3. Then select the Users tab under User Management.
4. Click your username or the username for another member of your team.
5. Scroll down to the Permissions section and check if the Integration Manager box is checked. If you are an admin you can check the box for other members of your team.