The Alchemer Gladly Integration is available as an add-on. If you are interested in purchasing the Gladly Integration, please contact us for additional information.
At a high-level, Alchemer's integration with Gladly allows you to easily:
- Push survey data from Alchemer into Gladly, for example to update customer records.
- Pull data from Gladly Customer Records into Alchemer, for use in surveys or email campaigns.
Customer feedback collected through Alchemer seamlessly flows into Gladly, reducing data silos and conserving time and resources that would have otherwise been used on manually inputting feedback into Gladly customer records.
On the Alchemer-side, this integration leverages data from Gladly records to create customized surveys tailored at the customer level. This personalized approach enables you to gather more relevant and targeted insights that lead to a better understanding of your customers' preferences and your overall customer experience.
What are some examples of the Alchemer Gladly Integration in practice:
- Run a Customer Experience Survey in Alchemer and automatically update customer records in Gladly when that customer provides feedback.
- Bring in data from Gladly Customer Records to personalize surveys sent through Alchemer.
Integration Set-Up
Adding an Integration Action
1. Select an existing survey or create a new survey. Then navigate to the Survey Builder.
2. Click "Add New: Action"
You cannot add this Integration Action to the first page of the survey.

3. In the Add Action modal, scroll down to Integrations. Then click "Add" for one of your purchased integrations.
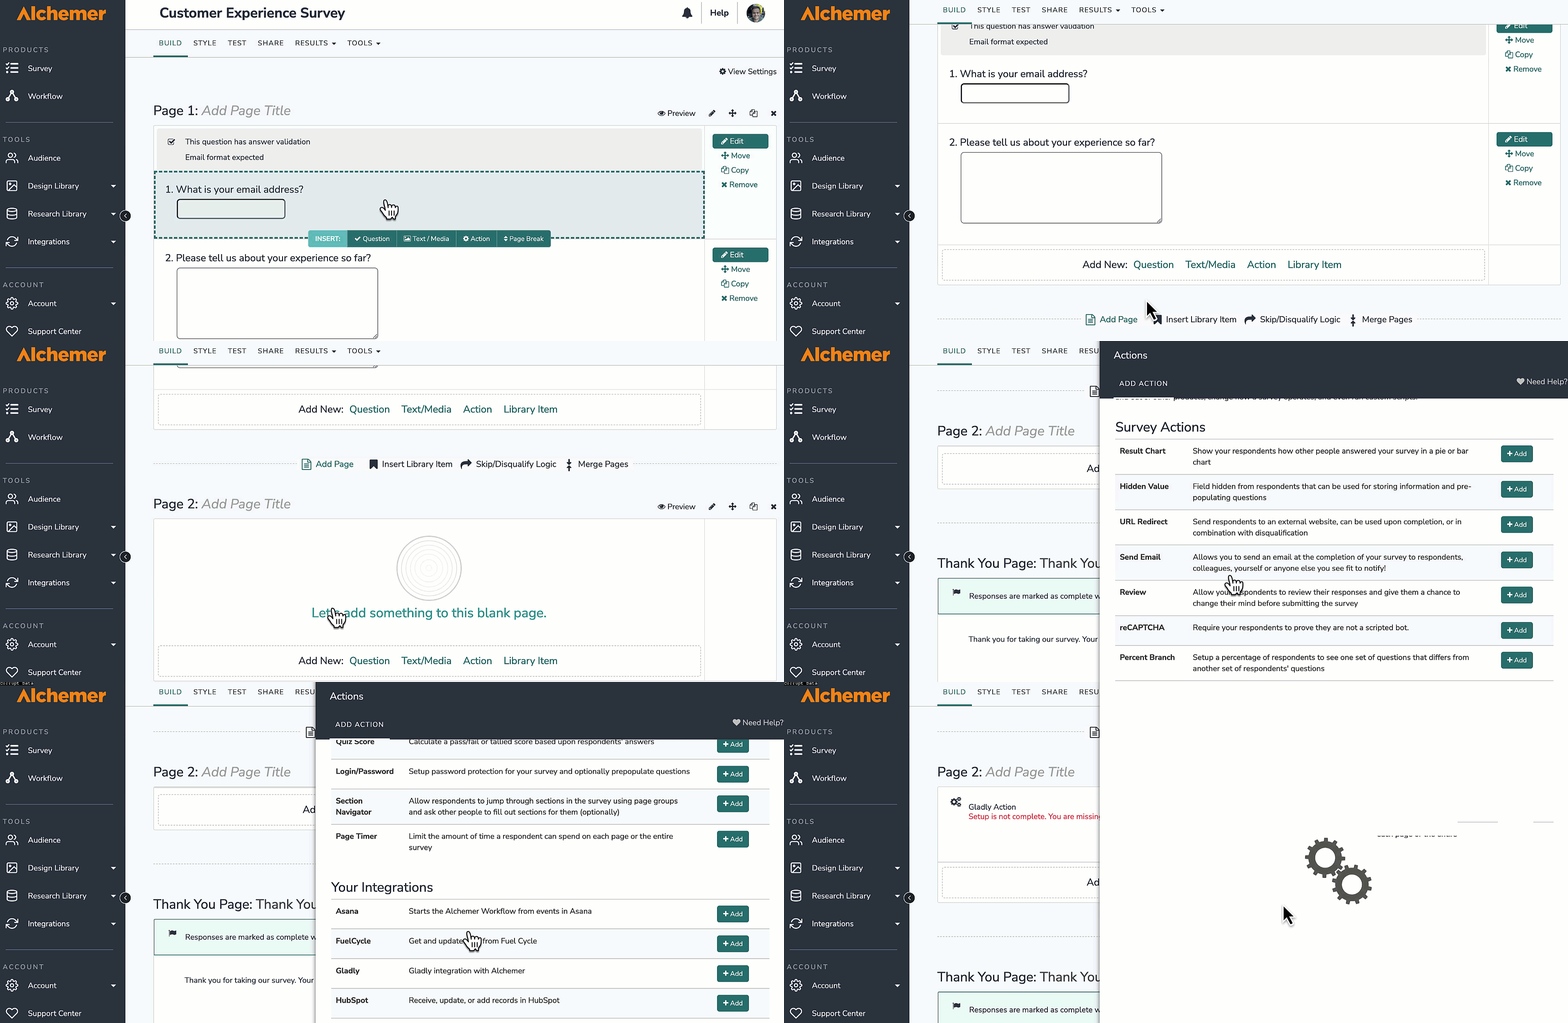
If you haven't purchased any additional integrations, you will see the below screen:

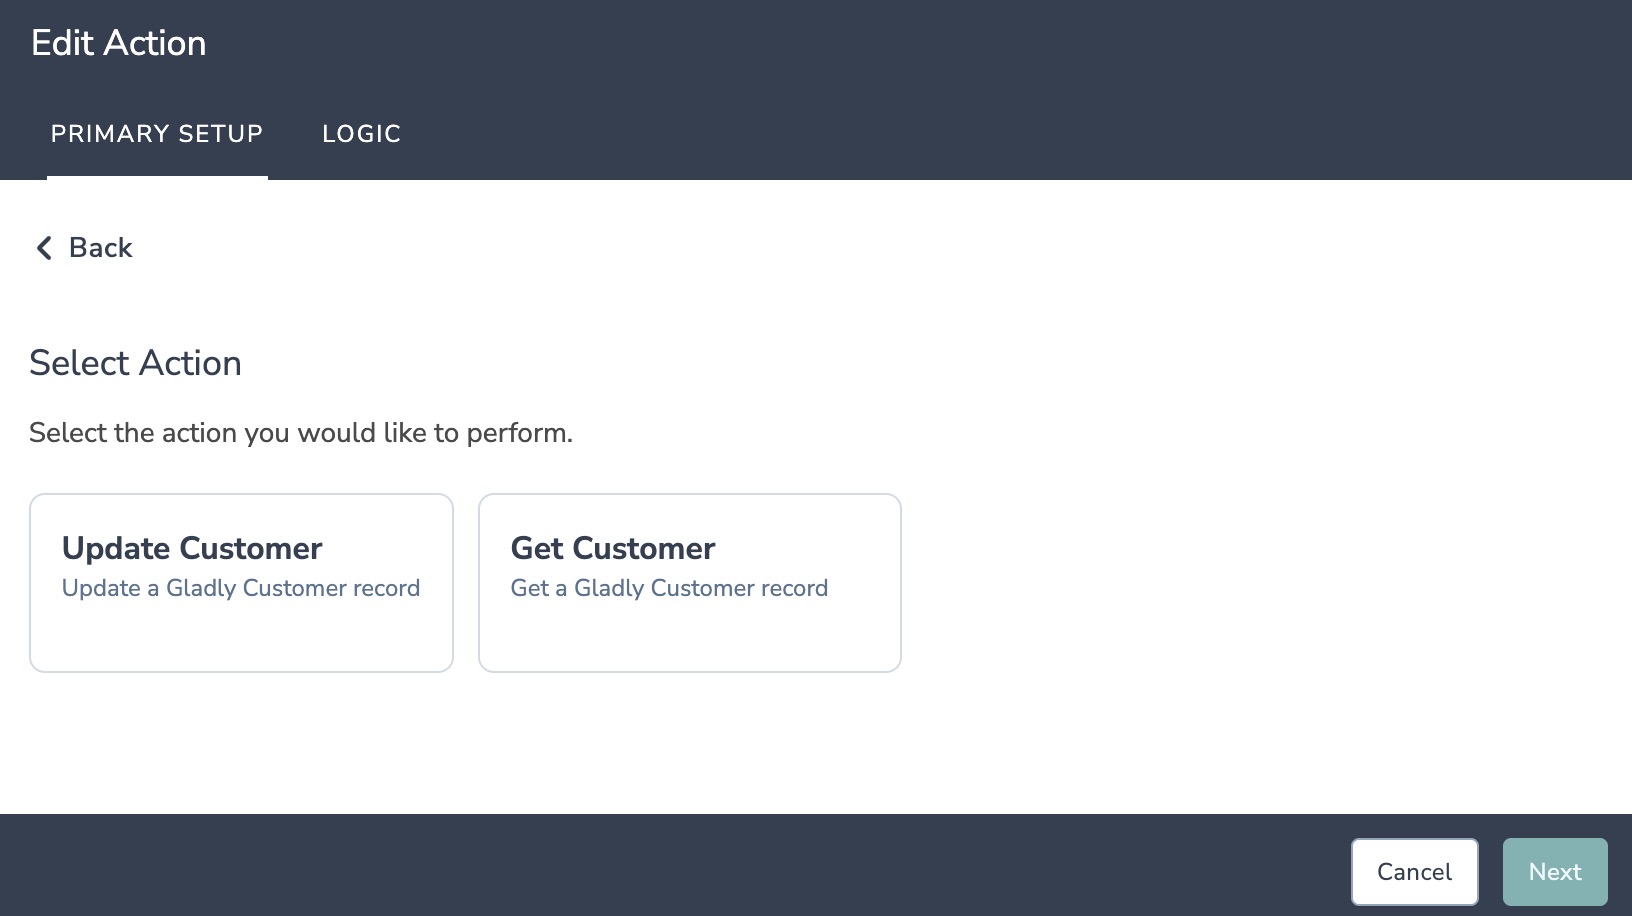
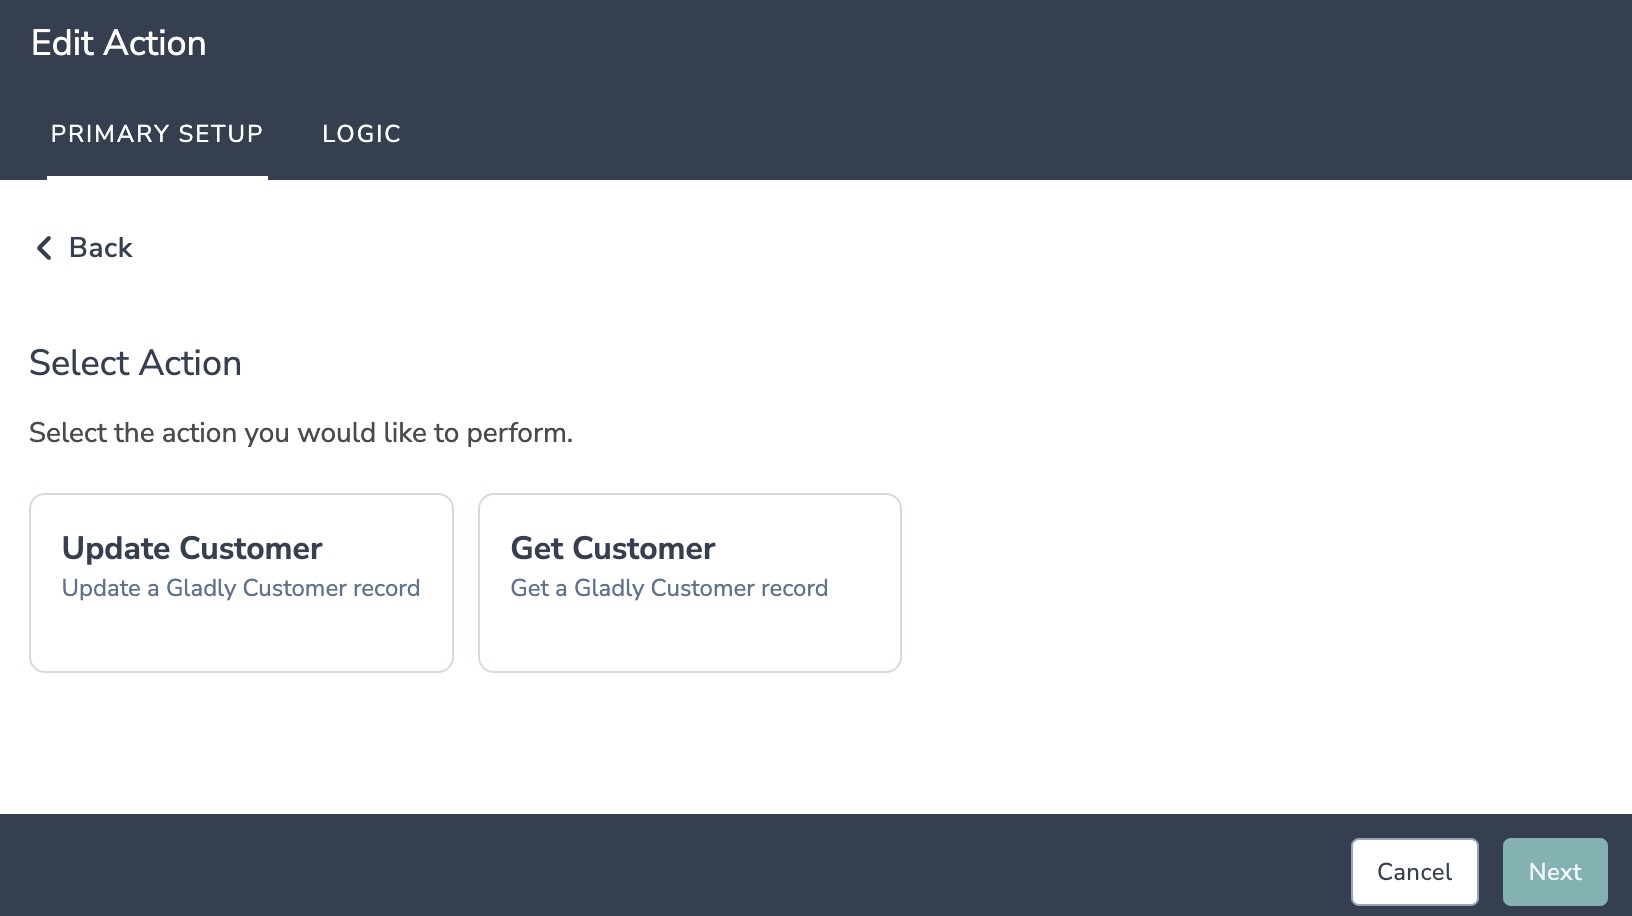
4. Select the action you would like to perform:
- Update Customer: Automatically update a customer record in Gladly with survey response data from Alchemer.
- Get Customer: Look up Gladly Customer Records by email, customer ID, or other field. Then pull information from those customer records into a survey or email campaign.
Configuration: Update Customer Record
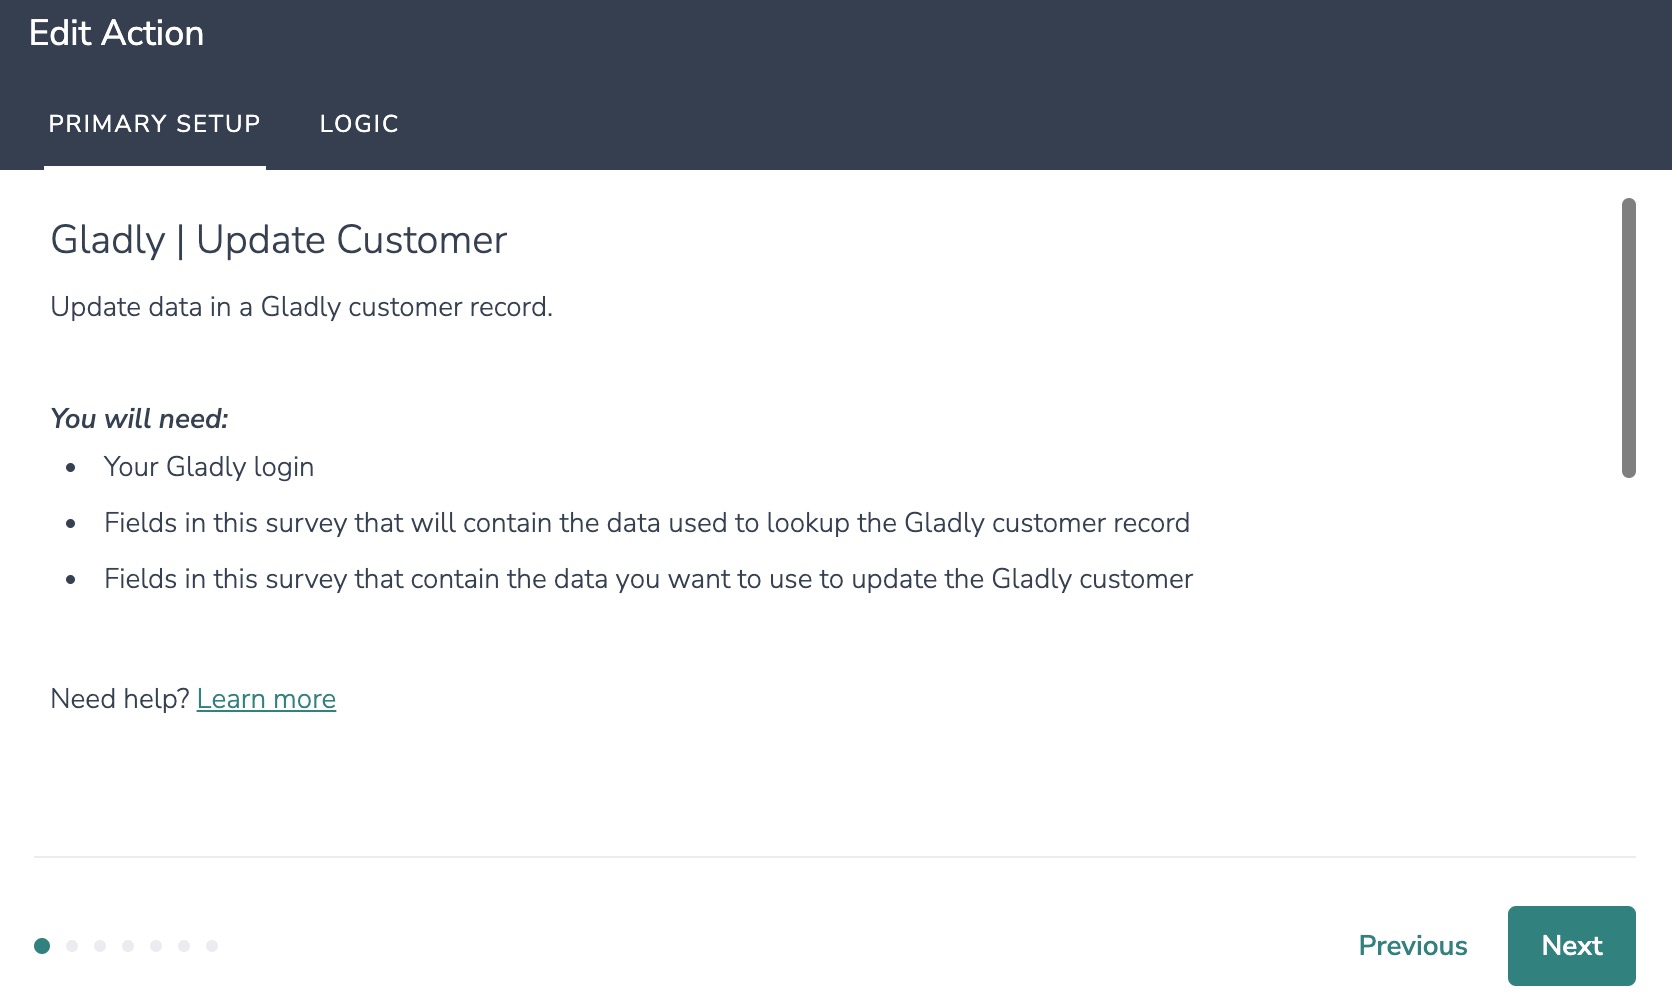
Before configuring the Gladly Integration action you will need:
- Your Gladly Login
- Fields in this survey that will contain the data used to lookup the Gladly customer record
- Fields in this survey that contain the data you want to use to update the Gladly customer
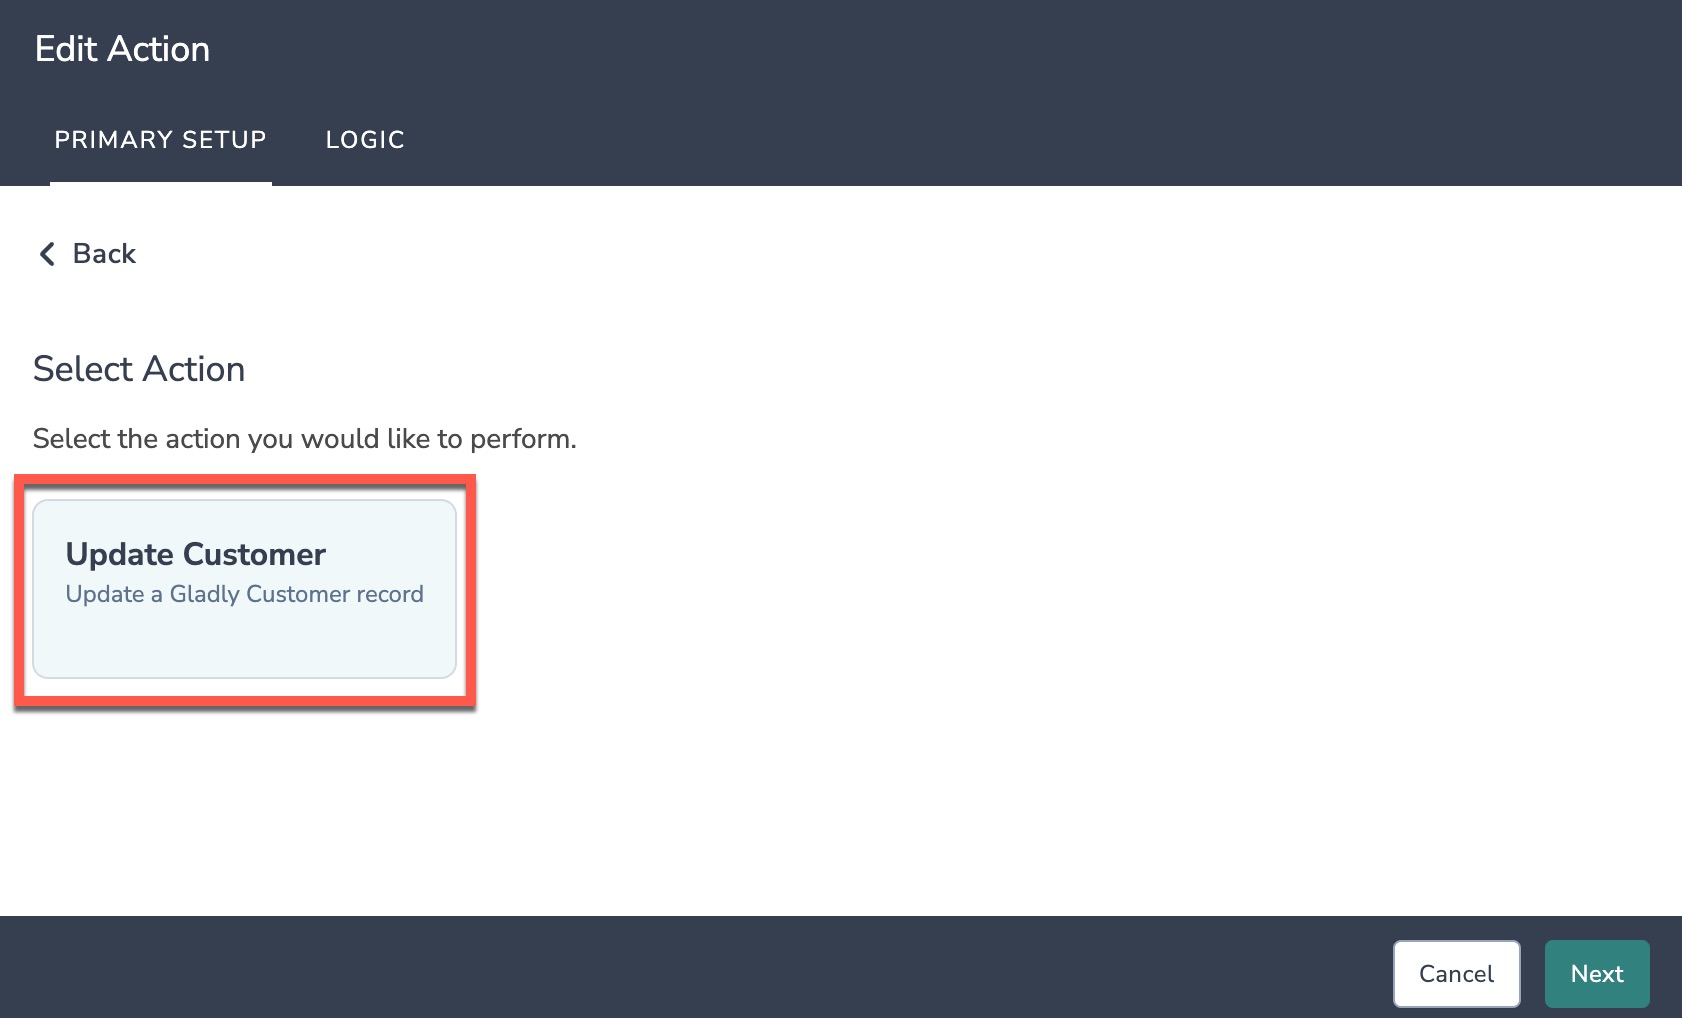
1. Select "Update Customer".
2. Hit "Next" on the overview screen.
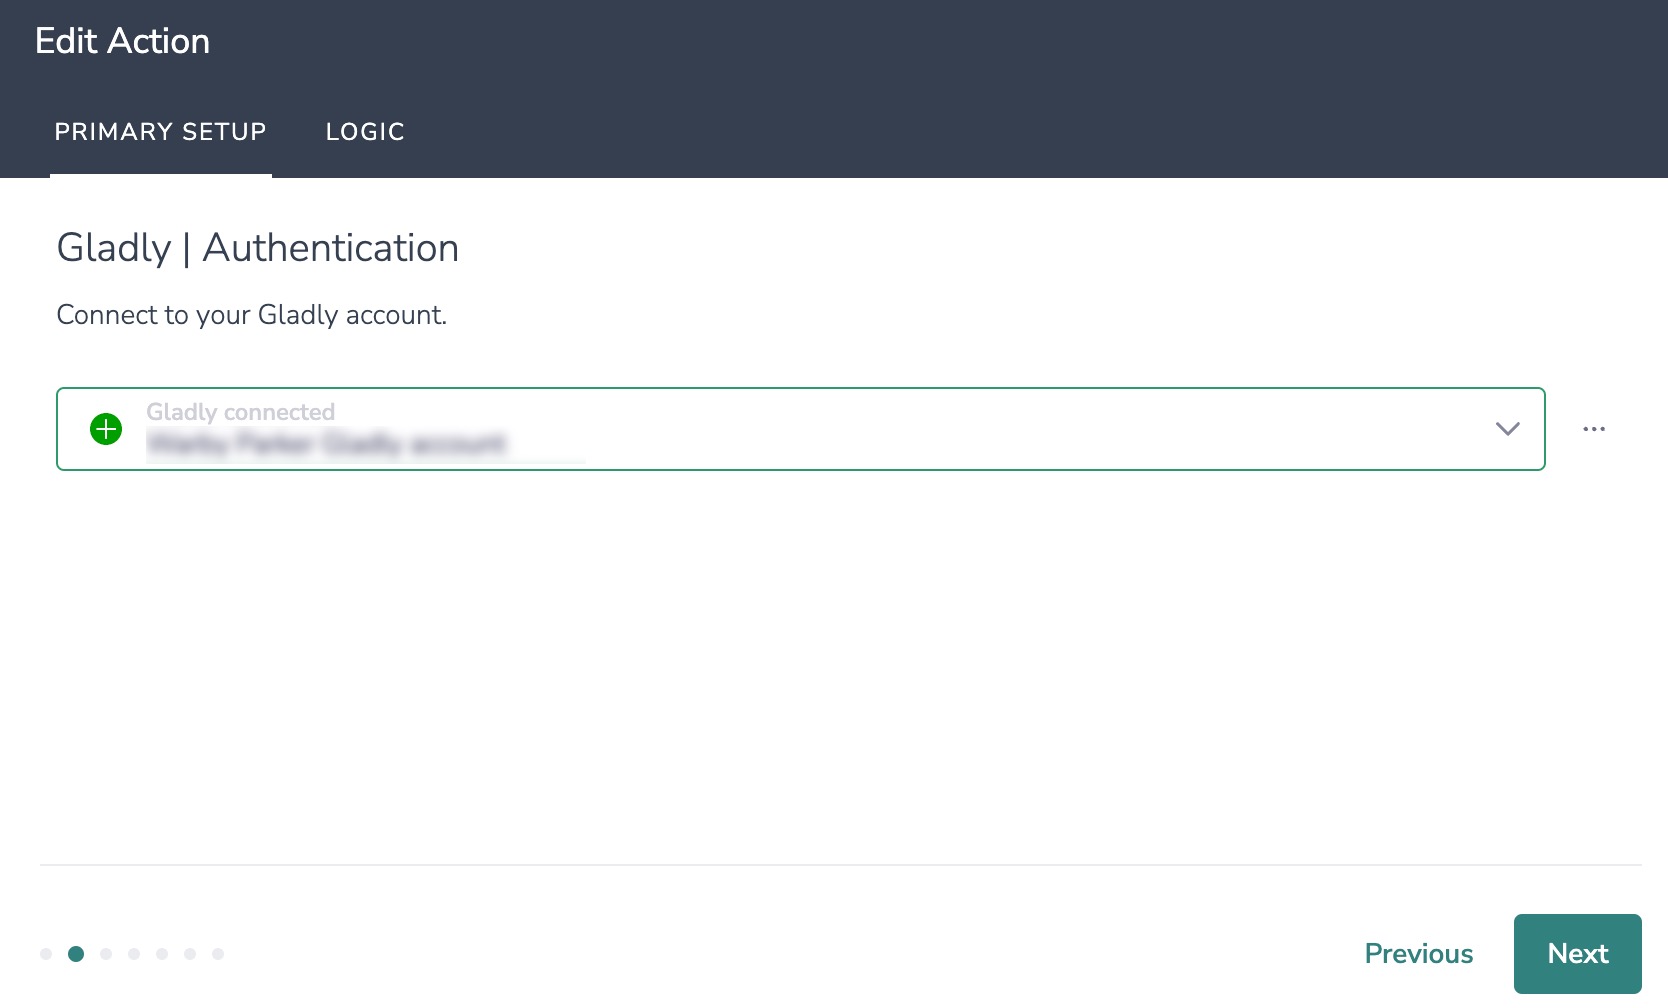
3. Connect your Gladly account.
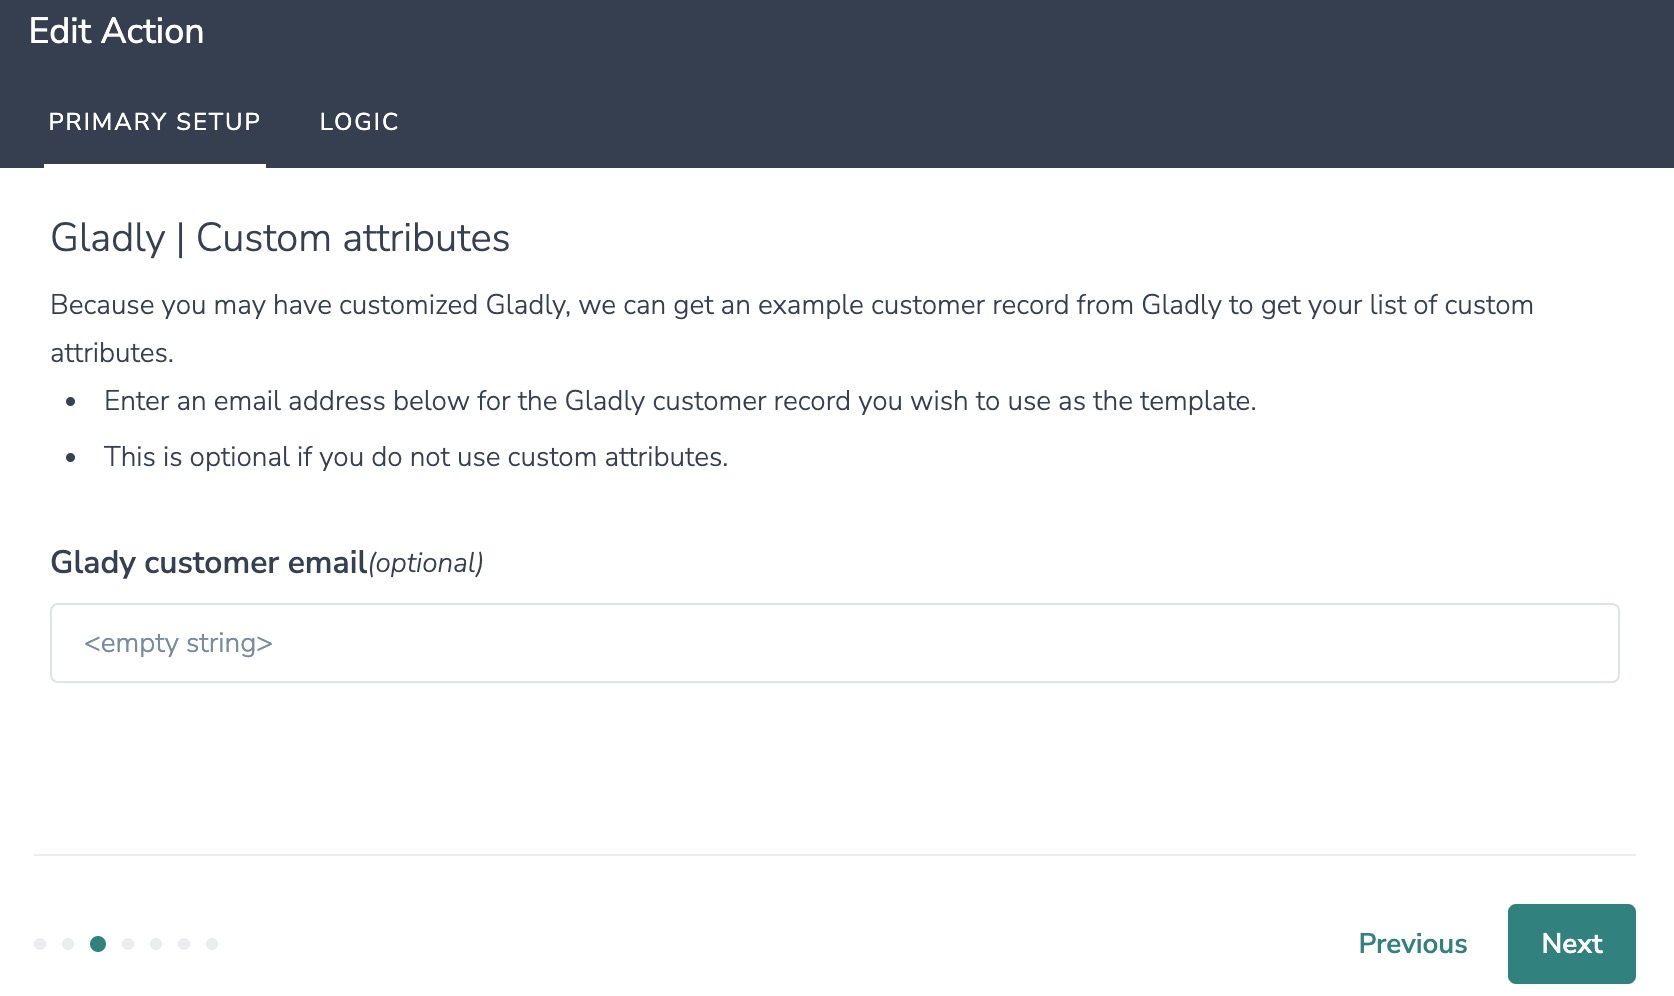
4. Optional: If your customer records in Gladly have custom attributes and you would like to be able to use those attributes with this integration, provide an email address associated with a Gladly customer record.
This sample record will provide the template for Alchemer to pull in your list of Gladly custom attributes. These custom attributes will appear as Gladly fields in the dropdown list in Step #6. You can map fields in Alchemer to the corresponding custom attributes in Gladly, and update them with survey data.
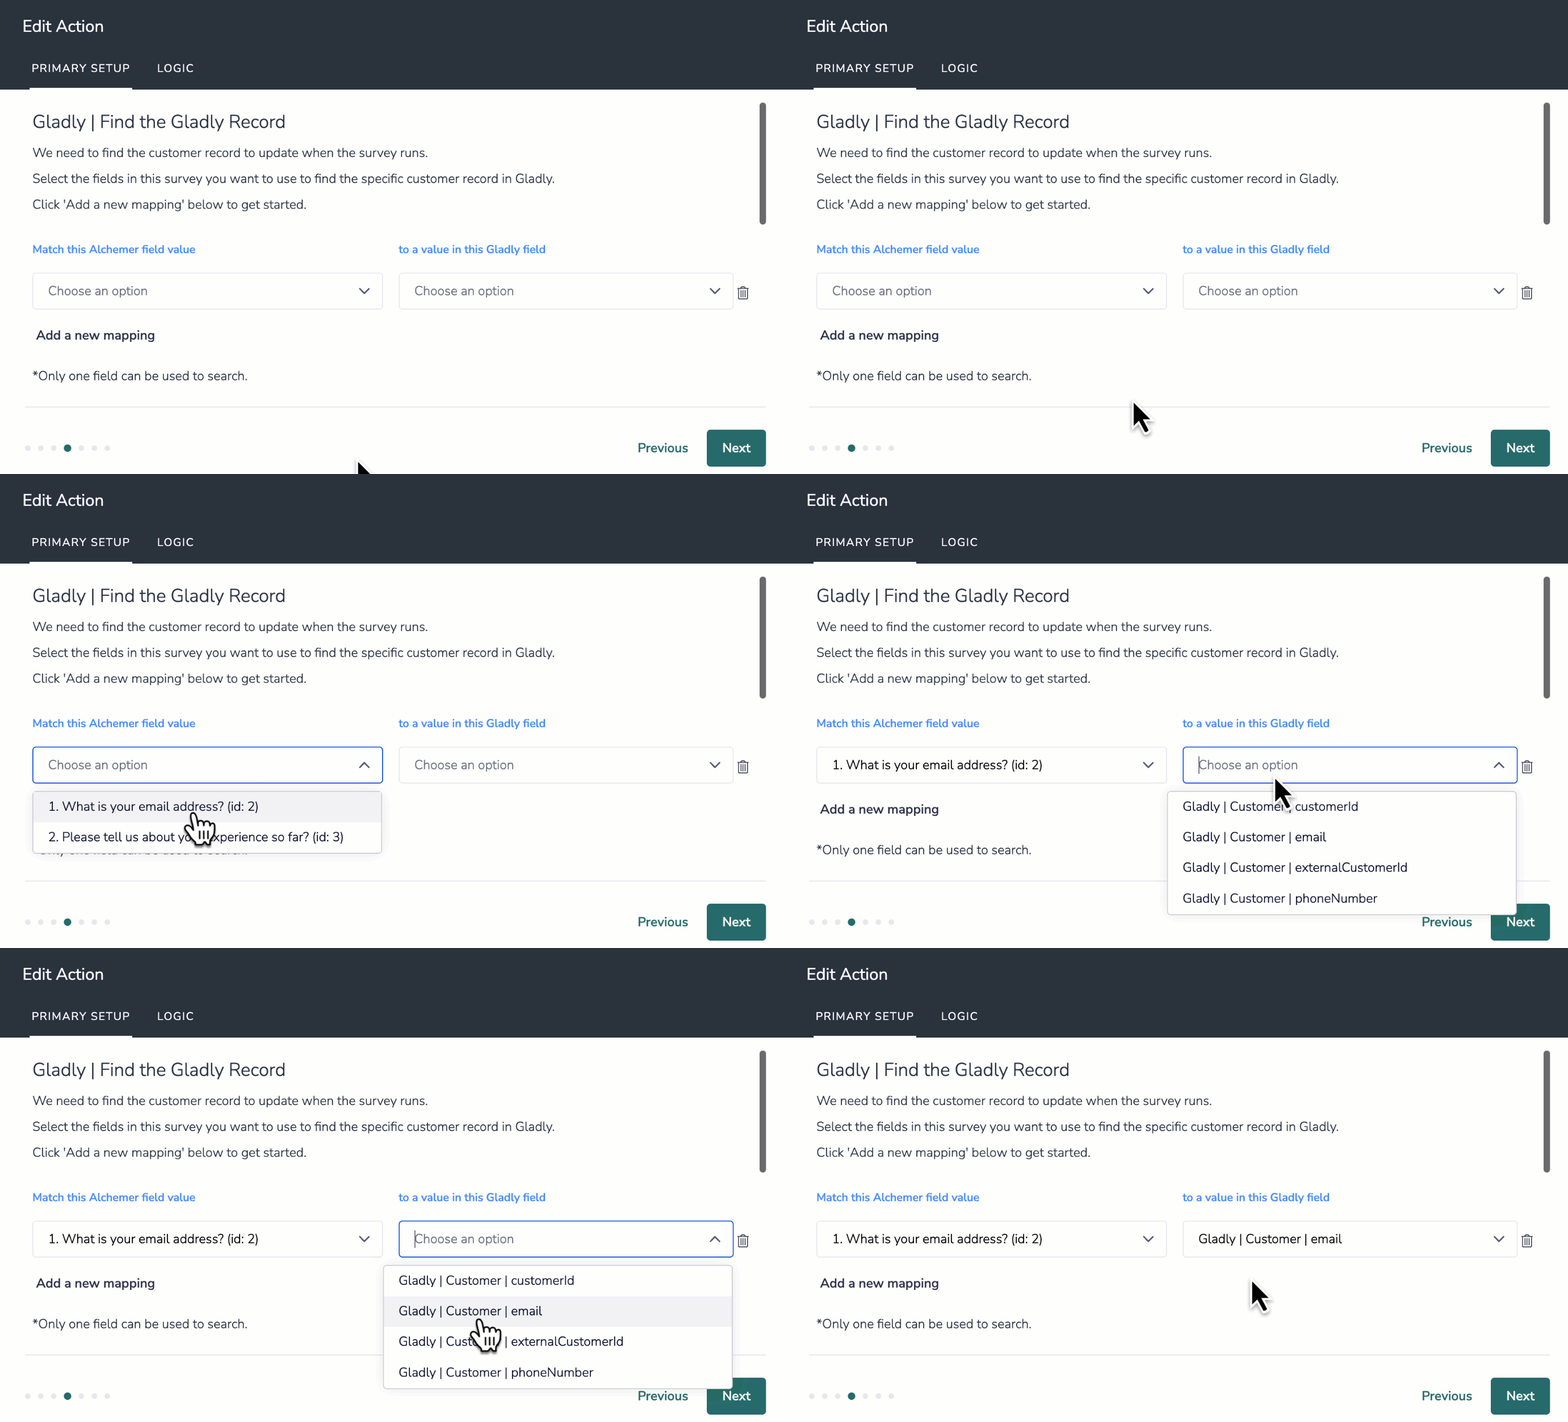
5. Select the field in this survey that you want to use to find the specific customer record in Gladly. 'Customer ID' or 'Customer Email' will often make the most sense, but you can use any of the other fields listed in the drop-down list.
How to Create Fields in Alchemer
1. Add survey questions that when answered will provide the desired field. (Example: What is the customer email address?)
2. Create a container using a Hidden Value. These Hidden Values can then be mapped to fields in Gladly and used as Merge Codes in your survey.
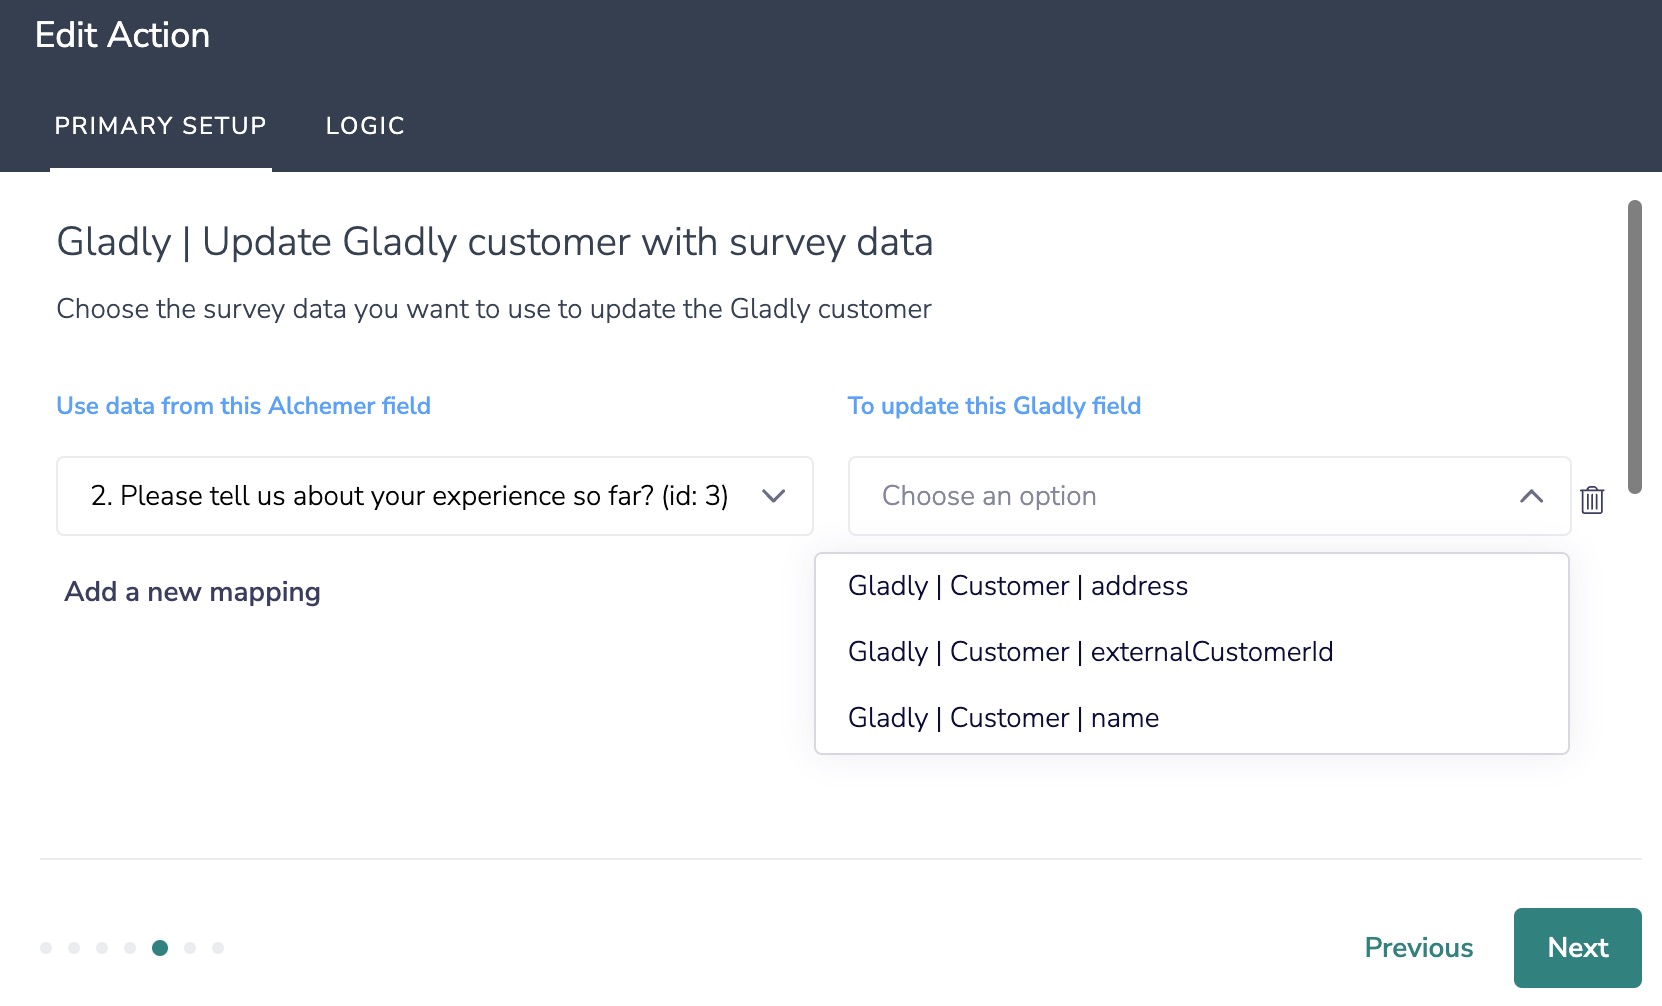
6. Map fields in Alchemer to corresponding fields in Gladly.
For Update Gladly Customer Records, you will map a survey field in Alchemer to a corresponding field in Gladly. This will push the data from that survey field into Gladly and update the corresponding field for that customer record.
Any custom attributes brought in during Step #4 will appear as fields in the Gladly field dropdown menu.
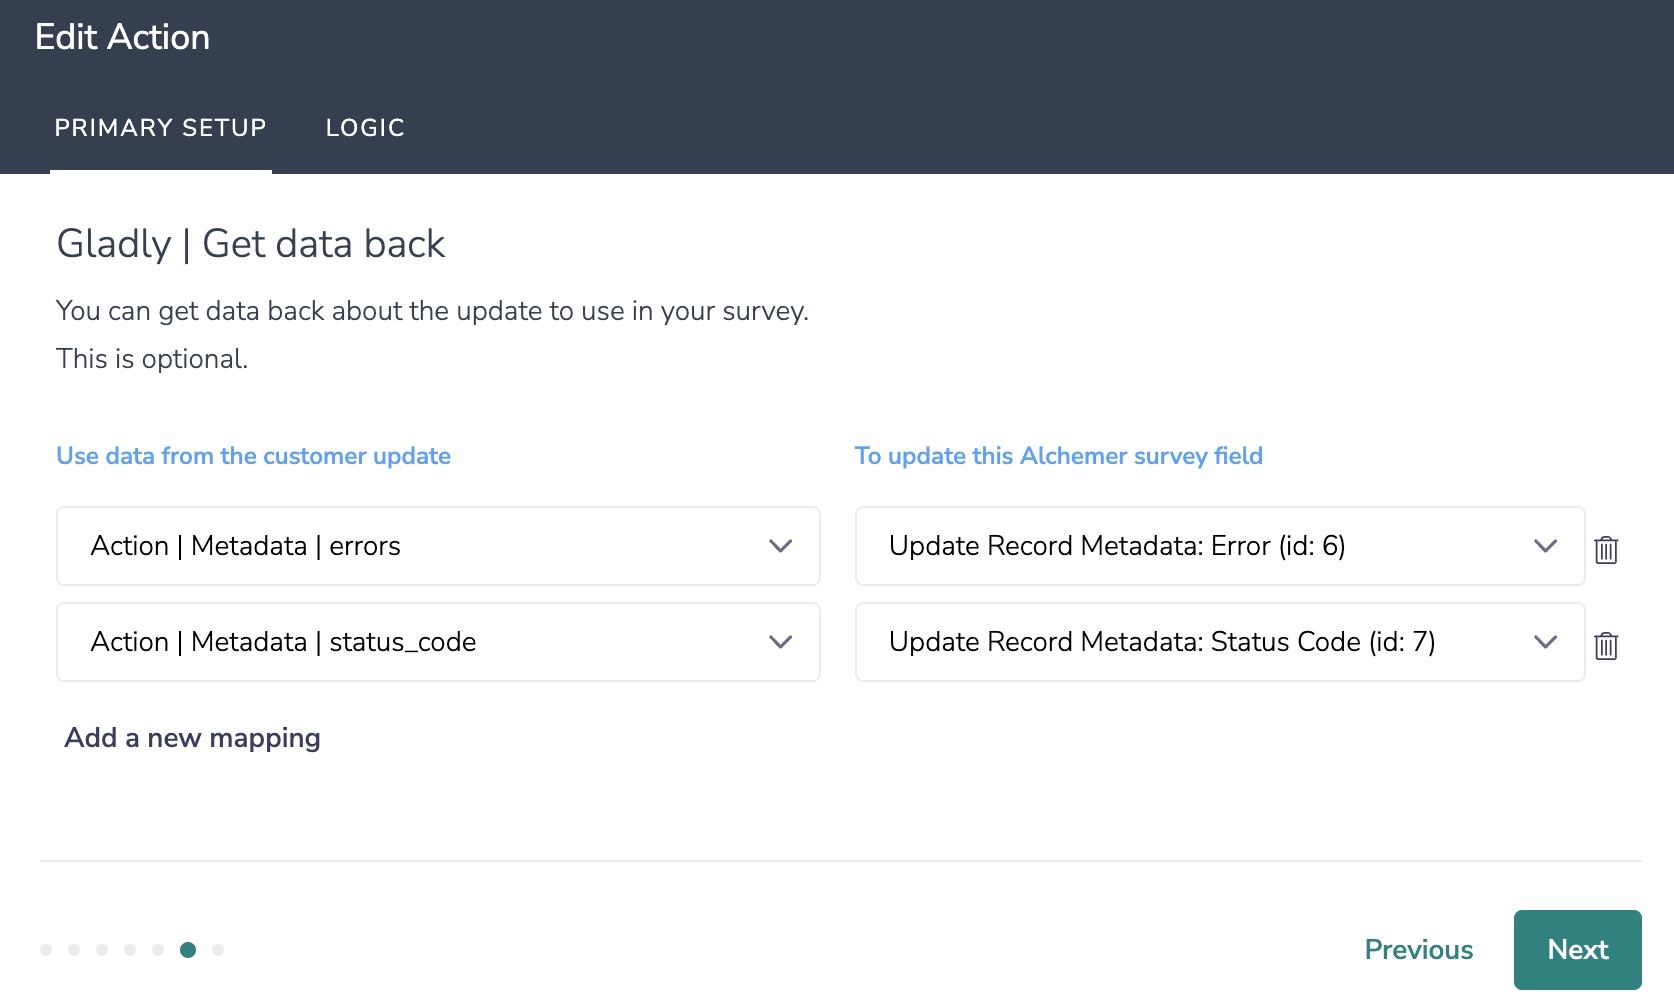
Optional: Get Data Back About the Record Update Action
After a Gladly Customer Record Update action occurs, data about the action is available for use in your survey. You can map this data back to fields in Alchemer.
For example, if there is an error in the action you can skip the rest of the survey questions for that respondent.
7. When complete, click "Save" to finalize the Integration.
Configuration: Get Customer Record
Before configuring the Gladly Integration action you will need:
- Your Gladly Login
- Fields in this survey that will contain the data used to lookup the Gladly customer record
1. Select "Update Customer".
2. Hit "Next" on the overview screen
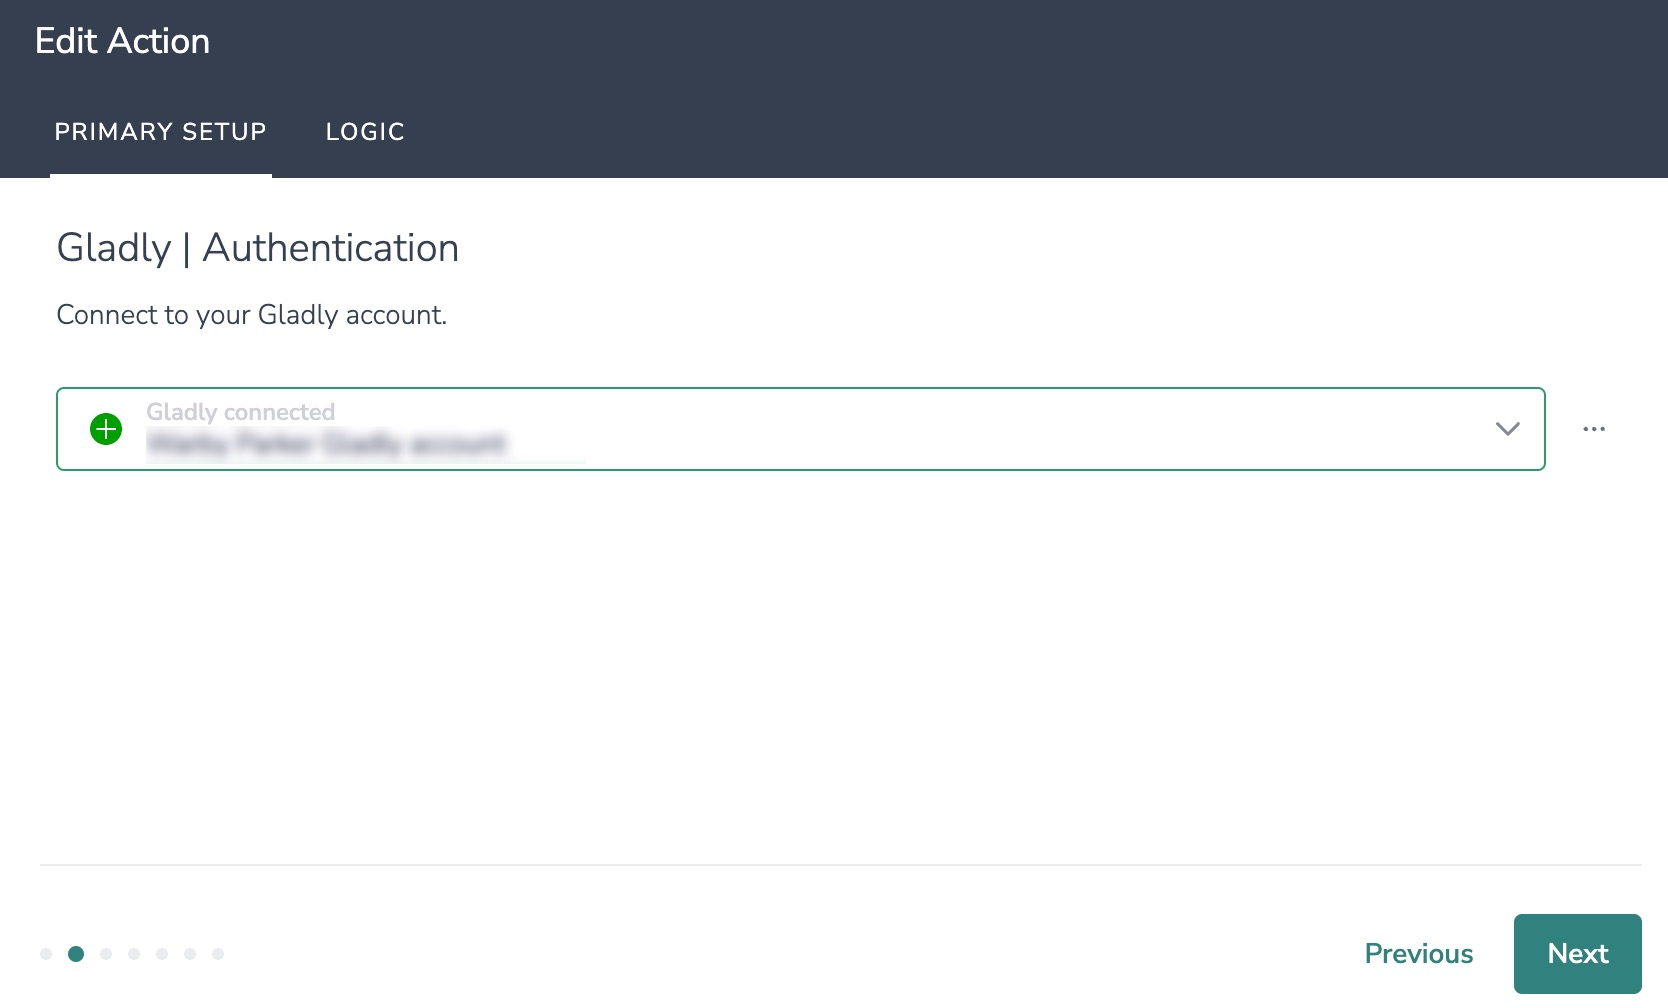
3. Connect your Gladly account.
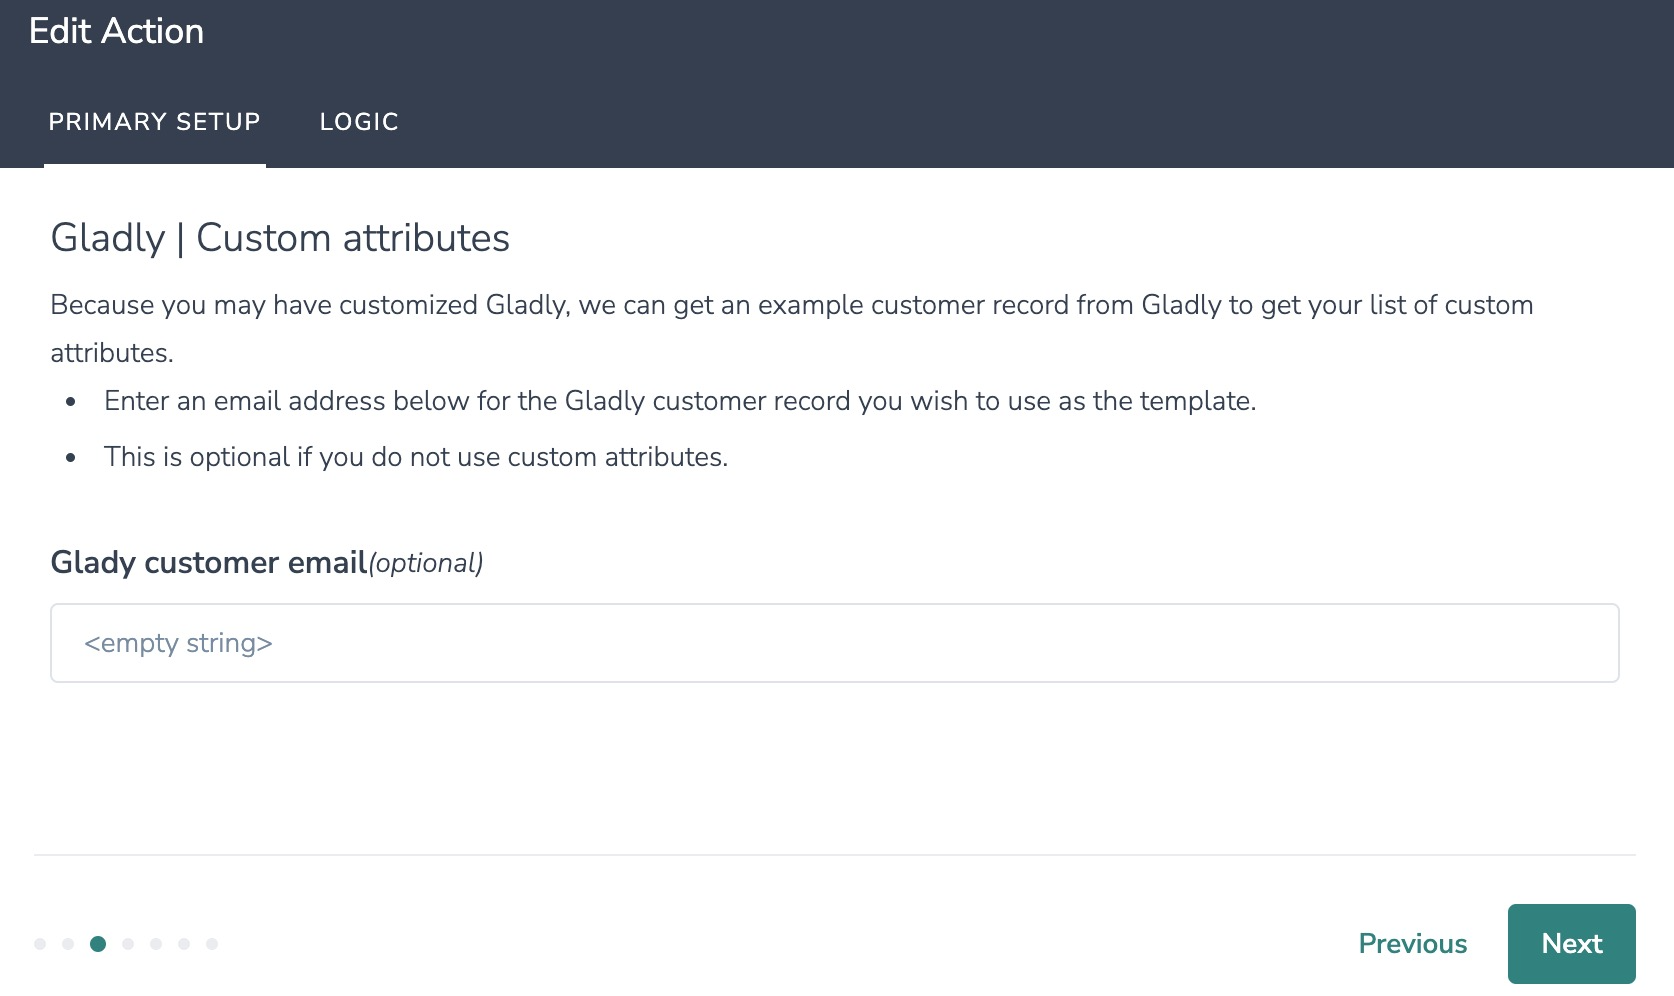
4. Optional: If your customer records in Gladly have custom attributes and you would like to be able to use those attributes with this integration, provide an email address associated with a Gladly customer record.
This sample record will provide the template for Alchemer to pull in your list of Gladly custom attributes. These custom attributes will appear as Gladly fields in the dropdown list in Step #6. You can map fields in Alchemer to the corresponding custom attributes in Gladly, and update them with survey data.
5. Select the field in this survey that you want to use to find the specific customer record in Gladly. 'Customer ID' or 'Customer Email' will often make the most sense, but you can use any of the other fields listed in the drop-down list.
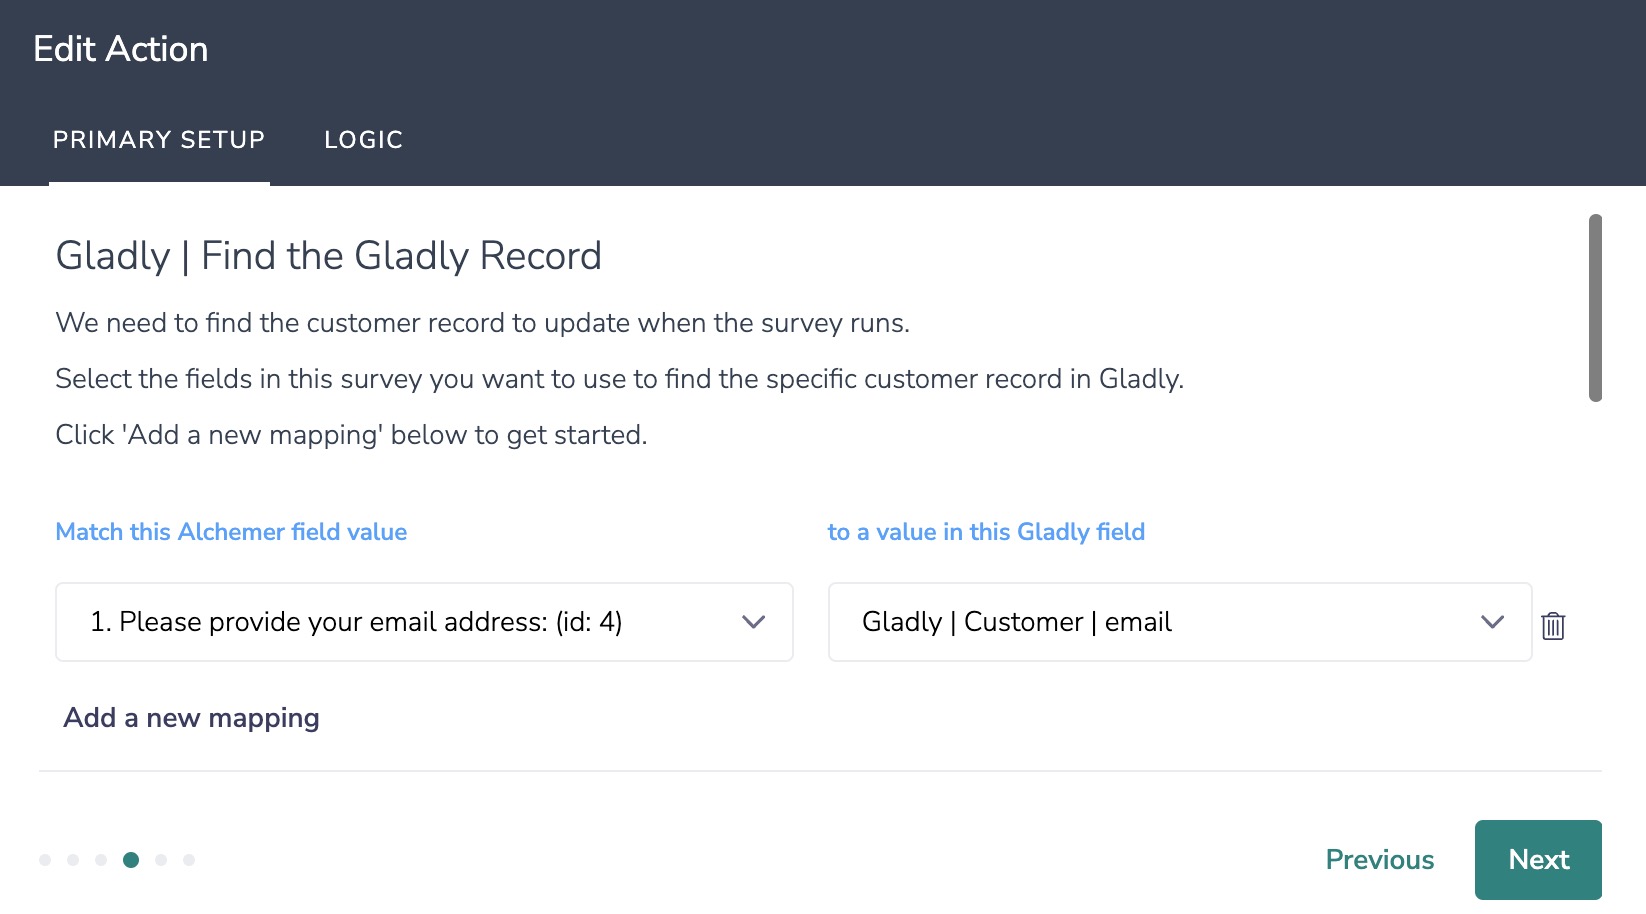
How to Create Fields in Alchemer
1. Add survey questions that when answered will provide the desired field. (Example: What is the customer email address?)
2. Create a container using a Hidden Value. These Hidden Values can then be mapped to fields in Gladly and used as Merge Codes in your survey.
6. Map fields in Gladly to corresponding fields in Alchemer.
If you selected Get Gladly Customer Records as your action, you will map a Gladly field to a corresponding field in Alchemer. This will pull in data from an existing field in Gladly and update the corresponding field in Alchemer.
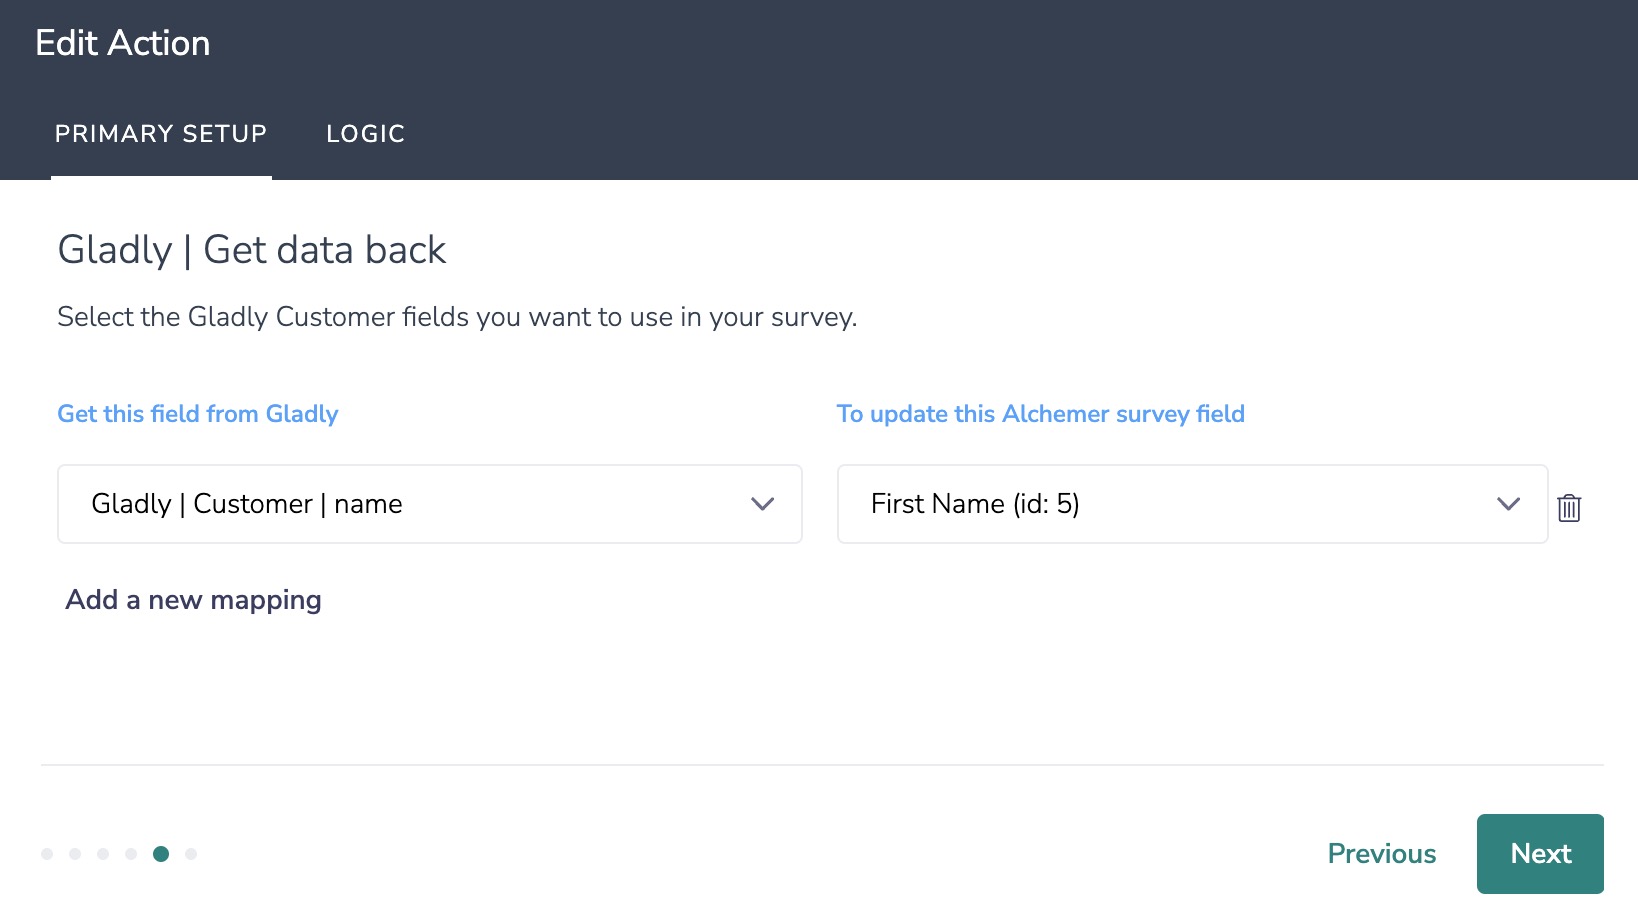
7. Hit "Save" to complete the integration set up.
Monitoring a Gladly Integration Action
A log of each run result can be found in Results > Individual Responses > Action Log. 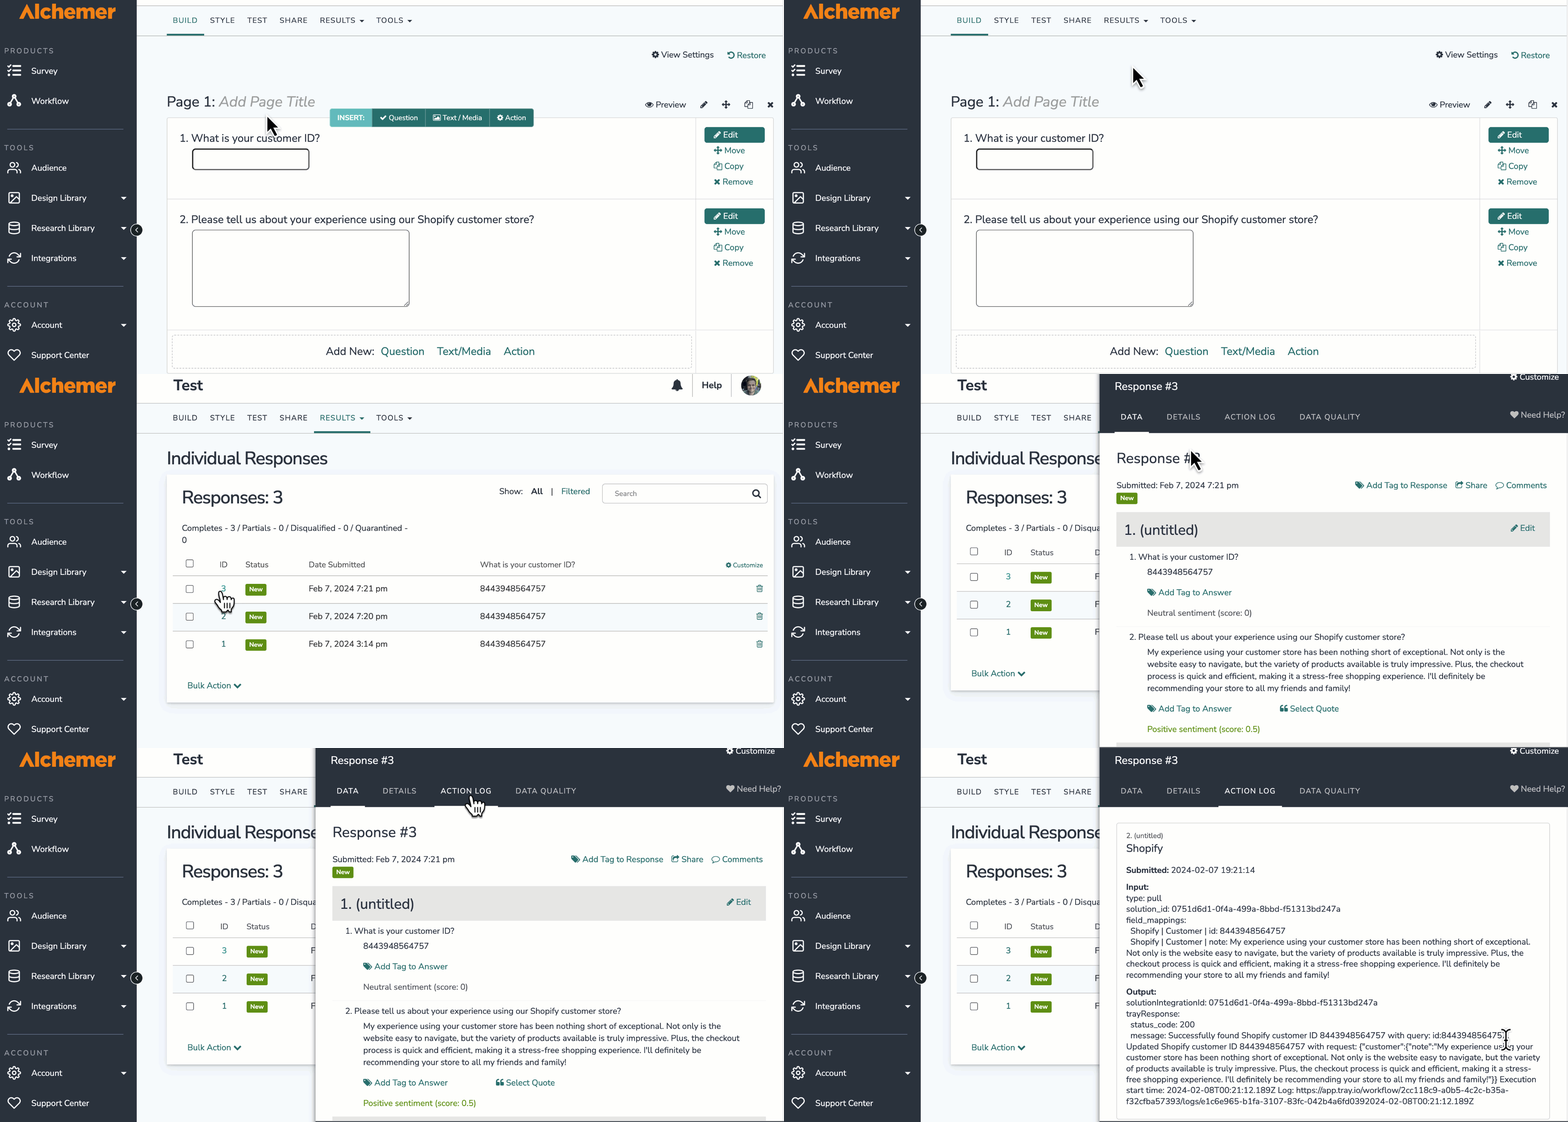
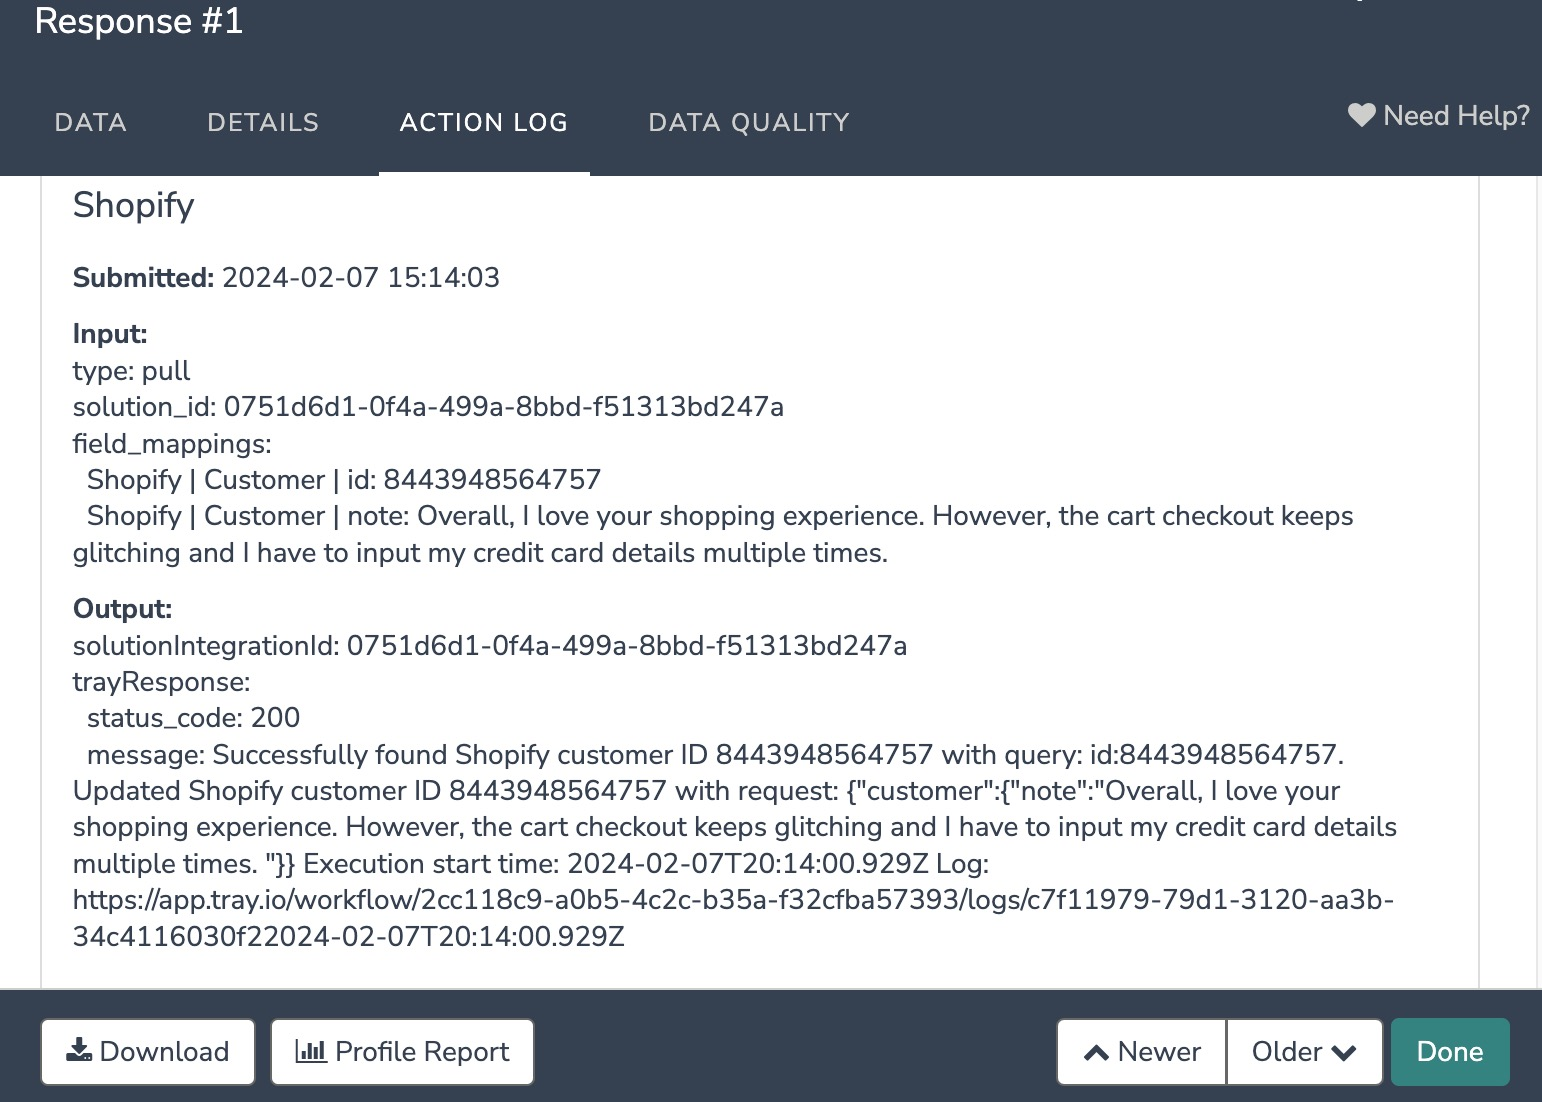
Select an individual response and then navigate to the Action Log. In the Action Log you can monitor if the action was successful or not.
FAQs
1. The Integration Manager Permission is required to set-up and use the Gladly Integration. If you don't have this permission you will see the following when trying to add the integration to a survey: 2. To check if you have this permission or grant this permission to someone on your team, go to the left-side product navigation and select the Account drop-down, then click on the user management tab.
3. Then select the Users tab under User Management.
4. Click your username or the username for another member of your team.
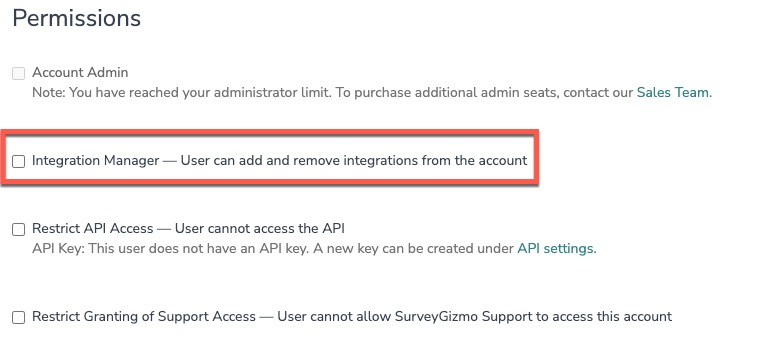
5. Scroll down to the Permissions section and check if the Integration Manager box is checked. If you are an admin you can check the box for other members of your team.
Alchemer is committed to continuously releasing updates and enhancements to our survey integrations. If you have specific use cases, questions, or just general feedback, we would love to hear it. Contact us here!
