SMS Campaign Regulations
SMS Campaigns are subject to the following regulations
- Your campaign must include opt-out messaging and identify your organization as the sender.
- You must have received opt-in consent from your contacts prior to sending messages to them.
- Messages can only be sent from 11am to 9pm EST for recipients in the United States and Canada.
- Phone numbers for all contacts must be capable of receiving SMS (cannot include landlines).
- If your campaign has high opt-out rates or error rates, we may temporarily suspend your account's SMS privileges.
The first time you send a survey via SMS, you'll be prompted to read and agree to these conditions. Learn more

Under the Campaign Designer step of your SMS Campaign, below the initial invite, you will have an option to add a reminder or a thank you message.

The set up process for Reminders and Thank You messages is the same as the initial invite.
Add a Reminder or Thank You Message
To ensure compliance with SMS Campaign Regulations, you will not be able to send Reminder or Thank You messages between the hours of 9:00PM and 11:00 AM EST
- To add a reminder or thank you message, click the Add Reminder SMS or Add "Thank You" SMS buttons on the Campaign Designer page.
- Next, use the Edit Message field to modify the content of the message, as needed. Keep in mind that SMS messages are limited to 160 characters.
- The reminder message will automatically include the word Reminder at the beginning of the message body. The survey link merge code is required.
- The thank you message will include placeholder text that you will likely want to customize.
- Click Save Message to finish customizing the content.
Next, we will take a look at the scheduling options for Reminder and Thank You messages.
Reminder Message Schedule Options
To access the scheduling options for Reminder messages, click on step 3 Send Campaign. Here, you will see all of the messages that you have created (Invite, Reminders, and Thank You). You can also access the scheduling options directly within a Reminder or Thank You message (beneath the message field).
- To access the scheduling options for a Reminder message, click the Not Scheduled link associated with a reminder.

- The resulting modal will allow you to either schedule the reminder for a Specific date or Relative date.
Specific date will be the default selection. Feel free to set the Date and Time if you want to use this option.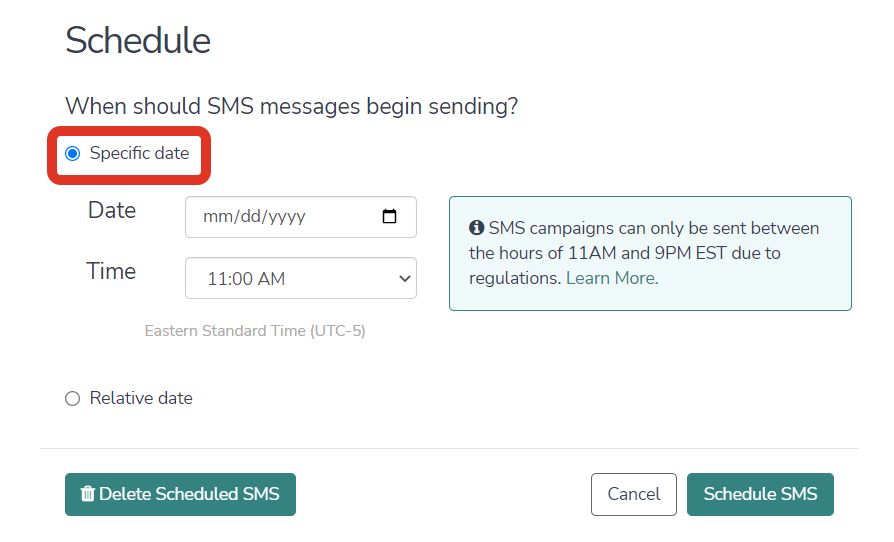 If you want to use relative dates, click the Relative date option. The following options are available for a Reminder Message. It is important to note that the schedule is not the only factor that determines whether a Reminder is sent to a specific contact. Please see the Additional Factors below to learn more!
- 1 day after last send
- 2 days after last send
- 3 days after last send
- 4 days after last send
- 5 days after last send
- 6 days after last send
- 7 days after last send
- 8 days after last send
- 9 days after last send
- 10 days after last send
- Automatically at a specific date & time

- Once you have set your schedule, click Schedule SMS to confirm. You will see your schedule in the Scheduled For column. Click the Change Schedule link to either update or cancel the schedule.

 If you want to use relative dates, click the Relative date option. The following options are available for a Reminder Message. It is important to note that the schedule is not the only factor that determines whether a Reminder is sent to a specific contact. Please see the
A note about x days after last send option
SMS messages set to send x days after last message are sent at the same time initially specified in the SMS campaign. For example, a reminder set to send 7 days after last SMS based on an initial invite sent at 4:30pm will send 7 days later at 4:30pm.
Thank You Message Schedule Options
To access the scheduling options for Thank You messages, click on step 3 Send Campaign. Here, you will see all of the messages that you have created (Invite, Reminders, and Thank You). You can also access the scheduling options directly within a Reminder or Thank You message (beneath the message field).
- To access the scheduling options for a Thank You message, click the Not Scheduled link associated with the Thank You.
- There are two scheduling options for a Thank You message:
- Specific date
- Immediately after completing the survey
It is important to note that the schedule is not the only factor that determines whether a Thank You is sent to a specific contact. Please see the Additional Factors below to learn more! The following scheduling options are available for thank you messages:
- Choose your scheduling option and click Schedule SMS once you are ready to set your schedule. You will see your schedule in the Scheduled For column. Click the Change Schedule link to either update or cancel the schedule.

Factors That Determine Whether a Reminder or Thank You SMS is Sent
We know how important it is to only send messages to your contacts when necessary. That's why our follow up messages (reminders and thank you) are only sent to contacts who are eligible to receive the message. So, there's no need to worry that someone who has already completed your survey will receive a nuisance reminder. Below we'll cover when reminders and thank you messages are eligible to be sent.
There are two criteria for SMS campaign contacts to be eligible for a reminder send:
The contact's Response Status must be something other than Complete (or Disqualified). This includes respondents who have partially completed the survey, contacts who clicked the link but did not answer any questions, or contacts who have not interacted with your survey at all.
AND
The contact must have received the previous message (either invite or reminder). If the initial message failed, they will not be eligible for a reminder. Similarly, if the contact is new and has not yet received the initial invite they will not receive the reminder.
There is only one criterion for a contact to be eligible for a thank you message send:
The contact must have completed the survey within 30 days. The contact's Response Status must be Complete.
Review your Send/Schedule Tab for Pending Contacts
The Pending Contacts column for each message under Send Campaign will dynamically update based on the above criteria.
Immediately after the send of the initial invite, we can see that only 10 of our 11 contacts are pending for a reminder.

This is the result of a failed message. We can confirm this under the Delivery Statistics or by Exporting Contacts with Send Status.

If we wait a little while, we'll see that the pending contacts for the reminder have dropped to 7. In addition, we have 2 contacts pending for the Thank You message.

This is because 2 contacts completed the survey and another 1 unsubscribed; thus, they are no longer eligible to receive the reminder. This can be confirmed this by Exporting Contacts with Send Status.
After a couple of days, we have still only received 2 responses so, we decide to manually send the first reminder message. This results in a couple more responses thus increasing the number of contacts eligible for the thank you message to 4 and reducing the number of contacts eligible for the second reminder to 5.

Review the Status Log for Specific Pending Contacts
If you need to identify which specific contacts are eligible for a given message the Status Log is your best bet. The Status Log can be found under the Contacts step or the Delivery Statistics step of your SMS Campaign. Click the link to Export Contacts with Send Status and review your spreadsheet looking for both the Response Status and the Send Status of previous SMS messages.
In the example below, the highlighted contacts will be included as pending contacts to receive the reminder as they have a "Not started" in the Response Status column AND they received the Initial Send message.

Thank You Messages
Identifying contacts pending for a thank you message is quite easy. Contacts who have completed a survey are the only contacts eligible to receive a thank-you message. Contacts with a Response Status of Complete will be included in the list of pending contacts for your thank you message. If you create your thank you message after some of your contacts have completed they will still be included in the list of pending contacts when you send out that thank-you message.
In the below example the highlighted contact is the only contact eligible to receive the thank you message.
