Looking to include a logo or other image in your email campaign invite messages? Need to attach a document or other file? We'll cover both of these options in this tutorial!
Add a Logo or Other Image to Email Message
If you are sending out an email invite and you would like to include a logo in the message, you can do so within email campaign messages, as well as, Send Email Action messages using the file URL for the image from your File Library.
We will cover the process for doing this within Email Campaigns, below:
- Start by uploading the image to your file library. If you need help with this check out our File Library Tutorial to learn how!
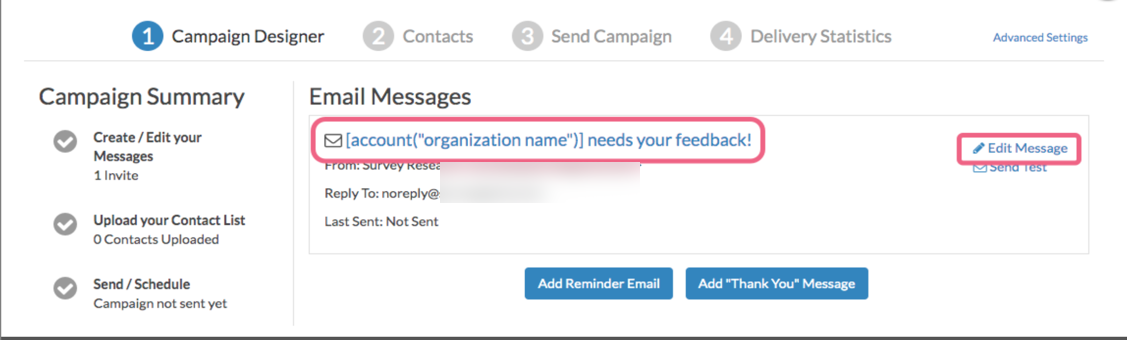
- Next, head over to the Share tab and edit or create an email campaign. If you previously created an Email Campaign, you can access the campaign via the Source Tracking section at the bottom of the Share tab. Click on the campaign name to re-access it.

- On the Campaign Designer step, edit your invite message. You can do so by clicking the message title or the Edit Message link.

- Click into the message body and place your cursor where you wish to add your logo/image. Next, click the Insert Image button in the editor toolbar. This will trigger the Insert Image menu.
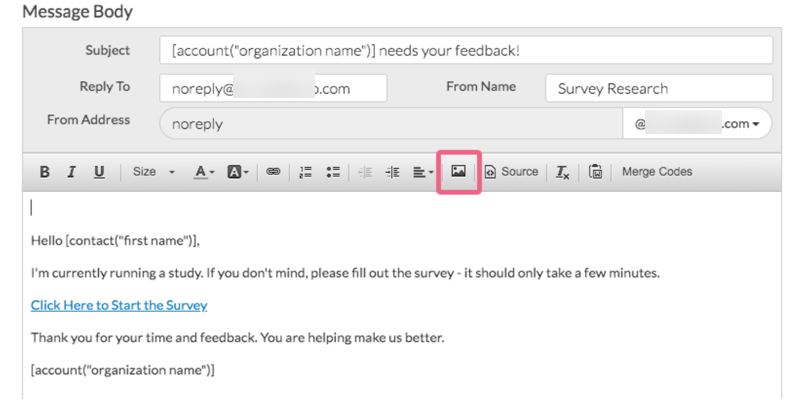
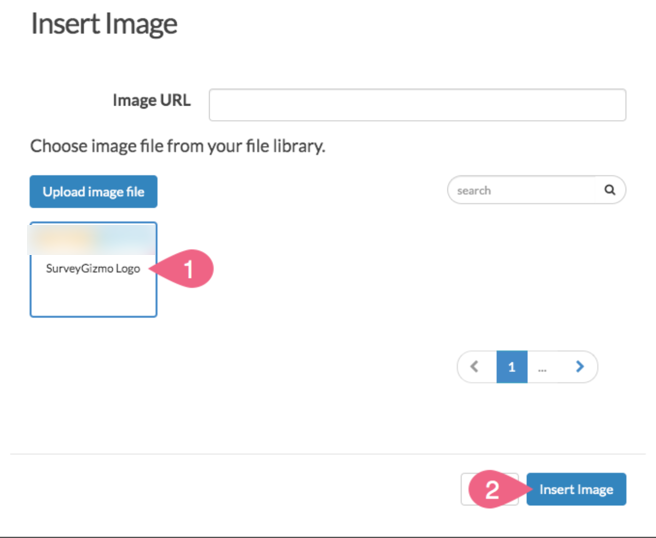
- Browse your file library for the image you wish to include. Once you locate the image, click on it to select it and click the Insert Image button.
- Your image will be inserted wherever your cursor was placed within your message. Click Save Message when you are finished. If you have reminder and thank you messages, follow the same steps to add your logo to these messages too!
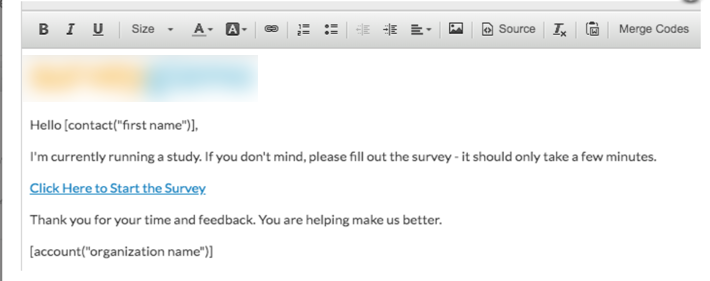


Image Sizing Options
There are a handful of options for changing the size of your image, though it is important to note that resizing images may negatively affect the quality of the image (particularly if you try to make your image larger that the original file).
Resize Using Third Party Tools
There are also various tools online to resize images e.g. http://www.picresize.com/. It is important to note that resizing images may negatively affect the quality of the image.
Resize During Upload to File Library
When uploading images to the file library, after selecting your file you will have the option to scale your image using a specific pixel width or a percent.
Select either the Percent or Pixel option and input a value. The default is to scale the image to 100%.

Resize After Adding to Email Message
If you want to change the image size after adding it to your email message, you can do so.
- Double-click the image in the body of the email. An Image Properties pop-up will appear.
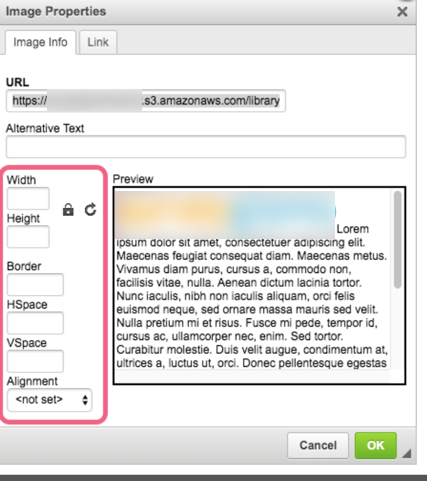
- Via the pop-up you have the option of customizing the following properties:
- Width
- Height
- Border
- HSpace (horizontal space around the image)
- VSpace (vertical space around the image)
- Alignment - Options are: Not Set, Left, and Right
- Input a Width or Height value and you will see a preview on the right. There will likely be some trial and error to get the image just right.
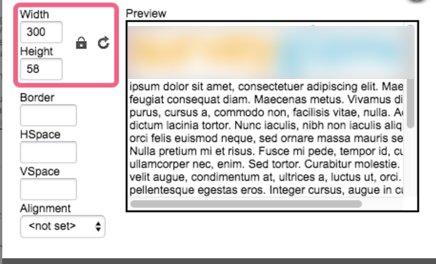 You will notice a lock icon to the right of the Width/Height values. When locked the image ratio will be preserved as you adjust either the width or the height. Click the lock icon to unlock and then you can adjust both the width and the height, but keep in mind that this could result in your image being distorted. We recommend leaving the ratio locked.
If the image size got away from you, you can always click the circular arrow icon to reset the size, or clear out the Width & Height values. - Click OK once you have image sized appropriately.

 You will notice a lock icon to the right of the Width/Height values. When locked the image ratio will be preserved as you adjust either the width or the height. Click the lock icon to unlock and then you can adjust both the width and the height, but keep in mind that this could result in your image being distorted. We recommend leaving the ratio locked.
Add a Document to Download
While you won't find a paper clip icon to attach documents to an email like you may be used to, you can add a link to a document for recipients click to download.
- Start by uploading the document to your file library. If you need help with this check out our File Library Tutorial to learn how!
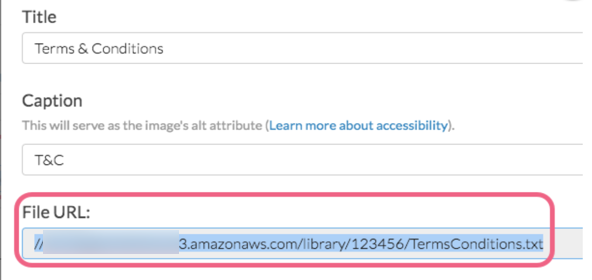
- Once you've uploaded your document you will need to grab the File URL for the document where it is located in the file library. To do so, navigate to Account > Libraries > File Library. Locate your file within the library and edit the file.

- Highlight the File URL, right click and copy.
- Next, head over to the Share tab and edit or create an email campaign. If you previously created an Email Campaign, you can access the campaign via the Source Tracking section at the bottom of the Share tab. Click on the campaign name to re-access it.
- On the Campaign Designer step, edit your invite message. You can do so by clicking the message title or the Edit Message link.
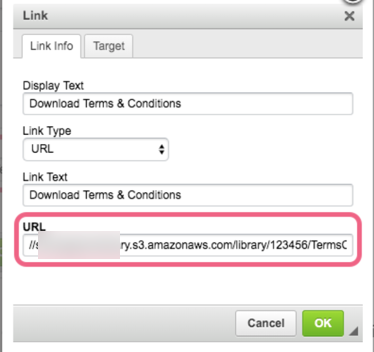
- Within the message, add the text you would like to display to recipients as a clickable link. Highlight the text and click the Link button in the editor toolbar.
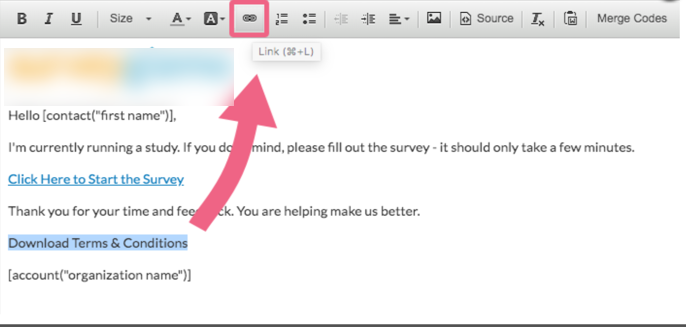
- On the Link Info tab of the editor paste the File URL that you copied in the file library in the URL field.
- On the Target tab, select New Window in the Target dropdown. This will open the document in a new tab or window, depending on the respondent's browser settings.

- Click OK and you will see that the text that you highlighted is now hyperlinked! Depending on the document type and the recipient's browser settings, the document will either open in a new tab or will download for the respondent to open and review.


