Users who don’t have access to the underlying data source can view a Dashboard but can’t interact with it by applying filters. Only users with access to the underlying data source can create and save personalized Dashboards. New filters can’t be added in a personalized Dashboard, they must be added in the original.
Create a personalized Dashboard view
You can create a personalized view for any Dashboard that you can apply filters to.
1. Open a Dashboard and apply your desired filters.
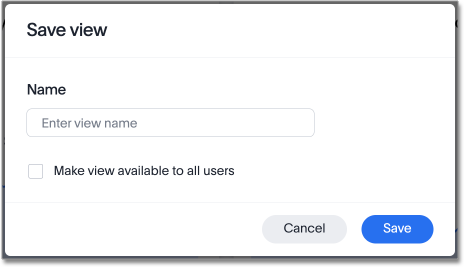
2. To save your personalized Dashboard view with these filters applied, select Save view.

3. Enter a name for your personalized Dashboard view.
4. Select Make view available to all users if you want the view to others for easy access.
If you have edit permission for the Dashboard, you can select Make view available to all users to share your view. This view will then be available to all the users who have access to this Dashboard.
If you have view only permissions for the Dashboard, you will not have the option to make any view public.
5. Click Save.
From a personalized Dashboard view, you can create additional views, update a view, manage views, or reset a Dashboard.
Update a Personalized Dashboard View
You can update a personalized Dashboard view.
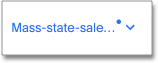
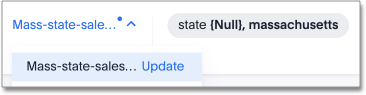
1. Open a personalized Dashboard view and apply your desired filters. A dot appears next to the view name to indicated that there are unsaved changes.
2. To update the personalized Dashboard view, click on the view name and select Update next to the view name in the drop-down menu.
Manage Personalized Dashboard Views
You can manage your personalized Dashboard views.
1. Open a Dashboard and click on Select view.
2. Select Manage views from the drop-down menu.
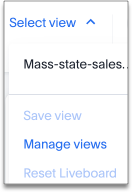
3. Click the checkbox to allow anyone to view the personalized Dashboard view, or Delete to remove the view.
Limitations
Each user can create up to 100 personalized views.