Alchemer Workflow is available as an add-on. If you are interested in Alchemer Workflow please contact us for additional information.
What is Alchemer Workflow?
Alchemer Workflow is a product that was purpose-built to help organizations act on customer feedback and close the feedback loop with their customers. It is a no-code feedback workflow engine that connects feedback to your teams, enabling you to create deeper connections with customers by driving human interactions and follow-up actions.
Alchemer Workflow expands on the functionality of Alchemer Survey. Alchemer Workflow:
Allows for cross-survey orchestration
Is triggered by listening to other events
Seamlessly fits into your current tech and communications stack
Enables you to reach your customers at the right time and place within their experience
Alchemer Survey is used to collect feedback. Alchemer Workflow is used to connect feedback to people and systems.
How to Get Started with Alchemer Workflow
To create and manage your workflows, navigate to the Products section in the left-hand navigation menu, then click on Workflow. The Alchemer Workflow page will list all of your workflow projects.
On this page you can:
Create a New Workflow
- To create a new workflow, first click “Create New Workflow.”
- Name your new workflow, then click “Start Building.”
- This will open the Build Tab for your new workflow.
Access Workflow Details and Links
Within the Alchemer Workflow page, you can review important details about your workflow in either grid or list view. 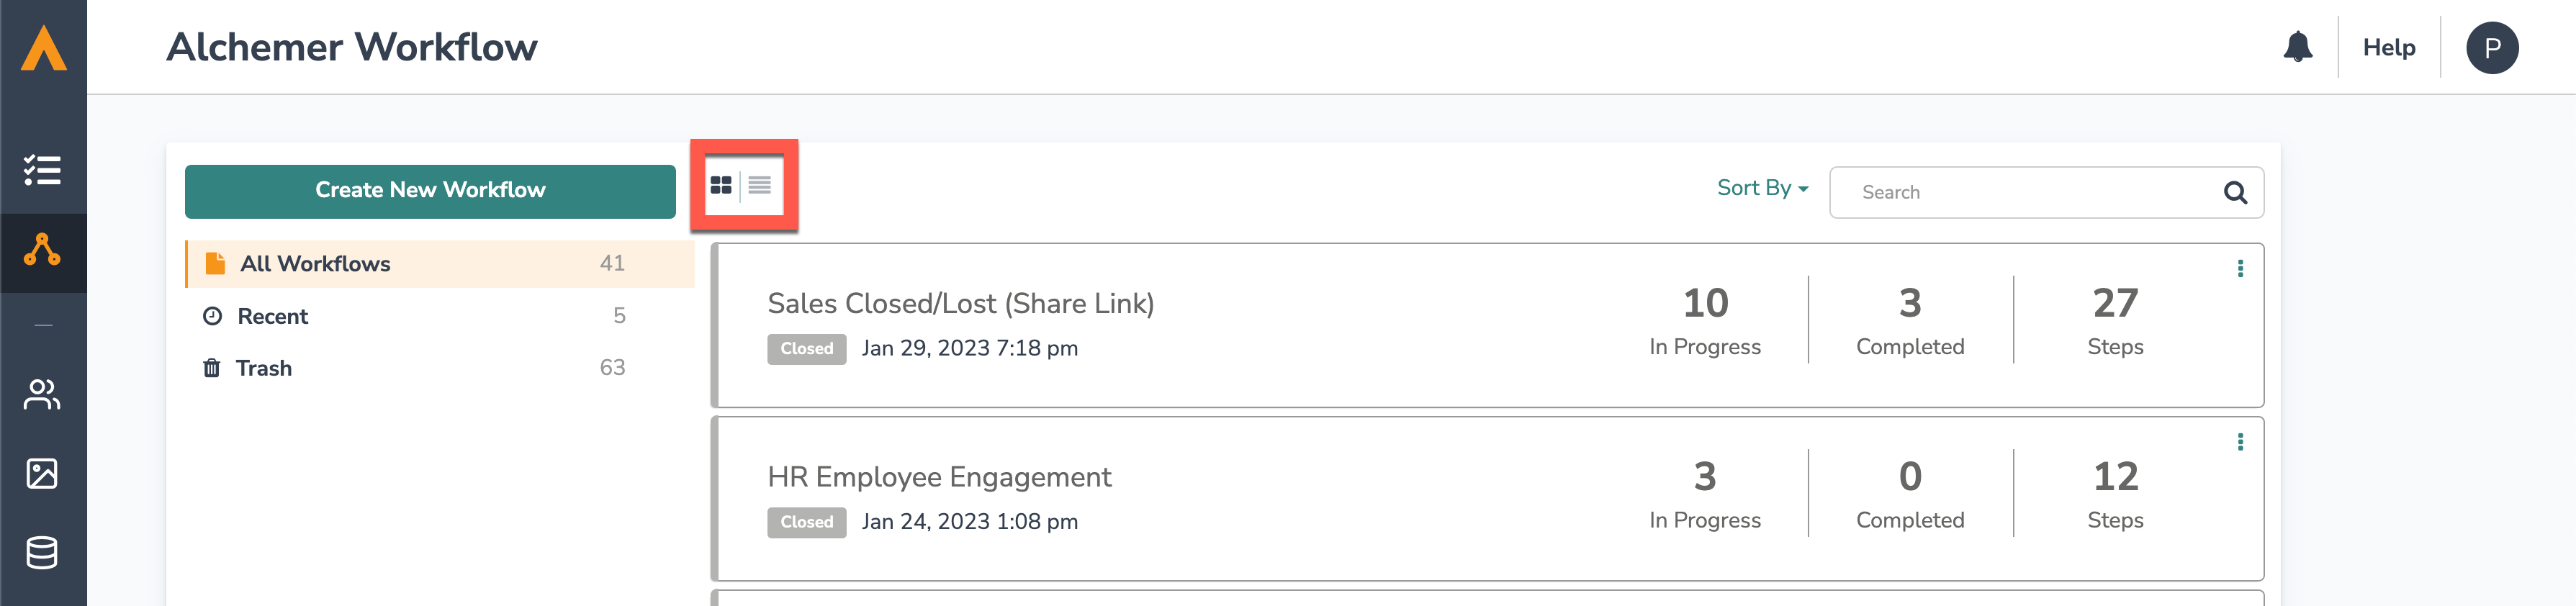 Alchemer Workflow Page View
In both the grid and list view, you can see the:
- Name of the workflow
- Workflow Status (Active or Closed)
- Number of respondents who are currently progressing through the workflow
- Number of respondents who have completed the workflow
- How many steps are included in each workflow
- Date and time the workflow was created
In the list view, you can additionally see when the last completed run occurred, and which team created the workflow.
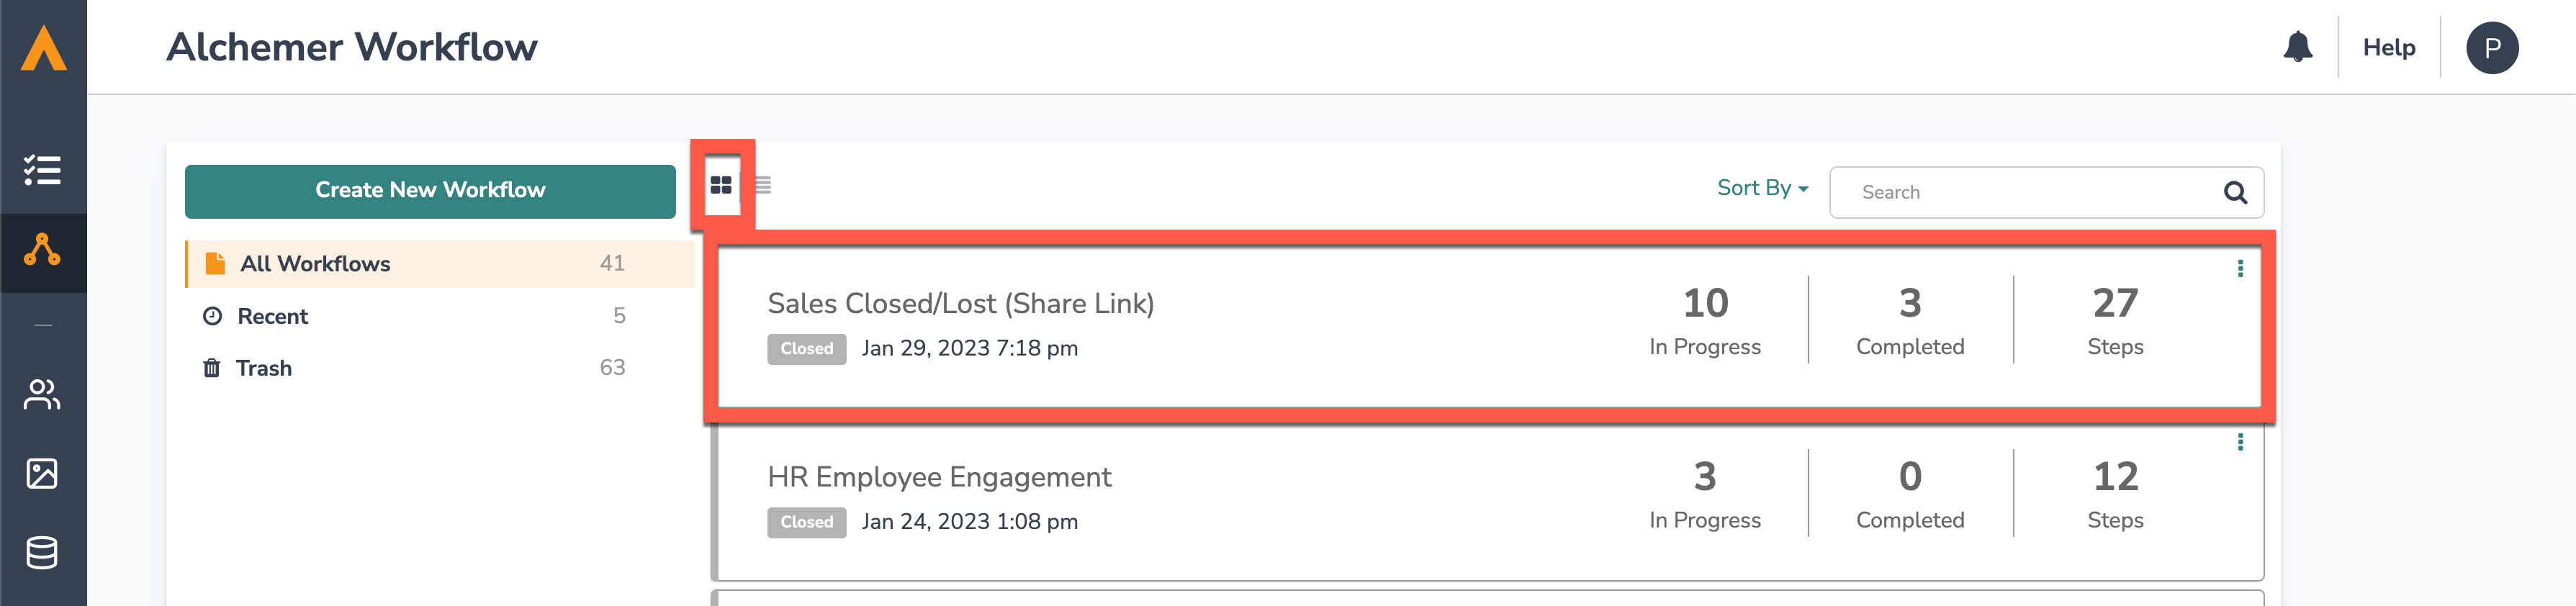 Alchemer Workflow Page Grid View
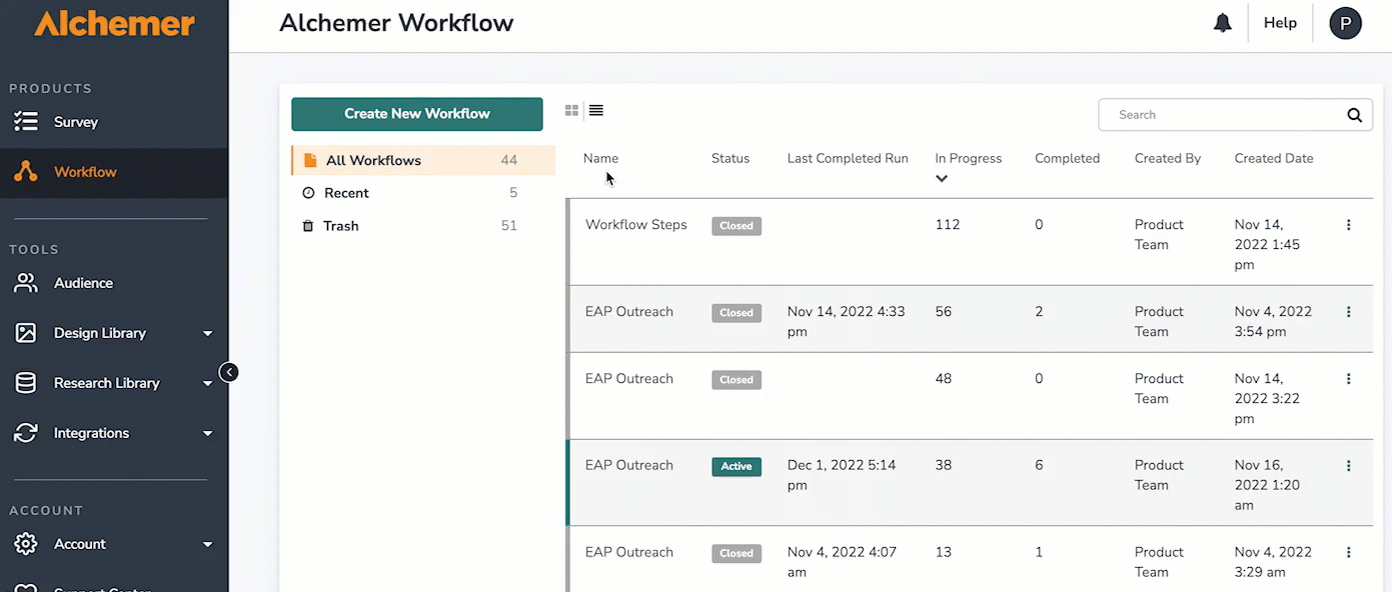
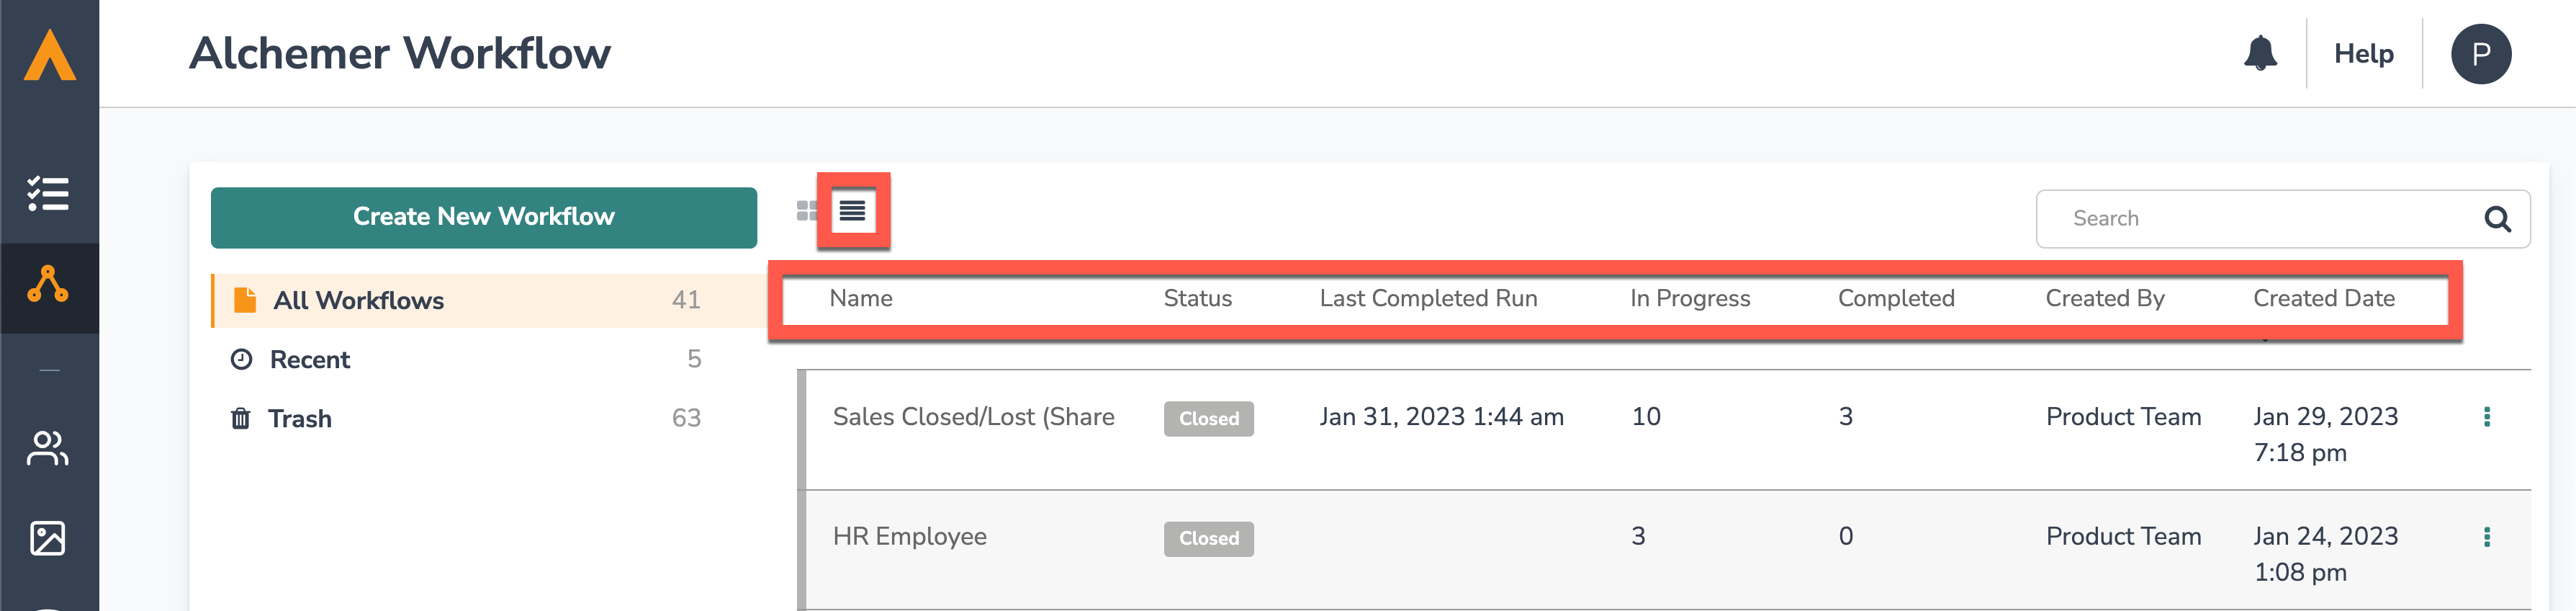 Alchemer Workflow Page List View
Manage Your Workflow Projects
Just as with Alchemer Survey, the Alchemer Workflow page allows you to easily view and manage the workflow projects you have access to.
You can sort projects by Name, Status, Last Completed Run, Date Last Edited, or Created Date. 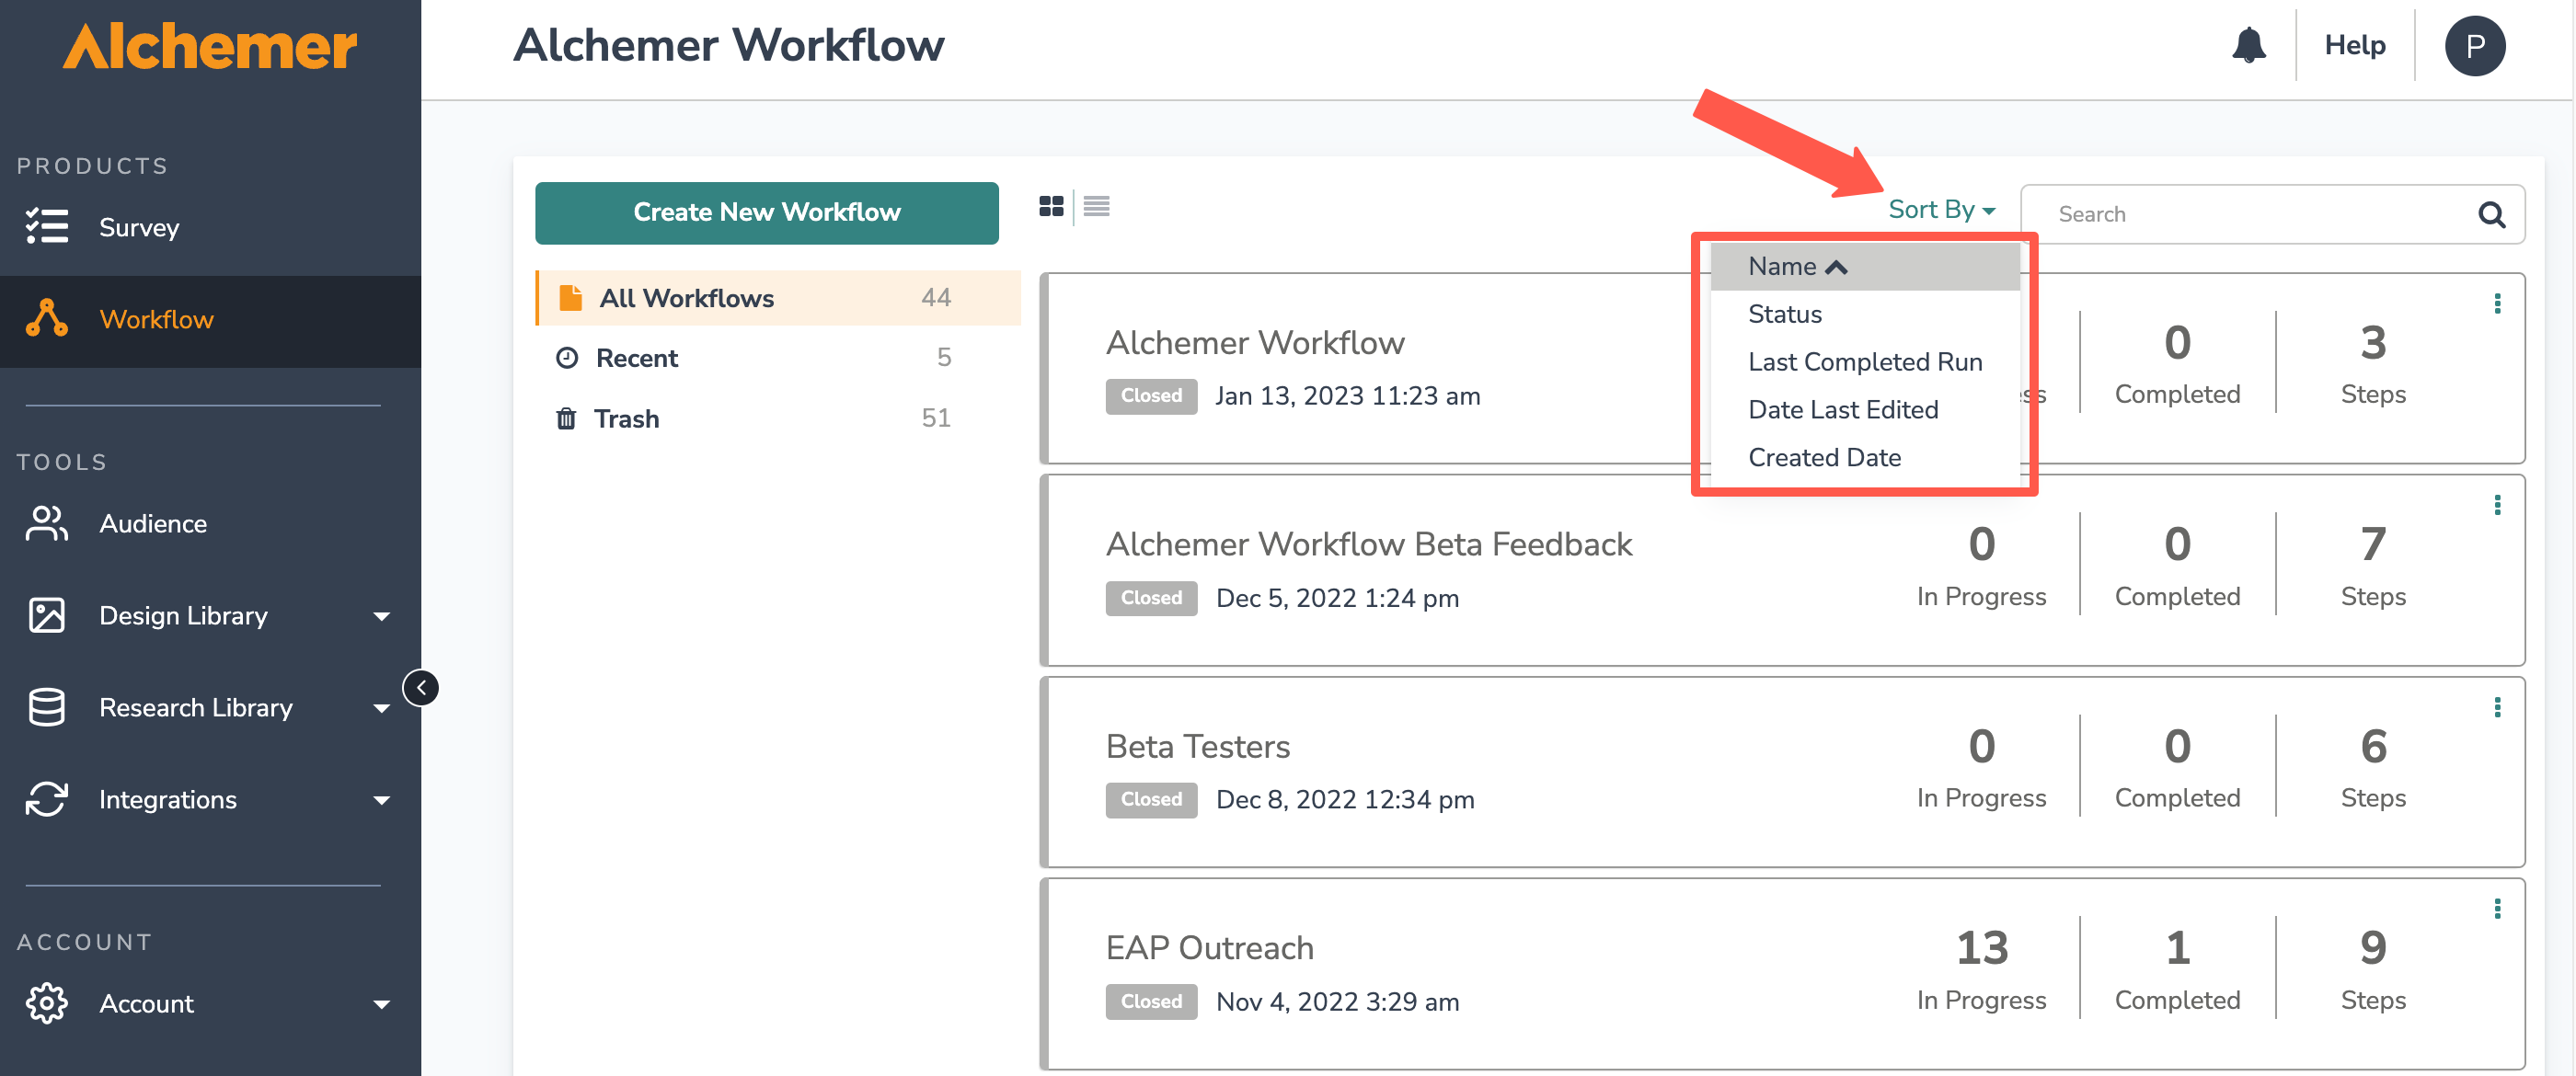
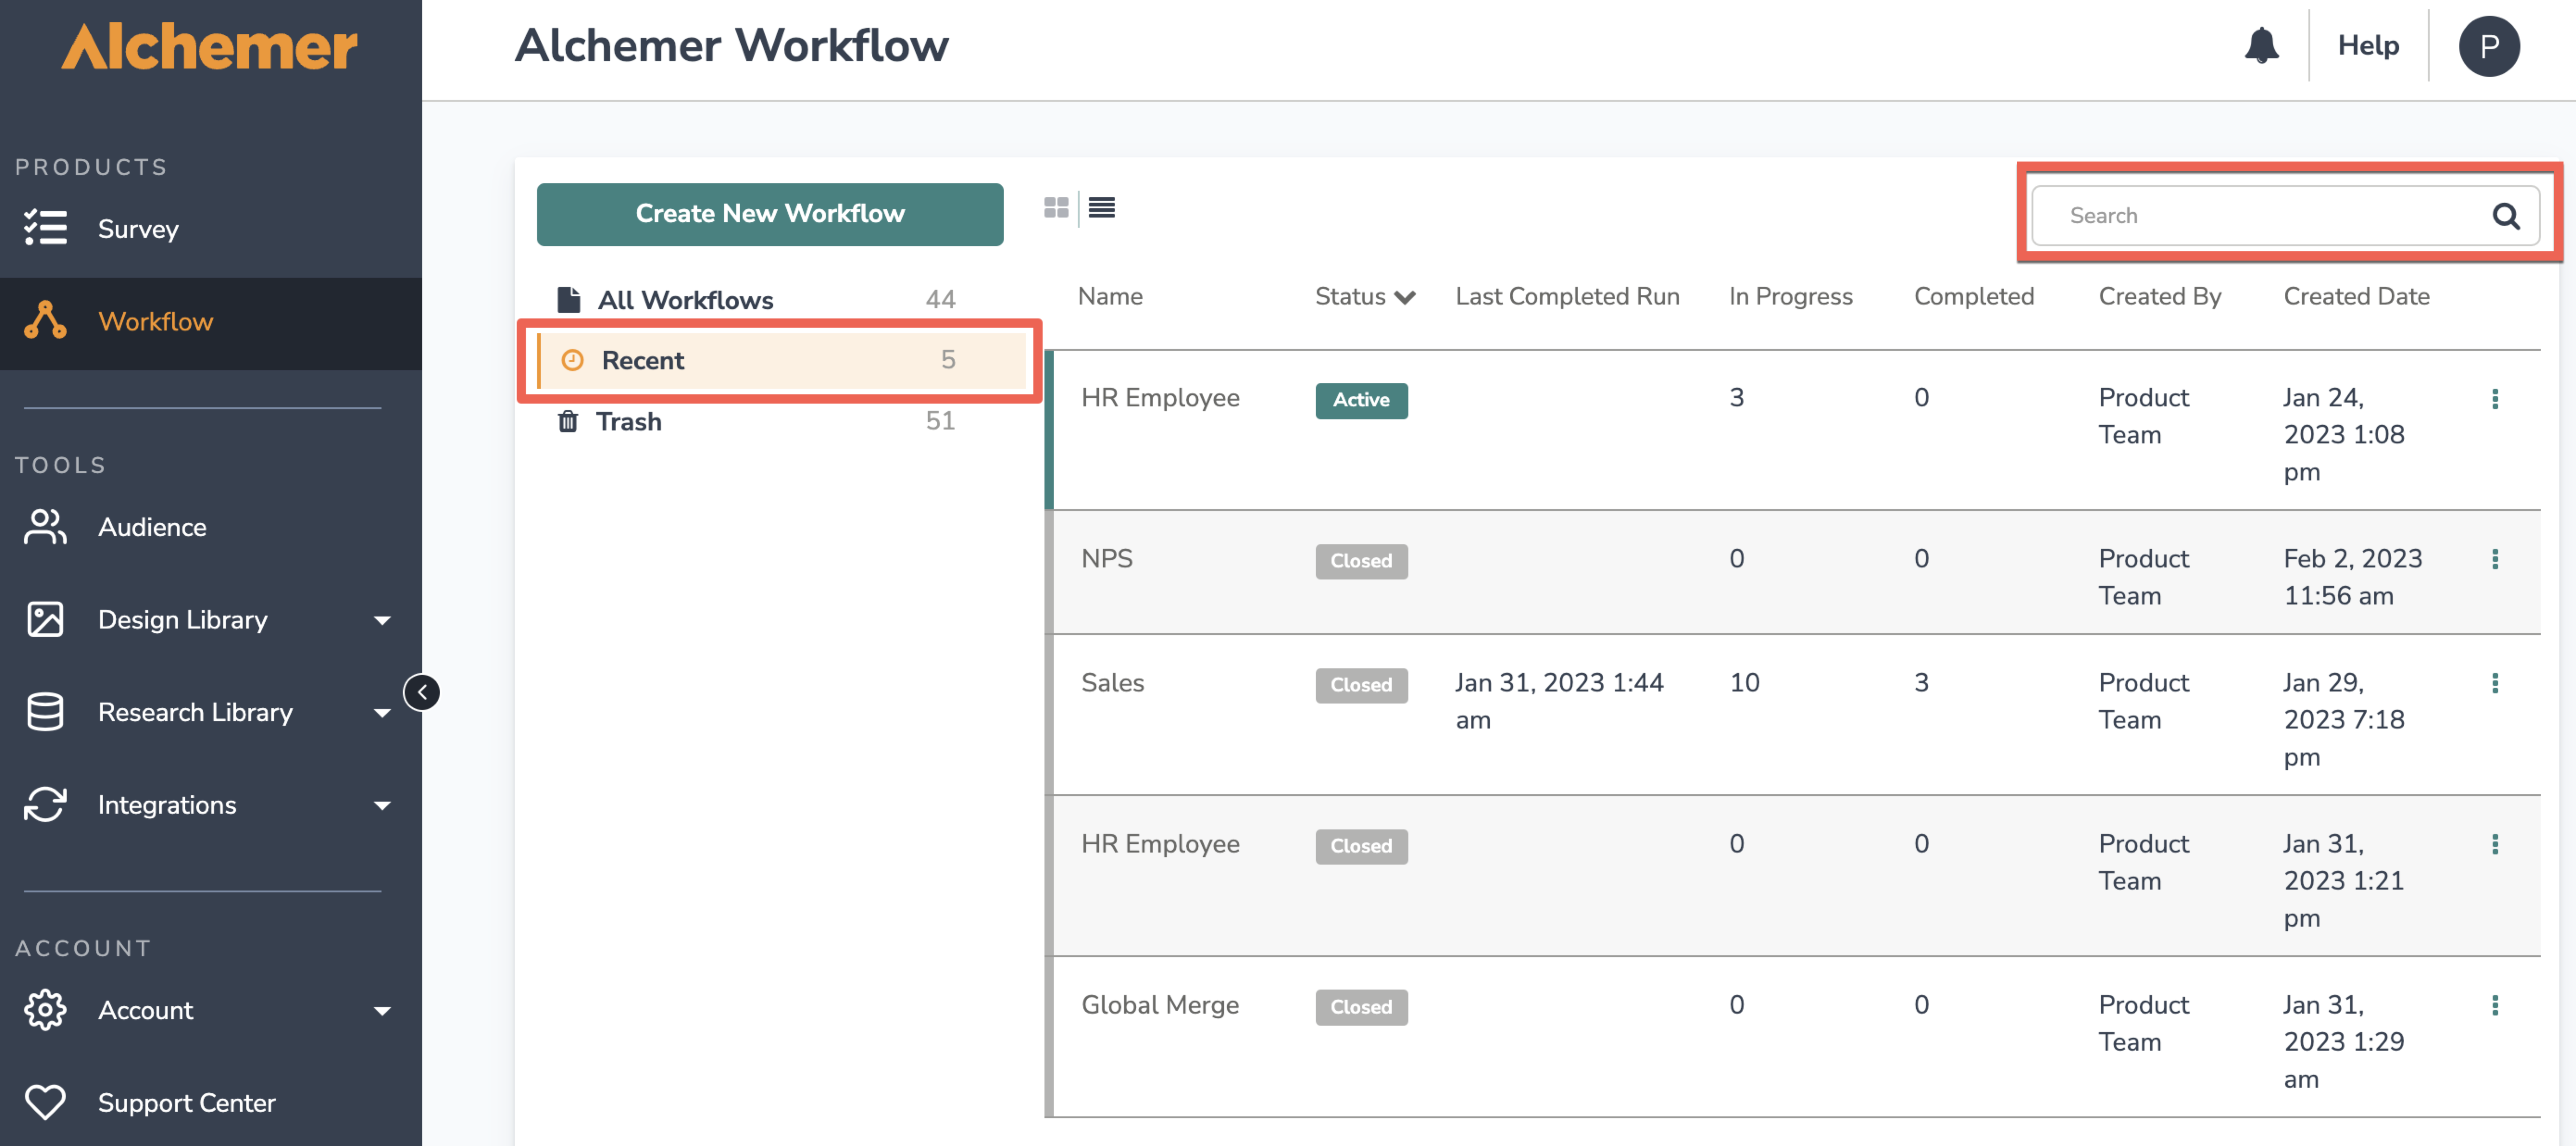
You can also view the five most recently edited workflows in the Recent Folder, or use the Search Bar to locate workflows you have access to.
Quickly access the Build, Test and Monitor Tabs of a workflow by hovering beneath the workflow title. 
Click the kebob menu to the right of a workflow to access the Build Tab, activate the workflow, or move the workflow to Trash. 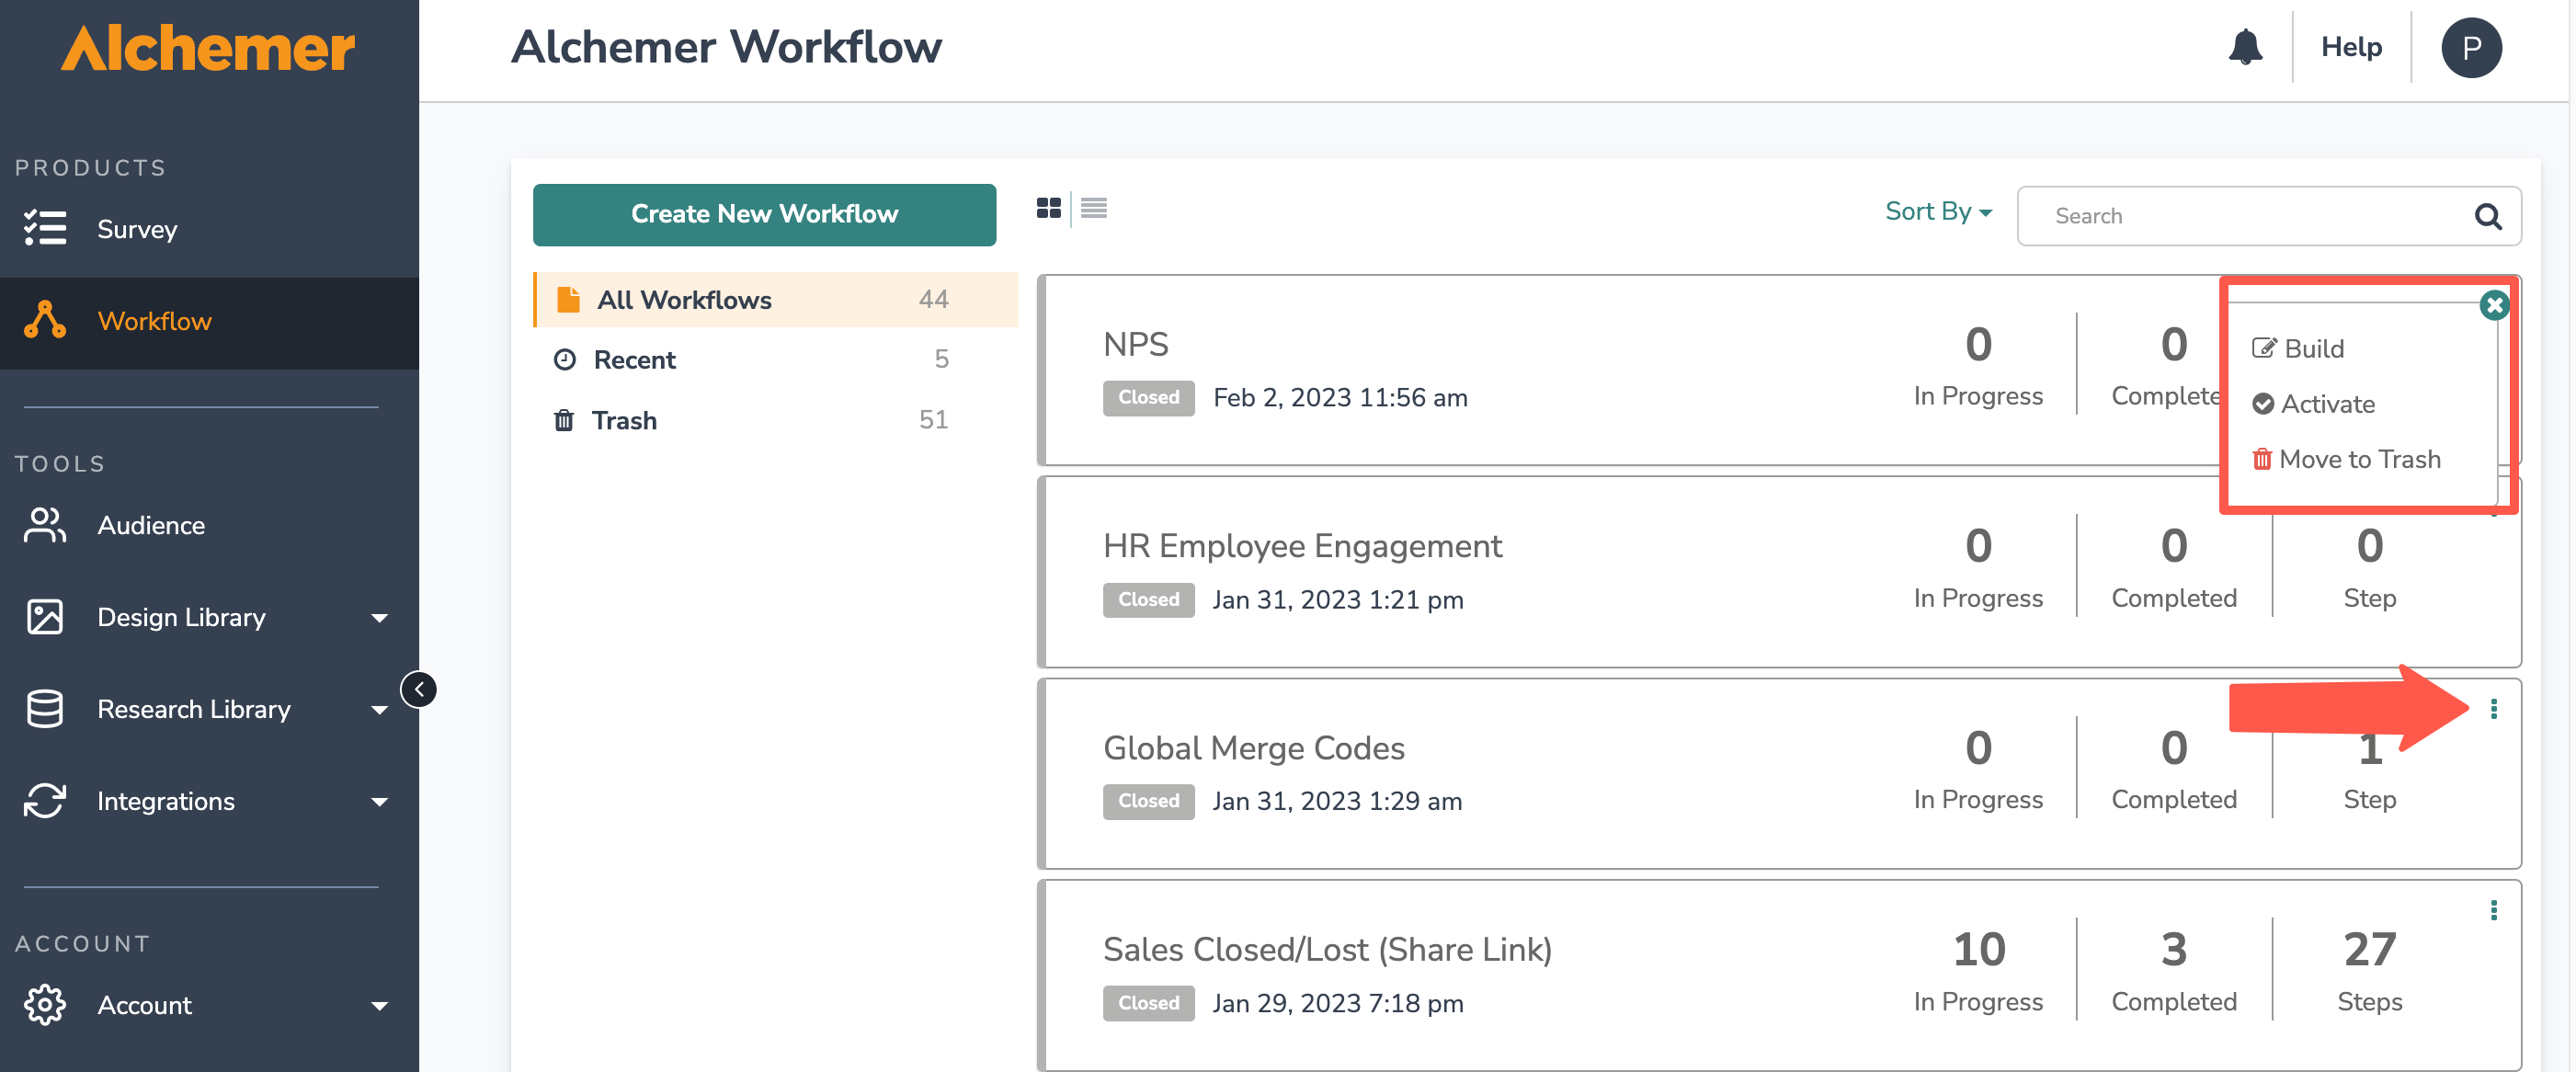
To restore a deleted workflow, open the Trash folder. Then click the kebab menu next to the desired workflow and click "restore." 
Deleting an active workflow will automatically change the status from Active to Inactive.
Identify Which Surveys are Connected to a Workflow
The Alchemer Survey page lists all of the survey projects you have access to. You can quickly see which surveys are connected to a workflow. Surveys that are connected to a workflow will be tagged with a workflow icon. 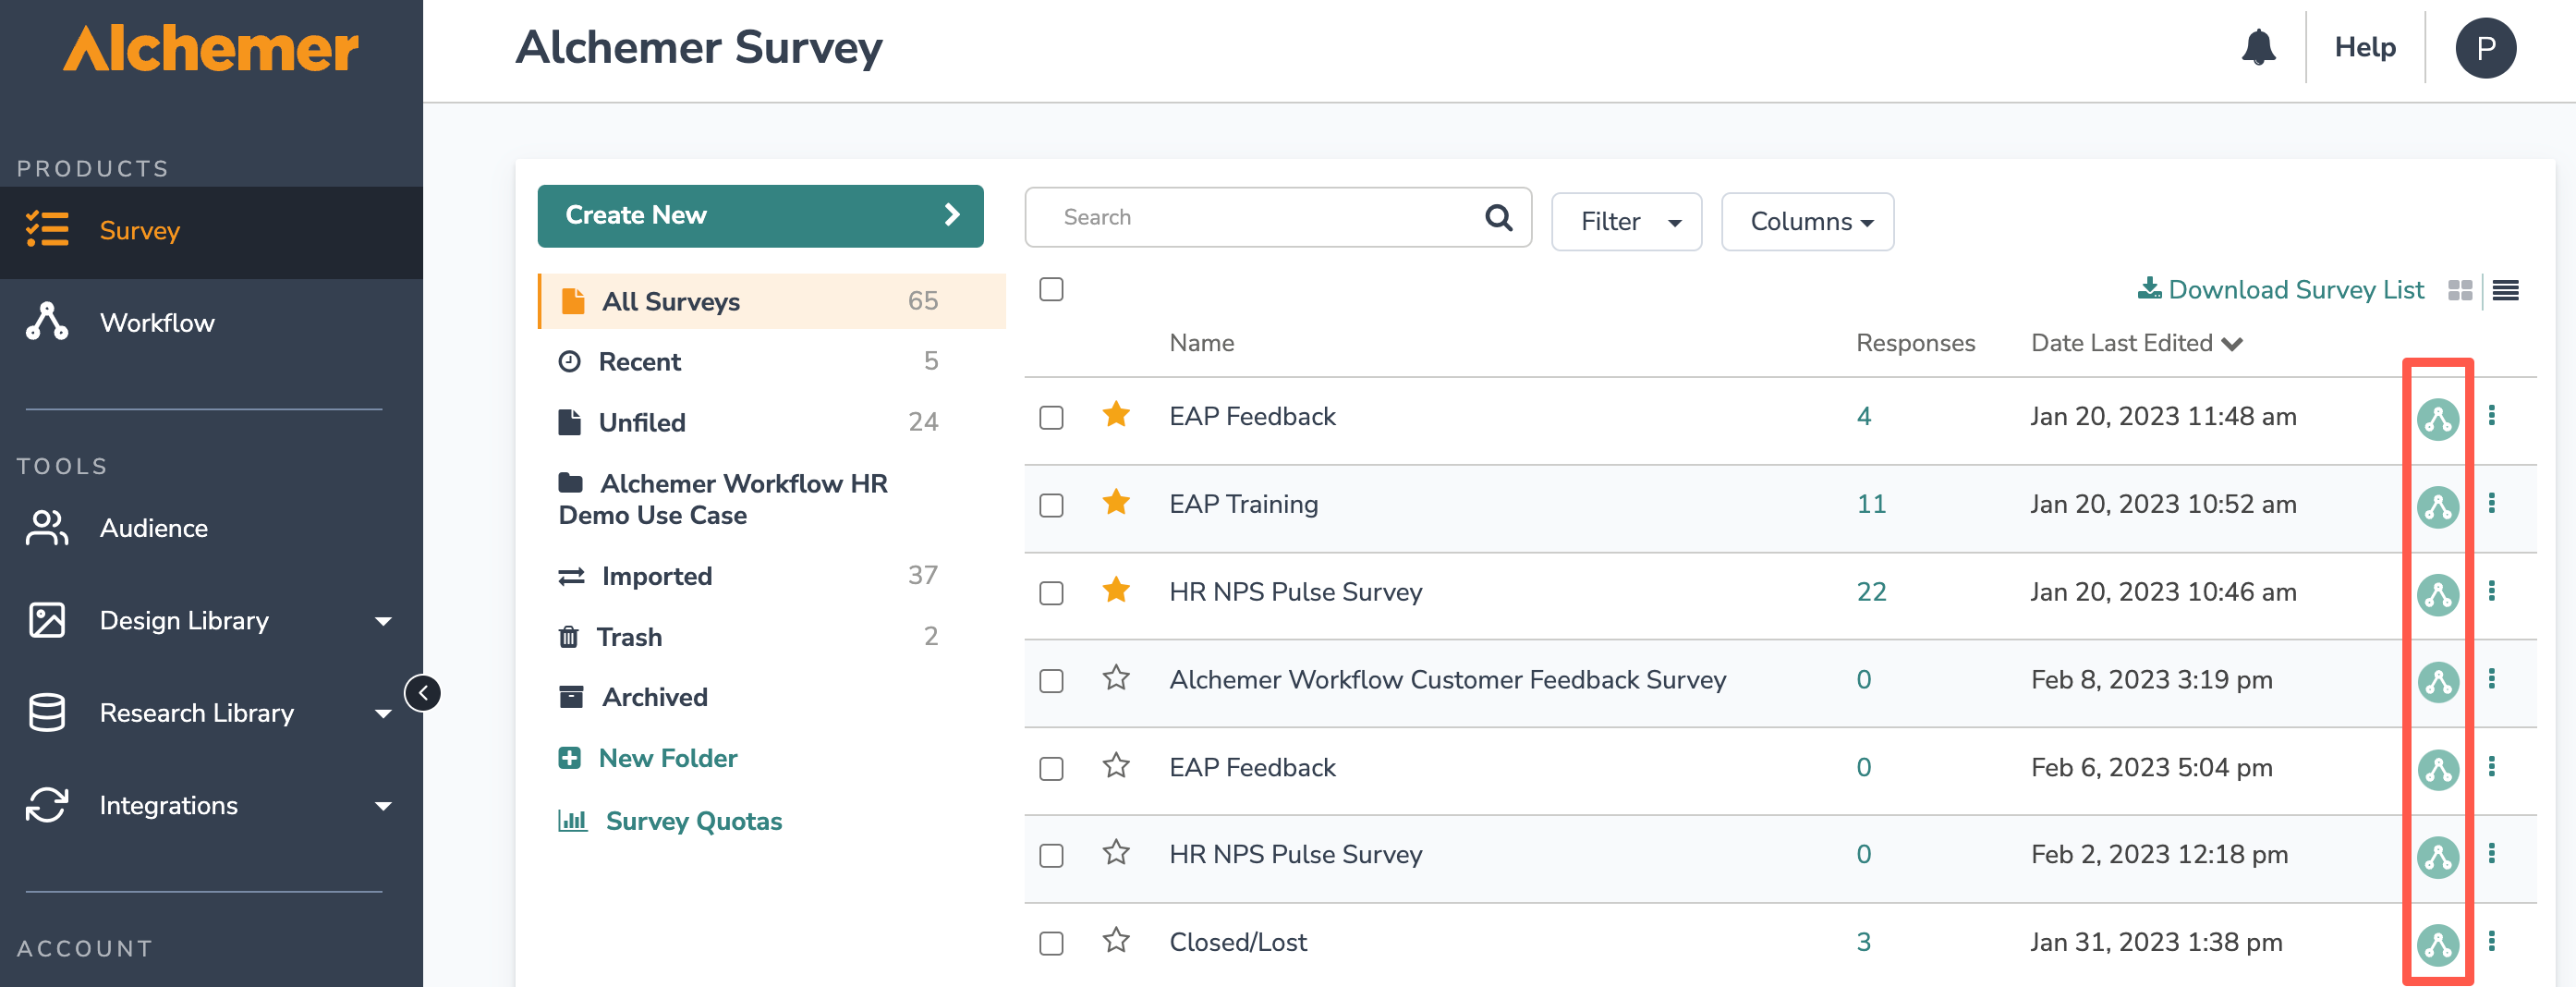
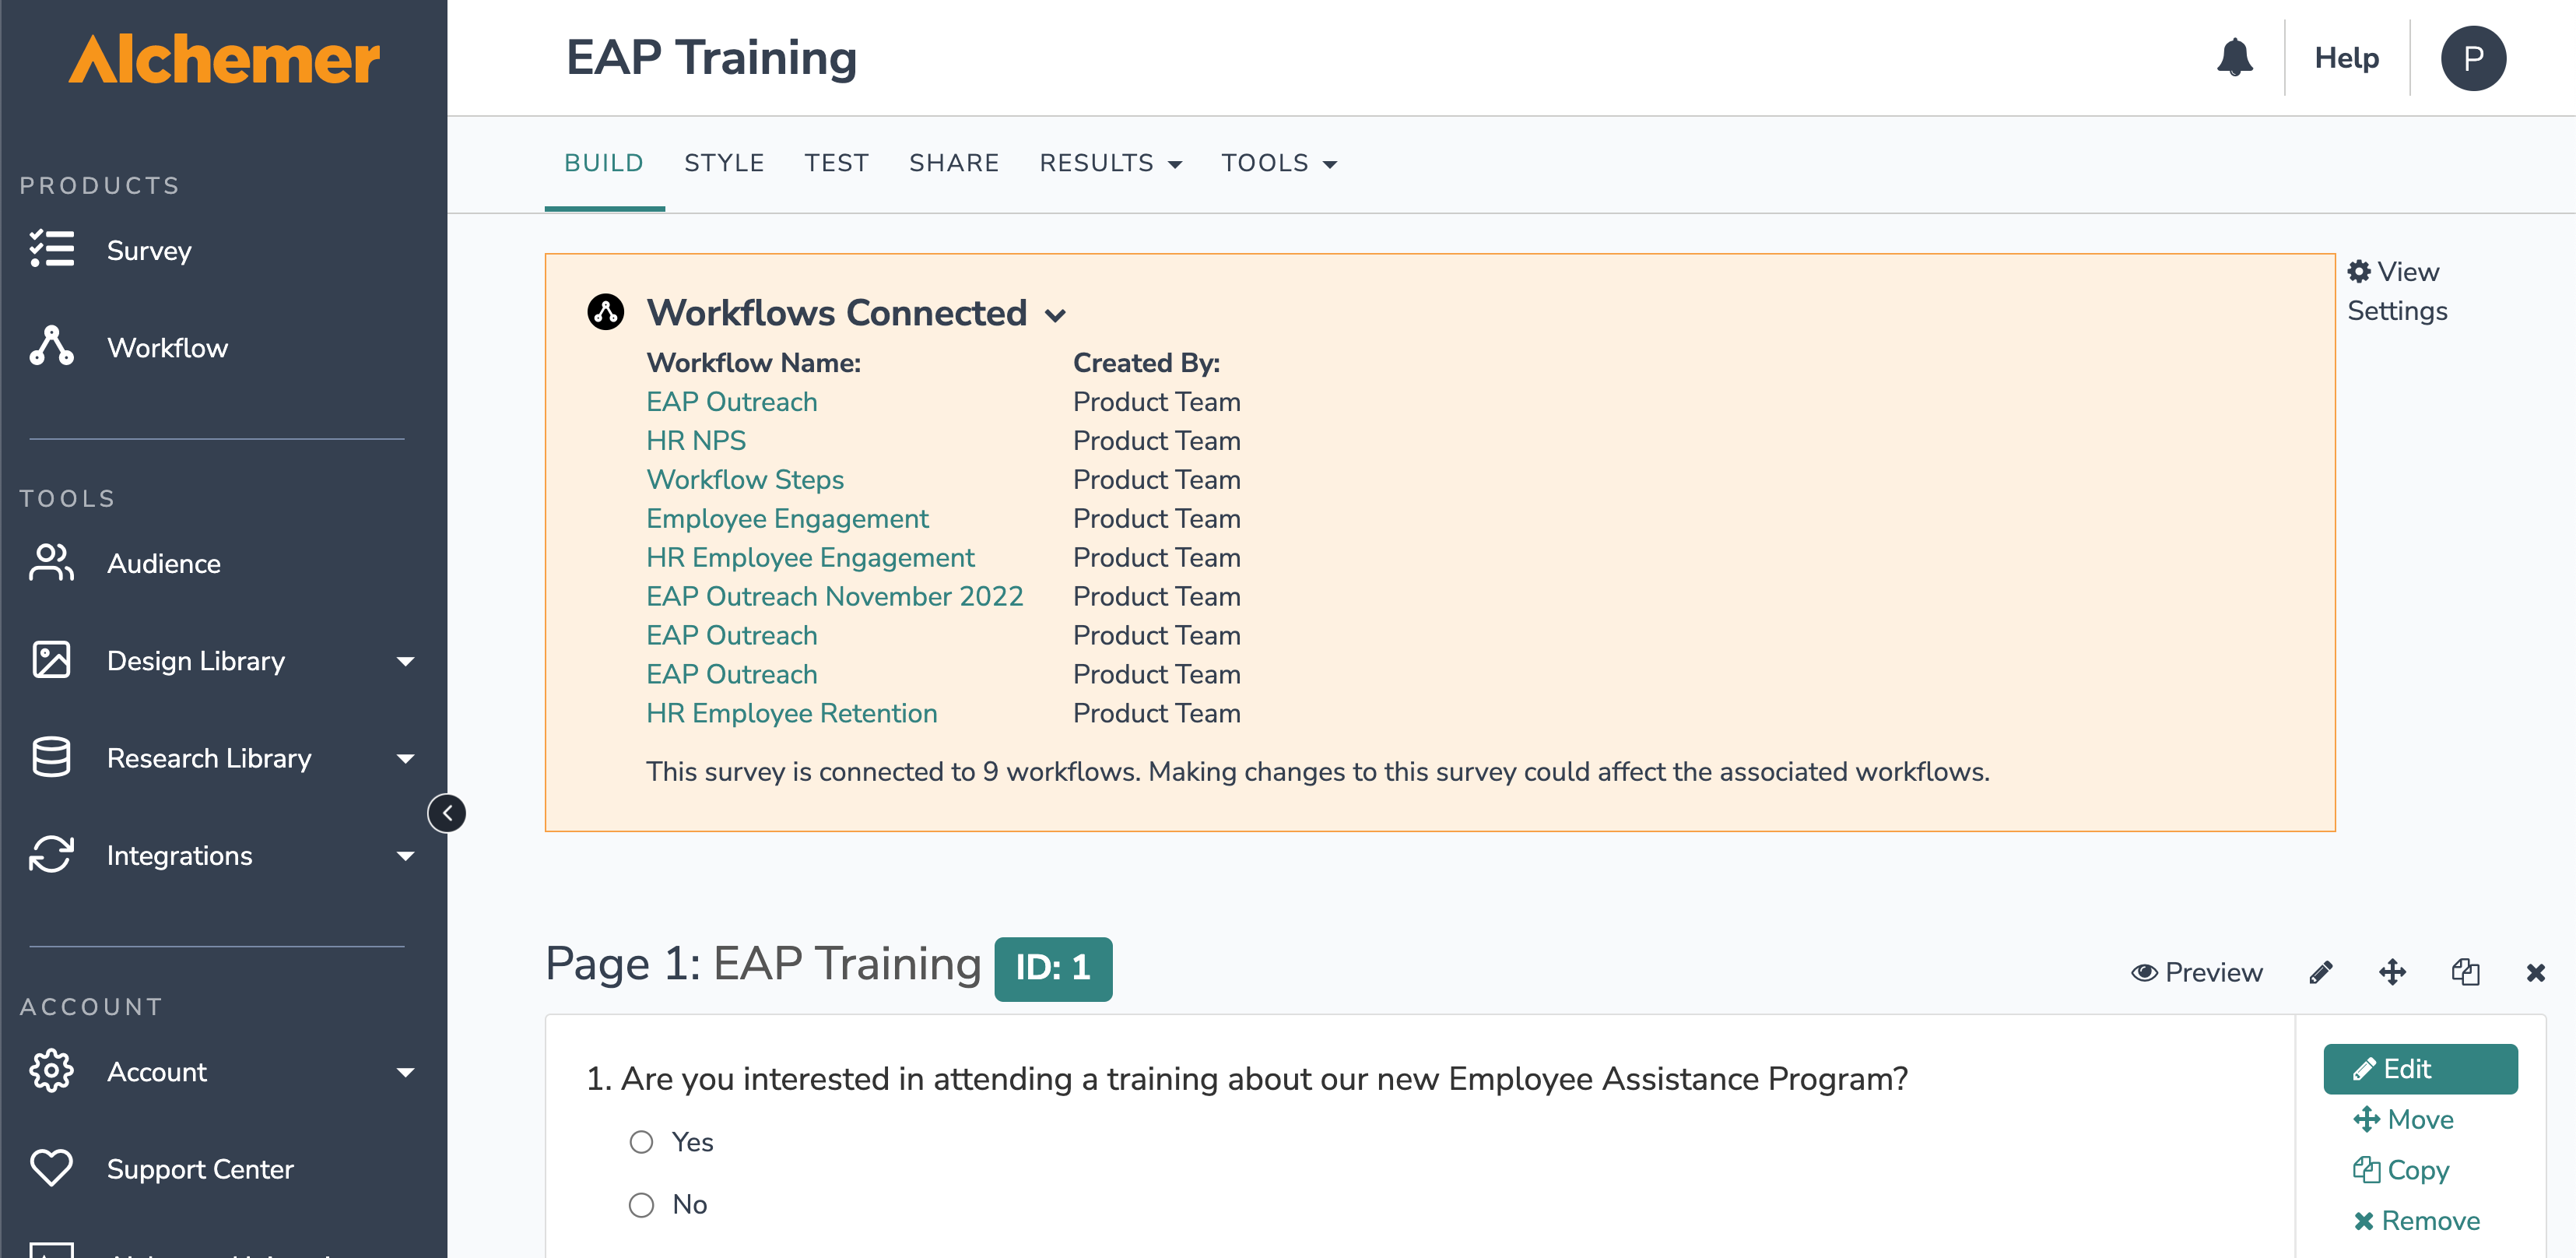
It is important to know that surveys can be connected to multiple workflows, and workflows can be connected to multiple surveys. A survey that is connected to multiple workflows will be noted at the top of a survey when you click into it:
You will only have access to surveys in which you have assigned permissions. See Users, Teams and Roles for more information.
You must have an Alchemer Workflow license to access workflows. If you try to access a workflow without a license you will get the following error message:

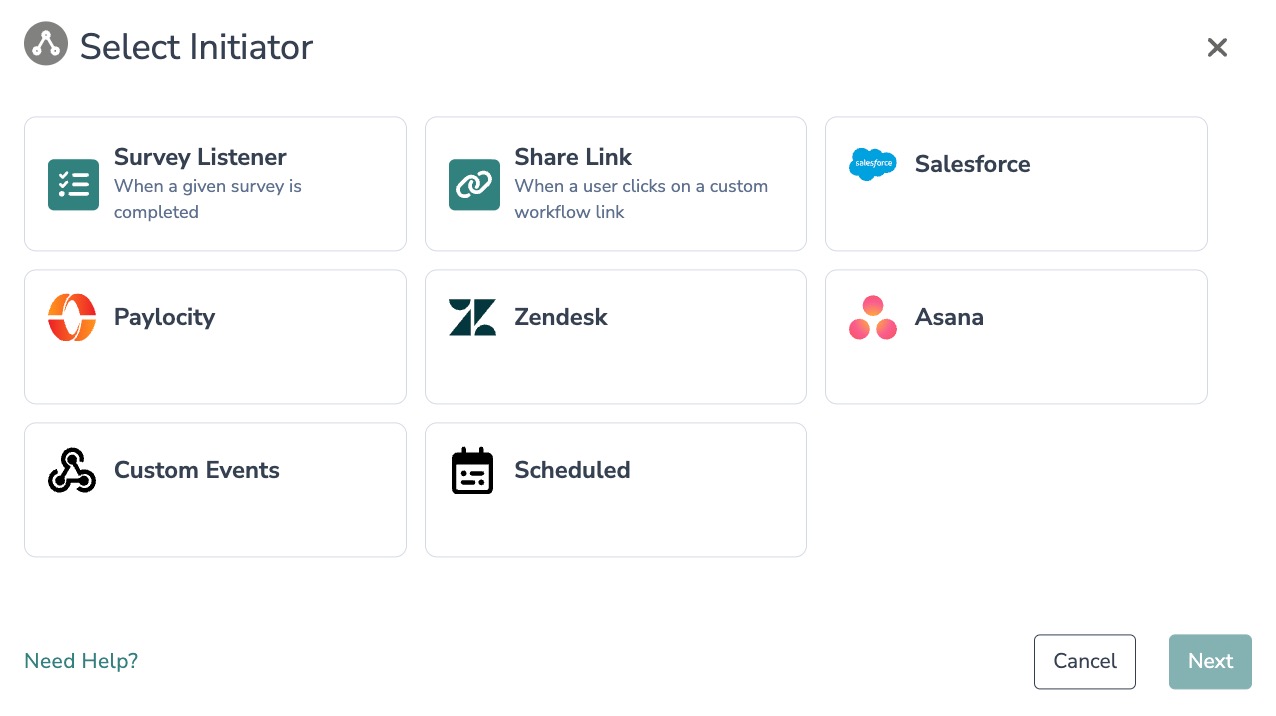
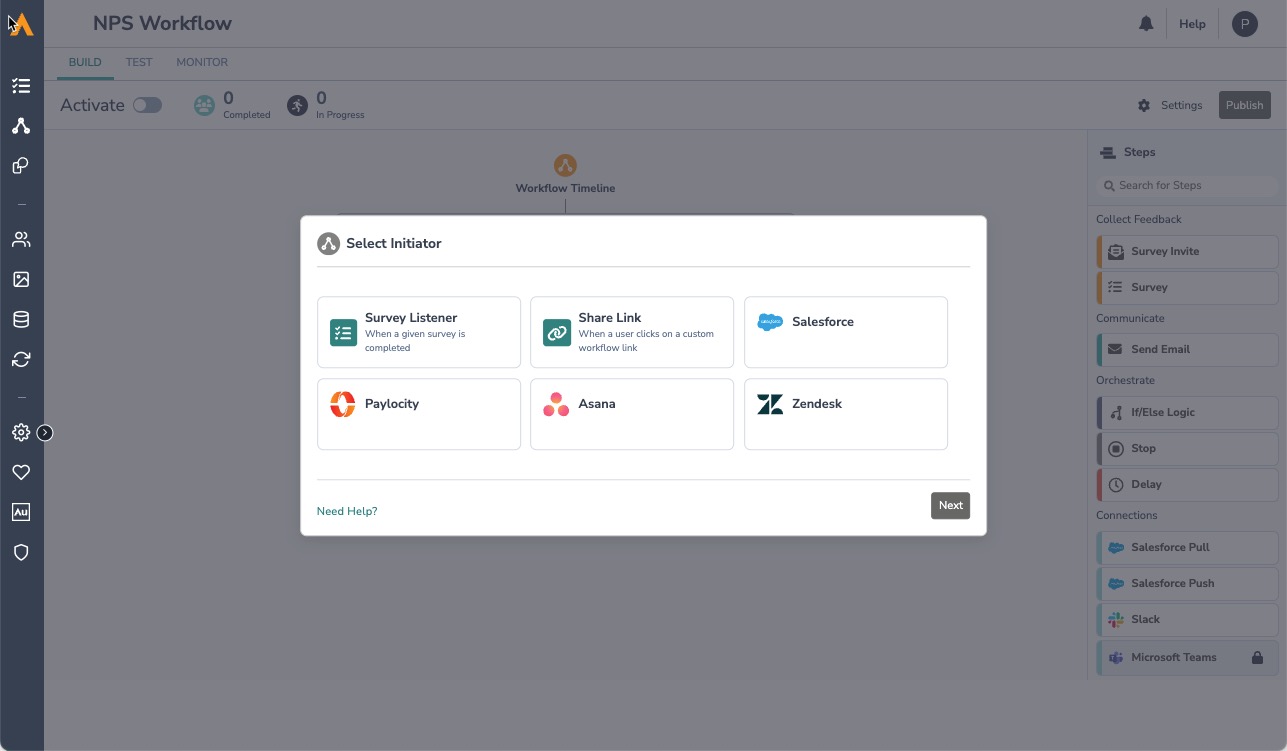
Initiating a Workflow
Every workflow must start with an initiator. There are many ways to initiate a workflow:
1. Survey Listener
Survey Listener launches a workflow when someone submits a response to a survey and reaches the “thank you” page.
You can select a new or existing survey to listen to. A single workflow can connect with multiple surveys that act as initiators. Likewise, multiple workflows can connect with a single survey. That one survey would then act as the only initiator.
Follow these steps to use Survey Listener as the workflow initiator:
- When you create a new workflow, you will immediately be prompted to choose an Initiator. Select “Survey Listener.”
- Select the existing survey that you would like to use as the initiator or create a new survey for this workflow with the “Create New” button.
- Hit save. You can change or edit the selected survey with the pencil icon on the initiator step in the Workflow Timeline.


When adding a survey step to a Workflow, users should be aware the completion of that survey within the workflow will count as a completed survey response, thus will initiate any other workflows that use the same survey in a Survey Listener step. Remember to check the Workflows Connected banner on the survey builder to see what other workflows might be impacted by a survey.
You can only select surveys that you have permission to access.
2. Share Link
The Share Link initiator launches a workflow when someone clicks on a unique workflow link. You can embed this link or internally transform the link into another distribution method.
The Share Link cannot be customized but it will not include private domain.
Keep in mind:
- You can have a survey step without a survey invite. It will just directly launch the survey.
- You cannot have If/Else Logic or a Stop step follow a Share Link.
- If the first step is anything other than a Survey, the respondent will see this message:
- If the first step is anything other than a Survey, the respondent will see this message:

Follow these steps to use a Share Link as the workflow Initiator:
- When you create a new workflow, you will immediately be prompted to choose an Initiator. Select “Share Link.”
- You can then copy the link and embed it into a button, email, or other distribution method. When respondents click the link, the workflow will then initiate.
- Hit the “Save” button.


3. Scheduled Initiator
The Scheduled Initiator allows you to initiate Workflows at specific intervals or at specified dates and times.
Follow these steps to use the Scheduled Initiator:
- When you create a new workflow, you will immediately be prompted to choose an Initiator. Select “Scheduled.”

- Select the interval you would to use for the Scheduled Initiator.
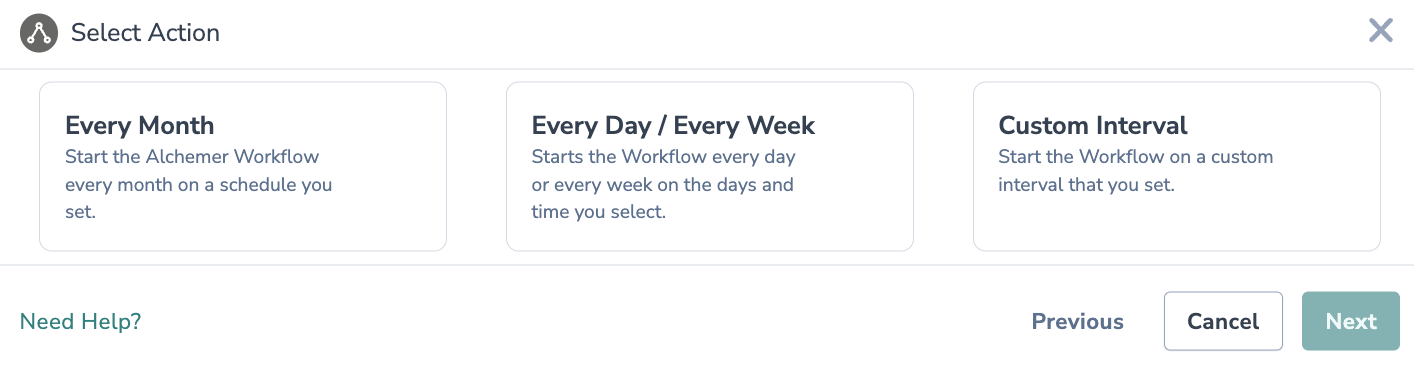
- Hit "Next" on the initiator overview screen.
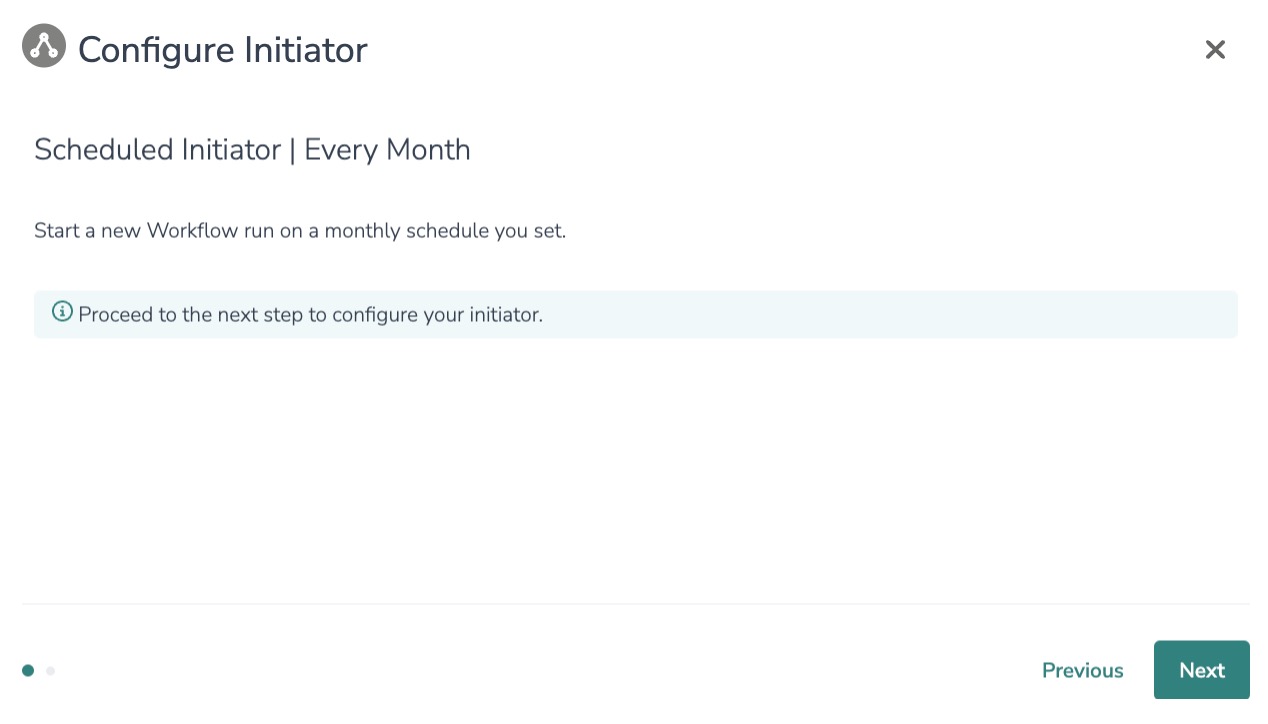
- Next, specify the exact time (day, hour, minute, and time zone) that you want Workflow to initiate. Additionally, provide a date range for the initiator.


The Scheduled initiator uses a 24 hour clock. Refer to the chart below for guidance:
| Standard Time | 24 Hour Clock | Standard Time | 24 Hour Clock |
|---|---|---|---|
| 12:00 AM | 0:00 | 12:00 PM | 12:00 |
| 1:00 AM | 1:00 | 1:00 PM | 13:00 |
| 2:00 AM | 2:00 | 2:00 PM | 14:00 |
| 3:00 AM | 3:00 | 3:00 PM | 15:00 |
| 4:00 AM | 4:00 | 4:00 PM | 16:00 |
| 5:00 AM | 5:00 | 5:00 PM | 17:00 |
| 6:00 AM | 6:00 | 6:00 PM | 18:00 |
| 7:00 AM | 7:00 | 7:00 PM | 19:00 |
| 8:00 AM | 8:00 | 8:00 PM | 20:00 |
| 9:00 AM | 9:00 | 9:00 PM | 21:00 |
| 10:00 AM | 10:00 | 10:00 PM | 22:00 |
| 11:00AM | 11:00 | 11:00 PM | 23:00 |
5. Hit "Save" to complete the initiator.
4. External Workflow Initiators
All external workflow initiators are included with Alchemer Workflow.
You can also select external initiators that trigger workflows in response to events occurring within your other software platforms. Alchemer Workflow currently offers the following external workflow initiators:
- Asana Initiator
- BigCommerce Initiator
- Braze Initiator
- Custom Events Initiator
- Gladly Initiator
- Greenhouse Initiator
- HubSpot Initiator
- Jira Initiator
- Kustomer Initiator
- Marketo Initiator
- Microsoft Dynamics 365 Initiator
- Oracle Cloud Initiator
- Paylocity Initiator
- PeopleSoft Initiator
- Salesforce Initiator
- ServiceNow Initiator
- Shopify Initiator
- Slack Initiator
- Workday Initiator
- Zendesk Initiator
- Zoho Sign Initiator
Click each link to see what specific events can trigger workflows and learn how to configure each initiator.
Building a Workflow
For information on building workflows, checkout these documents.
Testing a Workflow
For information on testing workflows, checkout these documents.
Publishing a Workflow
Monitoring a Workflow
For information on monitoring workflows, checkout these documents.
Reporting on a Workflow
For more information on reporting on workflows, checkout these documents.
Sending Survey Invites and Surveying
For more information on sending surveys in a workflow, refer to this documentation.
Sending Emails
For more information on sending emails through Alchemer Workflow,refer to this documentation.
If/Else Logic
Delay Step
For more information adding delays steps to a workflow, refer to this documentation.
Stopping Workflows
For more information on stopping a workflow, refer to this documentation.
Salesforce Integration
For information on the Alchemer Workflow Salesforce Integration, refer to this document.
Slack Integration
For information on the Alchemer Workflow Slack Integration, refer to this document.
Microsoft Teams Integration
For information on the Alchemer Workflow Microsoft Teams Integration, refer to this document.
