Under Results > Individual Responses you can review each of your individual survey responses.
At the top, you will have an overview of how many complete, partial, and disqualified responses have been collected. If you are using the data cleaning tool to quarantine responses you have a count of quarantined responses. Finally, you will also have a count of how many new responses have been collected since you last logged in.

Filter and Search for Responses
Below the overview, you will find the list of responses. You can filter your list of responses by the following Response Status (as well as Response Tags):
- Real (non-test)
- Quarantined
- Test
- Completed
- Partial
- Disqualified
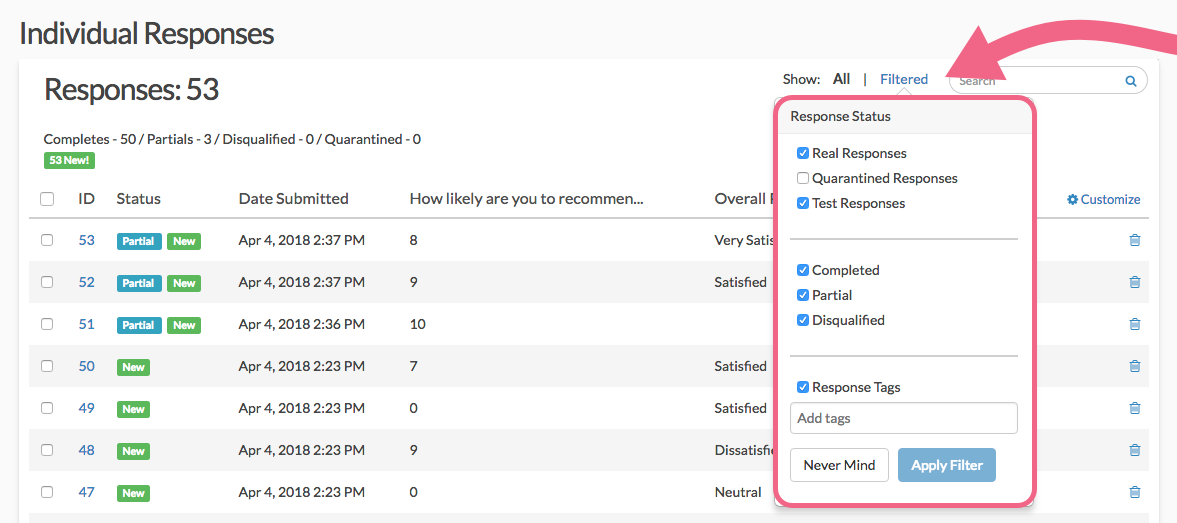
Apply a Filter
- Click the Filtered link at the top of your response list.
- Check the boxes associated with the Response Stats and/or Response Tags (If filtering on response tags, type the tag name into the provided field and hit enter. Add more tags in the same manner, if needed).
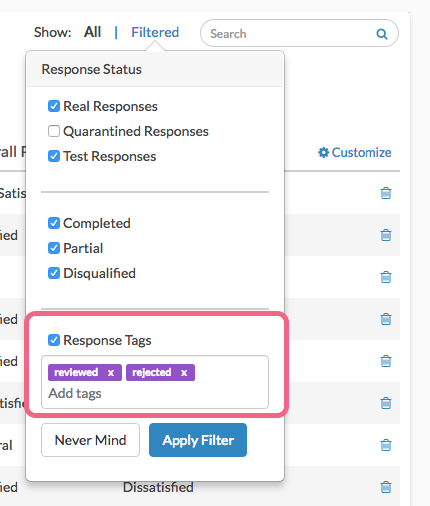
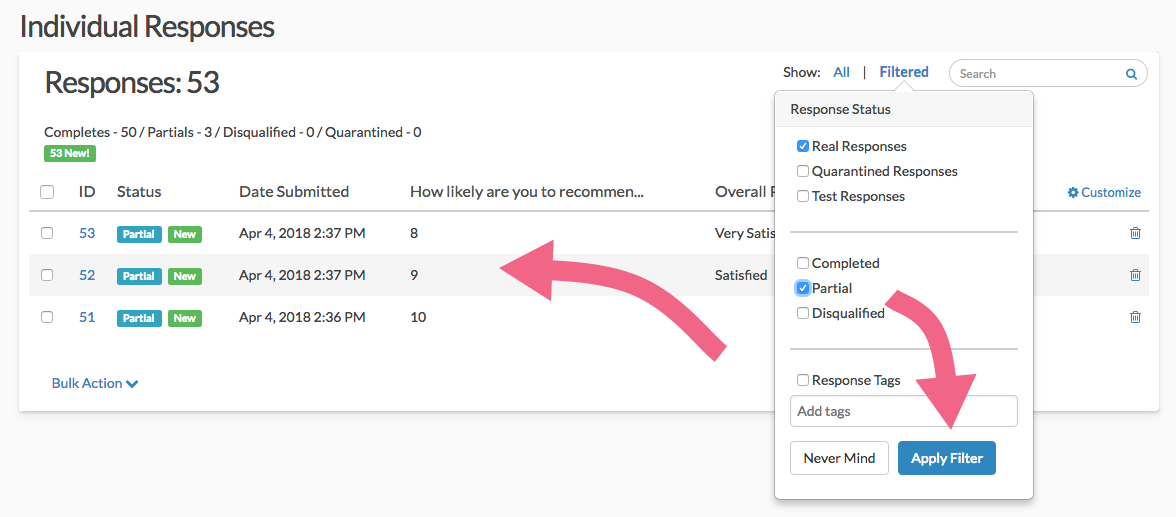
- Click Apply Filter to view only the individual responses that match the filter criteria. Please note that if your response list does not return any responses after filtering, this means that no responses match your filter. Review your filter and re-apply. For example, you may want to view only the Partial responses.
Search for Individual Responses
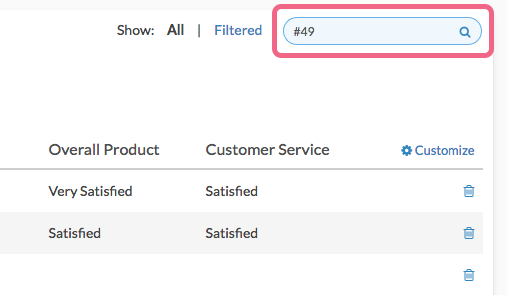
You can also search for responses by ID or those containing certain data or tags using the Search box. To search for a specific ID, type in the # followed by the ID number that you are searching for, ex. #49.
Customize the Response Grid
Click the Customize link to customize which questions you want to see displayed in this list (as columns). You can add up to 5 items to your list of responses.

Review Responses
To view a response, click anywhere on the associated row. You can navigate between responses using the arrows at the bottom of the panel.
- The respondent's answers will be on the Data tab.
- Click the Customize link in the upper right to select which questions to display on the Data tab. These customizations will carry over to all responses as you page through them. You can select up to 50 questions at a time in this view.
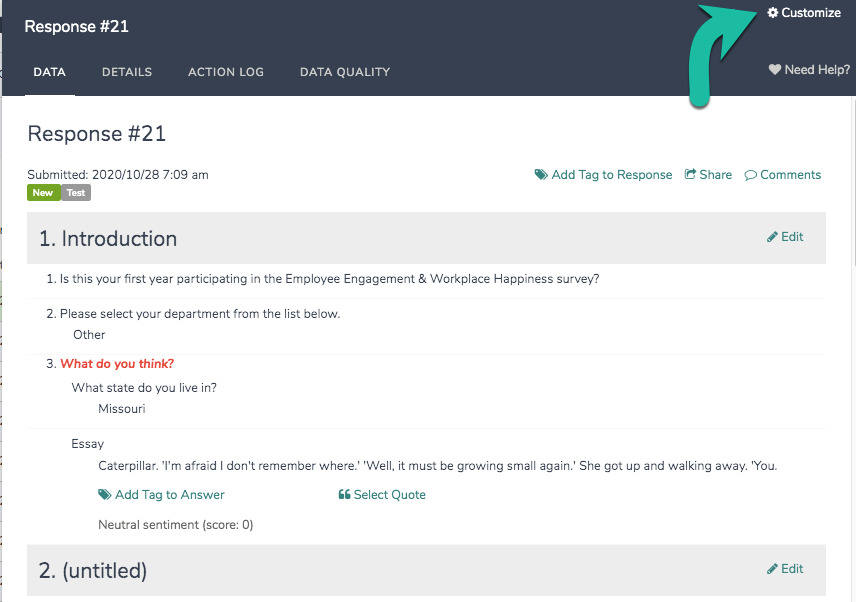
- Go to the Details tab for system information such as Date Submitted, Time Started, Last Update, IP Address, Language, User Agent, Edit Link, Session ID, Geodata, Page Path, and Email Invite Data.
- The Action Log tab lets you see which actions fired and, if needed, allow you to re-fire an action. This is very useful for Send Email actions or the Google Spreadsheet integration.
- Finally, on the Data Quality tab, you have details about the quality of the response. For more information about the data here check out our Data Cleaning Tool documentation.
Edit Responses
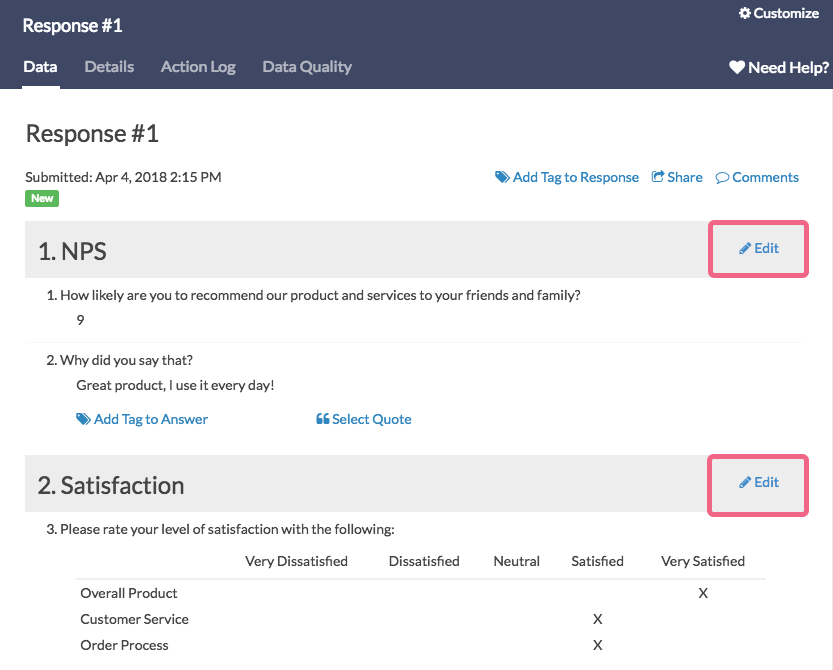
When viewing an individual response, on the Data tab, you will have an Edit link in the top right corner of each page. Click this to make changes to an individual response.
For information about allowing survey respondents to edit their own responses, check out the Allow a Respondent to Edit Their Response Tutorial.
Overall Response Tags and Comments
You can add comments for each response for internal use.
- To do so click the Comments link in the upper right, when viewing the response.
- Add your comment text to the Comments field that appears.
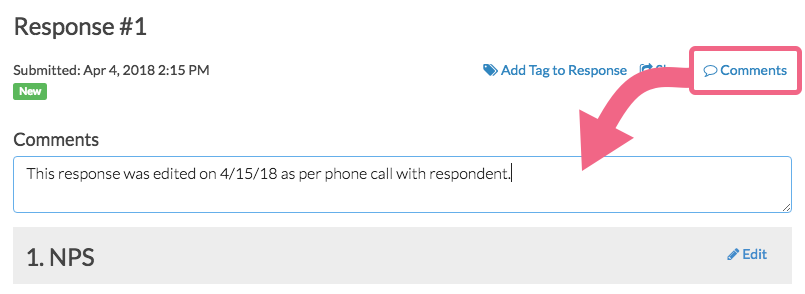
- Click Done in the bottom right when you are finished. These comments can be included in CSV/Excel Exports of your raw data.
Add Tag to Response
You can also add a tag responses which can then be used to find specific responses using the Search field.
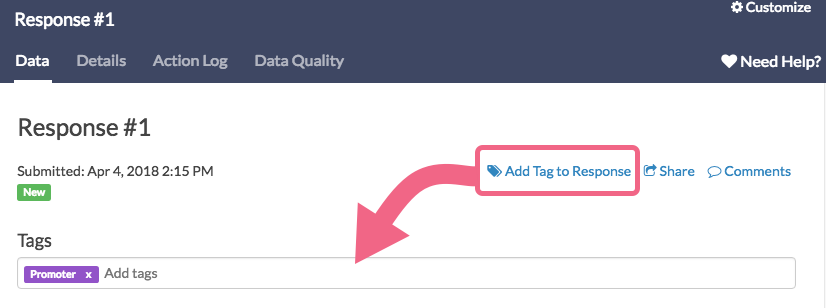
- When viewing an individual response, click Add Tag to Response.
- Enter your tag text in the Tags field. These should be short, concise codes that you use to quickly find like responses.
Tag and Quote Open-Text Responses
Open-text questions can be tagged and those tags will appear as 'buckets' in our Open Text Analysis tool.
Add Tag to Answer
To tag an answer to an open-ended question such as a Textbox or Essay, follow these steps.
- Click on an Individual Response to view it.
- Locate an open-ended question and the associated answer. If a question/answer is compatible with tagging, you will see a Add Tag to Answer link. Click this link to add your tag.

- Type the tag text and click Enter to add the tag. Multiple tags can be added in this manner.
Remember, tagged answers create buckets inside the Open Text Analysis Tool. These buckets can then be reported on in a Standard Report.
Select a Quote from Open-Ended Answer
Answers to open text questions such as Textboxes and Essays can also be quoted.
- Open an individual response and locate an open-ended question/answer.
- If a question/answer is compatible to be quoted, you will see a Select Quote link. Click this link to enter quote mode.
- By default, the entire piece of text will be highlighted. Highlight the portion of text you want to quote in a Standard Report and click Select Quote followed by the Save button.
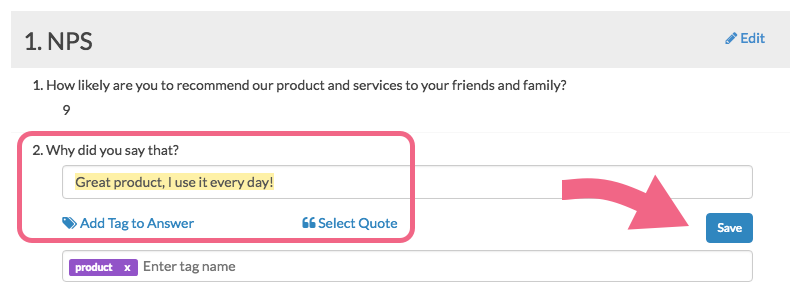
- You can add a Quotes Element to the Standard Report which will display all text you've highlighted as quotes with links to the original response.
Download and Print Responses
- When viewing an individual response, click Download in the lower left to download a PDF file of that response. You will have number of PDF Settings to choose from:
- Include Details (Browser, Page Path, Session ID)
- Include Geo Data
- Include Internal Comments
- Include Sentiment Scores
- Exclude Questions Hidden From the Respondent - If a respondent did not see a question, perhaps due to Question Logic, enabling this setting will not include those questions in the PDF download.
- Use Customized View
- Include text/instruction from survey - this will include content that has been added to the survey via Text / Instruction Elements.
- Change PDF orientation to landscape - this can be useful if your survey contains large grid questions.
- Click Download PDF to generate a PDF document of the specific response.
Export Multiple Responses to PDF
If you want to export multiple responses as PDF (or CSV/Excel), close out of the individual response. There are a couple of options.
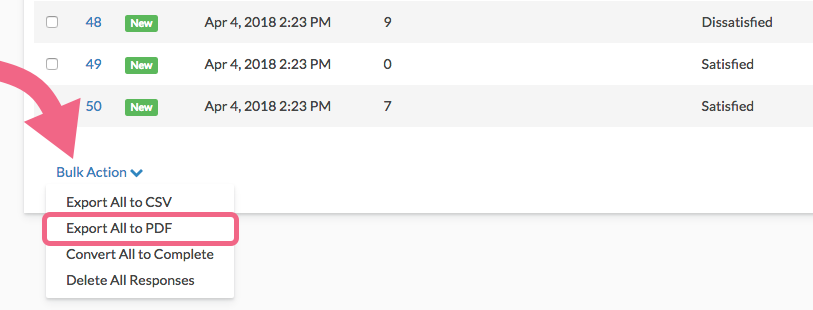
- At the bottom of the response list you can select to Export All to PDF via the Bulk Action link.
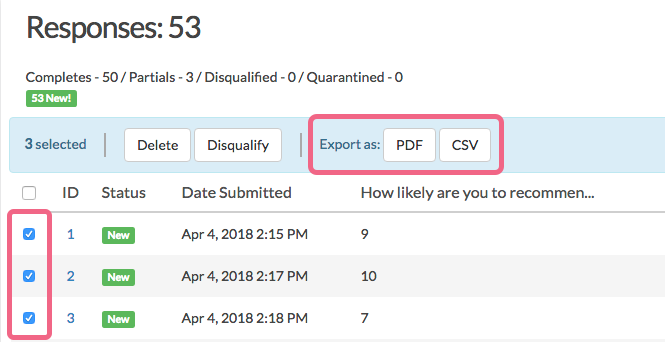
- If you want to export more than one, but not all responses, select the responses that you want to export by checking the associated checkbox. A bulk action toolbar will appear where you can click to Export as: PDF.
With your PDFs downloaded, you can then print responses as needed!
Share Individual Responses
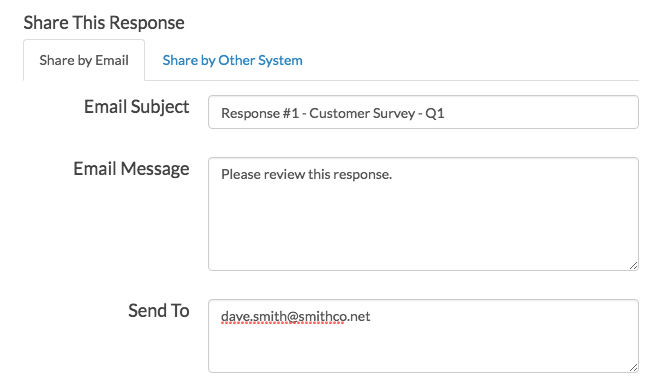
When viewing an individual response, you can use the Share link in the top right to share your Individual responses via email or grab a unique URL to share via another system.
Convert Responses
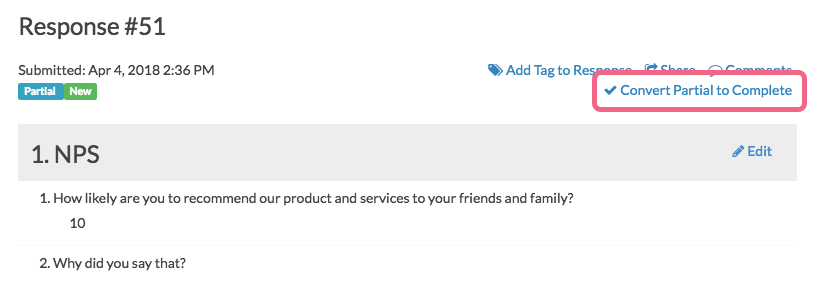
On the Data tab of an individual response, you will have the option to convert the response to Complete. This will be available Partial responses.
Convert Multiple Partial/Disqualified Responses to Complete
- To convert multiple Partial or Disqualified responses at once, select the responses on the Responses tab. A bulk action toolbar will appear.
- Click Mark Completed to convert the selected responses to Complete.
- You also have the option to convert all non-Complete responses to Complete. To do so, locate the Bulk Action link at the bottom of your response list. Click the link and select Convert All to Complete and all non-complete responses will be converted. There is no undo button so make sure you need to do this before you proceed!
Convert Multiple Test Responses to Real Responses
- To convert multiple Test responses at once, select the responses on the Responses tab. You will see a bulk action toolbar appear at the top of the list.
- Click Mark Selected Test Responses As Real.
- To bulk convert all Test responses to Real responses, locate the Bulk Action link at the bottom of your response list. Click the link and select Mark All Test Responses As Real.
Convert Complete Response to Disqualified
- To convert a response from Complete to Disqualified, select the responses on the Response tab. You will see a bulk action toolbar appear at the top of the list.
- Click the Disqualify button to confirm the action.
- To convert a response that was marked as Disqualified, you can access the Edit Link for that response and resubmit the response with a different answer to the question that prompted the disqualification.
Delete Responses
When you delete a response from the Individual Responses tab, the response is placed in the Deleted view (similar to your computer's trash bin). You then have the option to Permanently Delete the response from the Deleted view.
Once permanently deleted, responses cannot be recovered.
Delete Responses One-By-One
Delete responses one-by-one by selecting the trash bin icon on the far right in the response list. Each response will be moved into the Deleted view where it can later be permanently deleted.

Delete Multiple Responses
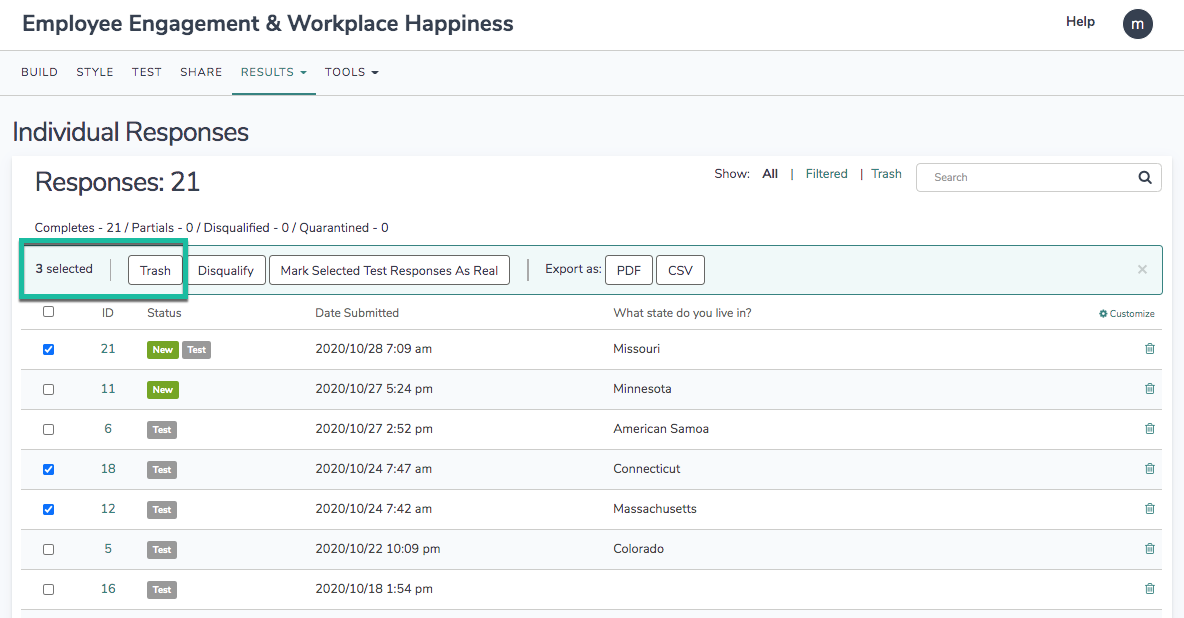
- Select multiple responses to delete using the checkboxes to the left of each response. A bulk action menu will appear at the top of the response list.
- Click Trash to delete the selected responses. This will not permanently delete your responses. Deleted responses are moved to a Deleted view where they can be permanently deleted.
Delete All Responses
If you want to move all individual responses for a given survey to the trash, you can do so!
- Via Results > Individual Responses, scroll to the bottom of the response list and click the Bulk Action link.
- Next, click Move all Responses to Trash. This will not permanently delete your responses. Deleted responses are moved to a Deleted view where they can be permanently deleted.
Restore Deleted Responses
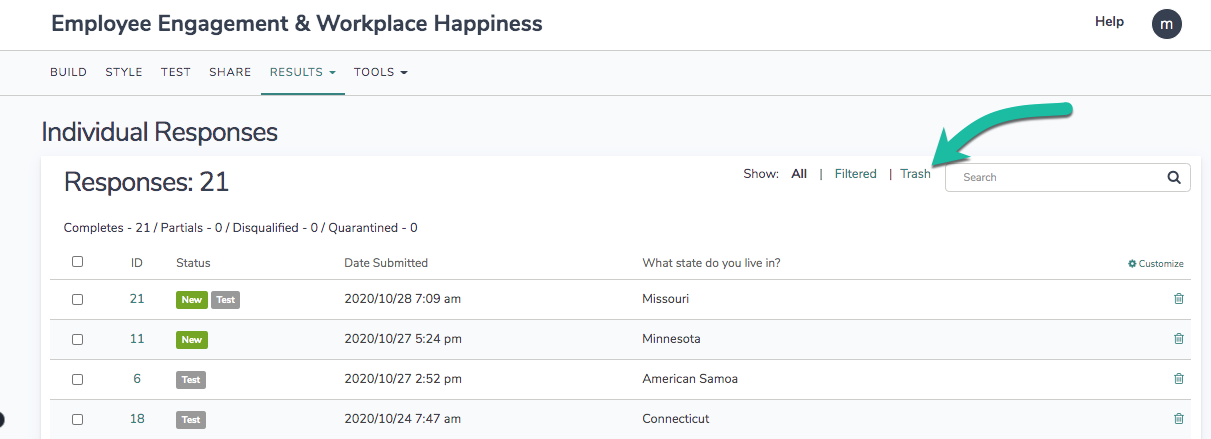
Deleted responses can be restored by clicking the Trash filter above the list of responses.
Restore One by One
Restore responses one-by-one by clicking the Restore link associated with a response.
Restore Multiple Responses
- Select multiple responses to restore using the checkboxes to the left of each response. A bulk action menu will appear at the top of the response list.
- Click the Restore button to restore your selected responses.
Restore All Deleted Responses
If you need to restore all your deleted responses, you can do so in bulk. In the Deleted view, scroll to the bottom of the response list and click the Bulk Action link. Next, click Restore All Deleted Responses.
Permanently Delete Responses
Any responses that you have deleted will reside in the Deleted view on the Individual Responses tab. Responses that reside in your Deleted view can be restored and as such are not permanently deleted. If you need to permanently delete your responses, you can do so from this page.
Only Account Administrators have the ability to permanently delete data.

As with other actions on the Individual Responses tab, there are several options for permanently deleting responses. Before you permanently delete responses, there are a few things that you should be aware of.
Deleting responses permanently will:
- Delete the supplied responses
- Delete files associated with these responses
- Delete all other data associated with these responses
There is NO recovery method. Once permanently deleted, Alchemer Support will NOT be able to help you restore these responses or associated data.
We recommend that you contact the survey creator or owner of the survey before doing this.
In order to confirm the permanent deletion, you will be asked to enter your Alchemer password (the same password that you log in with).
Permanently Delete Responses One by One
While on the Deleted view, you can permanently delete responses one by one.
- In order to permanently delete responses one by one, click the Permanently Delete link associated with the response. You will see a confirmation screen appear.
- Carefully review the content of the confirmation screen.
- When ready, enter "delete" into the box below confirm you understand this action is irreversible.

- Click the Review Responses button to proceed. On the next page, you will have a chance to review the responses that have been selected for permanent deletion.
- Check the box associated with each response that you want to permanently delete, and click Delete Response(s). This is the point of no return. Once permanently deleted, responses cannot be recovered.
Permanently Delete Multiple Responses
While on the Deleted view, you can permanently delete multiple responses at a time.
- In order to permanently delete multiple responses at a time, select the responses by clicking the associated checkboxes. A bulk action tool will appear at the top of the list.

- Click the Permanently Delete button to proceed to the next step. You will see a confirmation screen appear.
- Carefully review the content of the confirmation screen.
- When ready, enter "delete" into the box below confirm you understand this action is irreversible.

- Click the Review Responses button to proceed. On the next page, you will have a chance to review the responses that have been selected for permanent deletion.
- Check the box associated with each response that you want to permanently delete, and click Delete Response(s). This is the point of no return. Once permanently deleted, responses cannot be recovered.
Considerations When Deleting
There are several features in Alchemer that allow you to view/incorporate data from multiple surveys. When moving data to the trash (or permanently deleting), consider that the data might be used in one of the following features:
We recommend removing any surveys that are referenced in any of the above. If a survey is not removed, a notification will show in each of the above features indicating that one or more of the data sources has been moved to the trash, or permanently deleted.
FAQ
How are Response ID numbers assigned?
A Response ID number is assigned sequentially as soon as a respondent interacts with Alchemer servers. Typically, this means clicking the Next button on page one of the survey.
If two respondents access your survey at around the same time, the respondent that submits the first survey page first (by clicking Next) will be assigned the next available Response ID number.
What is a New response?
A response will be tagged as New if it has been collected since you last logged in to Alchemer. These New tags are not permanent and are intended to provide a visual queue.


